

Looking for a fun cheap gift that moves people-literally? The Touch-Sensitive Mimosa Plant is nature’s most dramatic diva. One poke, and it folds up like it just can’t deal. 🌿 Perfect for plant lovers, curious kids, or that one friend who insists they’re “not emotional,” this little green buddy proves that even your houseplants can have trust issues. It’s interactive, affordable, and way more entertaining than cable.

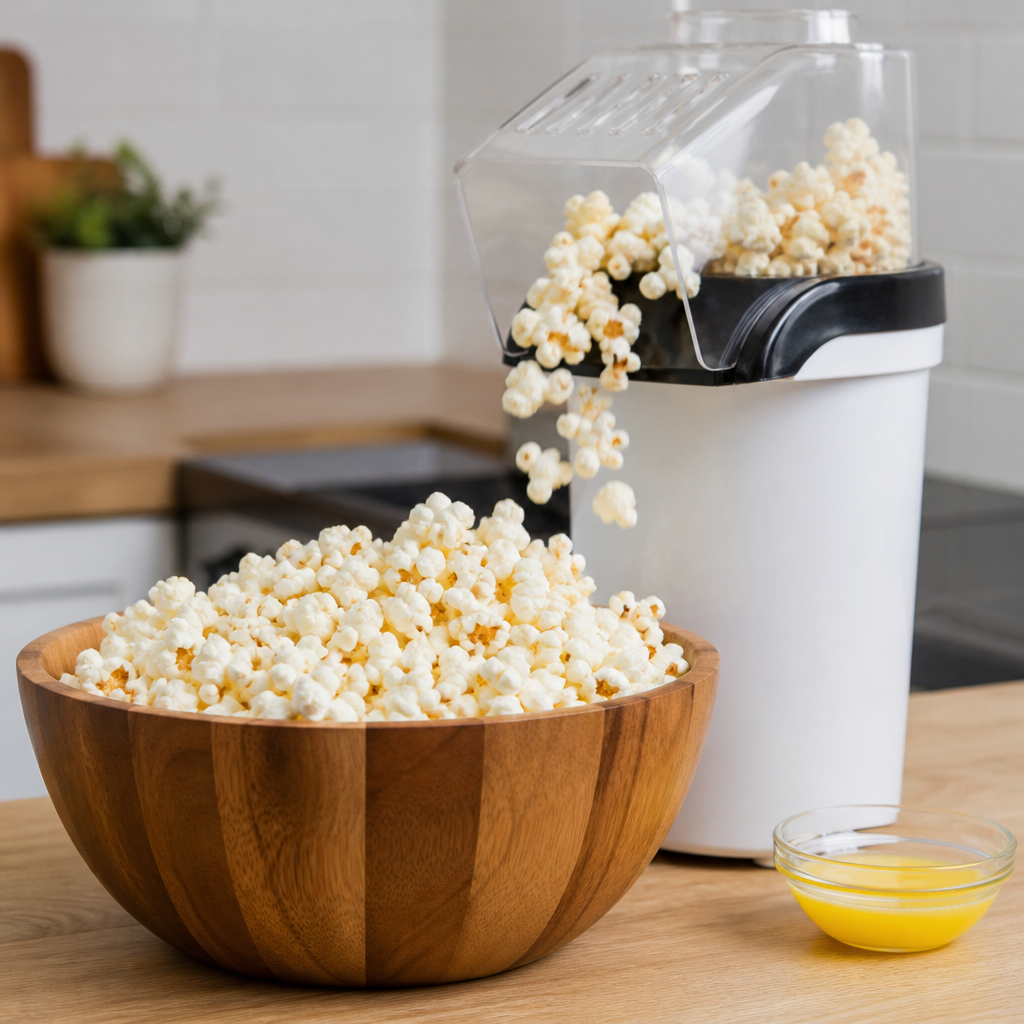
Fresh Popcorn for Pennies: A Guide to Air Popping at Home
Warm, fluffy popcorn is one of the most cheerful snacks around, and one of the thriftiest. A bag of plain kernels makes bowl after bowl, and air popping lets you choose exactly what goes on top, from a sprinkle of salt to cinnamon sugar.
Pull up a chair, class, because today’s lesson comes with a snack! Popcorn is a whole grain, it is fun to make, and plain kernels are among the most budget-friendly foods on the grocery shelf. Let Professor Ima show you how to turn a humble bag of kernels into movie-night magic.
Why Kernels Beat Microwave Bags
Microwave popcorn is handy, but each bag is a single portion with flavorings already chosen for you. A jar or bag of plain kernels can make many bowls, and you decide how much butter, oil or salt to add. Check the unit price on the shelf tag and you will usually see a happy difference.
How to Make Perfect Popcorn at Home
- Measure your kernels. Follow your popper’s directions. A few tablespoons of kernels can make a generous bowl.
- Keep kernels fresh. Store them in an airtight jar in the pantry. Fresh kernels pop up big and fluffy.
- Season while warm. A light mist of oil or a drizzle of melted butter helps seasonings stick. Toss in a big bowl as you sprinkle.
- Use a fine salt. Finely ground salt clings better than coarse salt. You can whirl regular salt in a spice grinder for a few seconds.
- Store leftovers well. Popped popcorn keeps its crunch for a day or two in a sealed container or bag.
Tasty Topping Ideas From Your Pantry
- Cinnamon and a little sugar for a sweet treat
- Garlic powder and grated Parmesan for a savory bowl
- Chili powder and a squeeze of lime for a zesty kick
- Nutritional yeast for a cheesy flavor many people love
- Dried Italian herbs with a little olive oil
- A handful of raisins or peanuts mixed in for a homemade snack mix
Try It Free First
You can pop kernels with what you already own. On the stove, warm a little oil in a large pot with a lid, add a few test kernels, and when they pop, pour in a single layer of kernels. Cover, shake the pot now and then, and take it off the heat when the popping slows. Another popular trick is putting a small amount of kernels in a plain brown paper lunch bag, folding the top over, and microwaving until the pops slow down. Stay nearby and listen carefully either way.
Where an Air Popcorn Popper Fits In
A hot air popper uses swirling heated air instead of oil to pop kernels. You pour kernels in, set a bowl under the chute, switch it on, and fluffy popcorn tumbles out in a few minutes. Since no oil is needed for popping, you choose how much, if any, to add afterward. Many people like poppers because they are quick, simple and easy to put away.
An air popper suits families who enjoy movie nights, anyone who snacks on popcorn often, and folks who like a light, wholesome treat. The button here is a search for this type of product, so compare listings, reviews, sizes and return terms before you pick one.
What to Look For When Comparing
- Batch size: Check how many cups it pops at once for your household.
- Measuring cup: Many include a cup that doubles as a butter melter.
- Easy cleanup: Removable parts that wipe or wash easily are a plus.
- Compact storage: Note the size if cupboard space is precious.
- Cord and switch: A simple on and off switch and a comfortable cord length are handy.
Professor Ima’s Wrap-Up
Some of life’s best treats are also the simplest. A bag of kernels, a few pantry seasonings and a big bowl add up to a cozy evening for very little money. So queue up a favorite movie, invite a friend, and let the popping begin. Class dismissed, and save me a handful!
As an Amazon Associate, Cheap101 earns from qualifying purchases, at no extra cost to you. Browse more handy finds in the Student Store.

How to Teach Kids and Grandkids to Save (With a Clear Piggy Bank)
Few things light up a young face like watching their own coins pile higher and higher. Teaching kids and grandkids to save can be joyful, hands-on fun, and a clear piggy bank lets them see every bit of progress they make.
Why Seeing the Money Matters
Welcome, junior scholars and the grown-ups who love them! For young children, money can feel like an idea floating in the air. When they can actually see coins stacking up, saving becomes real. Each nickel dropped in is a tiny victory they can watch happen.
Simple Ways to Make Saving a Happy Habit
Pick a goal together. A new book, a kite, or a trip for ice cream. Let the child choose. A photo or drawing of the goal taped near the bank keeps the excitement alive.
Try the three-jar idea. Many families like dividing money into Save, Spend, and Share. Saving for a goal, spending a little now, and giving a little to others teaches balance and kindness at the same time.
Count it together. Sorting pennies, nickels, dimes, and quarters is a sneaky little math lesson. Younger kids can learn coin names, while older kids can add up totals and figure out how much more they need.
Make deposits a ritual. Birthday money, chore coins, or loose change found in the couch can all go in. A regular deposit day, like every Saturday, makes saving feel like a fun tradition.
Offer a little match. Some grandparents love adding a bonus, such as a dime for every dollar saved. It is a gentle first lesson in how savings can grow, much like interest at a bank.
Celebrate the finish line. When the goal is reached, make the purchase a happy event. Talk about how good it feels to buy something with money you saved yourself.
Ideas by Age
- Ages 3 to 5: focus on dropping coins in and watching the pile grow. Short goals work best.
- Ages 6 to 9: add counting, coin values, and a goal a few weeks away.
- Ages 10 and up: try bigger goals, simple record keeping, and a visit to open a real savings account.
Try It Free First
A clean glass jar or a clear plastic peanut butter jar works wonderfully. Cut a coin slot in the lid with adult help, or simply leave it open on a shelf. Let the child decorate a label for the lid with stickers or markers. It costs nothing and gives you the same see-through magic.
Where a Clear Piggy Bank Fits In
A clear piggy bank adds a dash of charm to the lesson. The classic pig shape is fun to hold and makes a cheerful gift for a birthday or holiday. Because it is see-through, kids can admire every coin, and many styles have a stopper on the bottom so grown-ups can open it easily when goal day arrives.
It suits grandparents looking for a meaningful little gift, parents starting the money conversation, and anyone who wants a sturdier option than a glass jar for little hands.
What to Look for When Comparing
- Material: shatter-resistant plastic is often a better choice than glass for small children.
- Opening: check for an easy-to-remove stopper so you never have to break the bank.
- Slot size: some slots fit only coins, while others also fit folded bills.
- Size: a medium bank fills up fast enough to feel rewarding.
- Age guidance and reviews: read listing details and buyer comments about durability.
- Return terms: compare a few listings before you decide.
Professor Ima’s Wrap-Up
Every great saver started with a single coin and someone who cheered them on. Whether you use a jar from the recycling bin or a shiny clear pig, the real treasure is the time you spend counting, dreaming, and celebrating together. That is a lesson worth more than any allowance!
As an Amazon Associate, Cheap101 earns from qualifying purchases, at no extra cost to you. Browse more handy finds in the Student Store.

How to Make Saving Fun With Goal Trackers and Scratch-Off Posters
Saving money can feel like a game when you can see your progress. Coloring in a chart, filling a thermometer, or scratching off a square each time you set money aside turns every deposit into a small celebration. Here is how to make saving fun.
Why Seeing Progress Feels So Good
Hello, class! Saving can sometimes feel invisible. The money goes into an account, and you do not see much happen. A visual tracker changes that. Each little square you fill shows you are moving closer to your goal, and that cheerful feeling encourages you to keep going.
How to Set Up a Fun Savings Goal
- Pick something exciting. A trip to see family, a new recliner, a holiday fund, or a cozy emergency cushion.
- Put a number on it. Decide the total, like $600 or $1,500.
- Break it into chunks. Divide the total into squares. A $1,000 goal could be 50 squares of $20 each.
- Choose a deadline. Divide the total by the number of weeks or months to see how much to save each time.
- Post it where you will see it. The fridge, a closet door, or right by your desk.
- Mark every deposit. Color, sticker, check, or scratch. Make it a little ritual.
Fun ideas to try
- Thermometer chart: color it up as you save, just like a fundraiser.
- Random squares: fill a grid with different amounts ($5, $10, $25) and pick whichever fits your week.
- Picture puzzle: print a photo of your goal, cut it into pieces, and add a piece each time you save.
- Milestone treats: celebrate every 25 percent with a free reward, like a picnic or movie night at home.
Save as a team
Couples, roommates, and families can share one chart for a group goal. Grandkids especially love coloring squares. It turns saving into something everyone enjoys together.
Try It Free First
Draw your own chart on plain paper with a ruler and crayons or colored pencils. Graph paper works great for grids. Many free printable savings trackers are available online too. Tape it up and start coloring today.
Where Savings Trackers and Scratch-Off Posters Fit In
Ready-made savings tracker charts and scratch-off posters come pre-printed with goal amounts and fun designs. Scratch-off versions have a coating you rub away, like a lottery ticket, revealing a color or picture underneath. That little reveal can make each deposit feel extra rewarding.
They can suit visual people, families saving together, and anyone who wants a cheerful reminder on the wall. Some come in sets with several goals, which is handy if you are saving for more than one thing at once.
What to Look For When Comparing
- Goal amounts: preset totals, or blank versions you fill in yourself.
- Size: poster size for walls, or smaller cards for binders.
- Style: scratch-off, coloring, or sticker designs.
- Number included: sets with several charts let you track multiple goals.
- Reviews and returns: check photos and reviews for scratch quality, and read return terms.
Professor Cheap’s Wrap-Up
Who says saving cannot be playful? A little color, a chart on the wall, and a goal you are excited about can turn money habits into pure joy. Pick your goal, grab your crayons or a scratch-off poster, and start filling those squares. I am cheering you on from the front of the class!
As an Amazon Associate, Cheap101 earns from qualifying purchases, at no extra cost to you. Browse more handy finds in the Student Store.

The Total Money Makeover by Dave Ramsey: Big Ideas for Everyday Budgets
Dave Ramsey’s The Total Money Makeover turns money goals into a clear, step-by-step path. Here is a friendly look at its big ideas, who tends to enjoy it, and a few simple steps you can try this very week.
What the Book Is About
Class, gather round. The Total Money Makeover is one of the best known personal finance books in America, written by radio host Dave Ramsey. Its heart is a simple, ordered plan he calls the Baby Steps. The idea is that money feels much lighter when you tackle one goal at a time, in a set order, instead of trying to do everything at once.
Ramsey writes in a lively, no-nonsense style and sprinkles in stories from everyday families who followed the plan. He is a big believer in living on cash, avoiding new borrowing, and giving every dollar a job before the month begins.
The Big Ideas, in Plain Words
Here is the general shape of the Baby Steps, in my own words. These are ideas readers can consider, not personal advice for your situation.
- Start with a small cushion. Set aside a modest starter emergency fund so small surprises do not land on a credit card.
- Clear non-mortgage debts with the debt snowball. List debts from the smallest balance to the largest, make minimum payments on all, and throw every extra dollar at the smallest one. Each payoff gives you a quick win and frees up money for the next.
- Build a full emergency fund. Grow the cushion to cover several months of expenses.
- Invest for retirement. Put a steady share of household income toward long-term retirement saving.
- Later goals. Save for children’s education if that applies, pay the home off early, and then build wealth and give generously.
Alongside the steps, the book leans on a zero-based budget, where income minus planned spending equals zero on paper, and on cash envelopes for categories like groceries and fun money.
Who Will Enjoy It
Readers who like clear rules and a checklist feel right at home here. It suits people who want motivation and momentum more than spreadsheets and theory. If you prefer a gentler, more flexible approach, you may still pick up handy pieces, like the snowball idea, and leave the rest. Some readers and financial writers have different views on topics such as credit cards and investing details, so it can be nice to read it alongside other books on our shelf.
Takeaways You Can Try Today
- Write a one-page budget. List this month’s income, then assign every dollar to bills, food, savings, and fun until you reach zero.
- Make a debt list. Write balances from smallest to largest. Just seeing it on paper often brings a happy sense of control.
- Try one cash envelope. Groceries is a fun one to start with. When the envelope is empty, the shopping is done for the week.
- Celebrate small wins. Mark each paid-off balance on the fridge. Momentum is the secret sauce of this book.
Read It Free First
Here is a Professor Cheap favorite: your public library. Many libraries carry this title in print, and apps like Libby and Hoopla may offer the ebook or audiobook with your library card. Because the book is so popular, used copies also turn up often at thrift shops, library sales, and used book sellers. Borrow it, try a few ideas, and buy your own copy only if you want to keep it close for underlining.
If You Decide to Buy
- Check which edition you are getting. The book has been updated over the years.
- Compare paperback, hardcover, ebook, and audiobook prices.
- Look at used copies in good condition for extra savings.
- Some sellers offer a companion workbook if you like filling in pages.
Class dismissed with homework: one budget on one sheet of paper. That single page can be the start of a calmer, brighter money year. Every plan is personal, so take the ideas that fit your life and leave the rest on the shelf.
As an Amazon Associate, Cheap101 earns from qualifying purchases, at no extra cost to you. Browse more handy finds in the Student Store.

Piggy Bank for Kids / Adults
Saving money is a skill for life-and it’s never too early to start teaching it!
The My First Piggy Bank is a perfect, kid-friendly way to introduce the idea of saving, responsibility, and patience in a fun and meaningful way.
Whether you’re encouraging your own child or looking for a thoughtful gift, this sturdy little piggy bank is built for everyday use and big dreams.
Why Parents (and Kids!) Love This Piggy Bank:
✅ Unbreakable and Kid-Proof:
Made with thick, non-toxic plastic, this bank is built tough to survive accidental drops and rough play. It’s safe, durable, and worry-free.
✅ Perfect Size for Little Savers:
At about 5.9 x 4.7 x 5.1 inches, it’s just the right size for kids to carry, hold, and admire-while still offering plenty of space to save a growing collection of coins and cash!
✅ Easy Access When Needed:
A convenient plastic knob at the bottom makes it easy for kids to retrieve their money when it’s time for a special treat or a big deposit.
✅ Colorful and Fun Choices:
Available in more than ten bright, cheerful colors, there’s a perfect match for every personality-whether your little saver loves classic pink, bold blue, sunny yellow, or beyond!
✅ A Gift That Grows with Them:
Ideal for birthdays, Easter baskets, Christmas gifts, or just because, this piggy bank is perfect for kids ages 4-10-and a thoughtful way to encourage healthy money habits from the start.
Teaching kids to save doesn’t have to be boring-it can be colorful, exciting, and part of their daily adventures!
Give them a place to stash their treasures, celebrate milestones, and build habits that will serve them for a lifetime.
👉 Get your My First Piggy Bank here and start the saving journey!
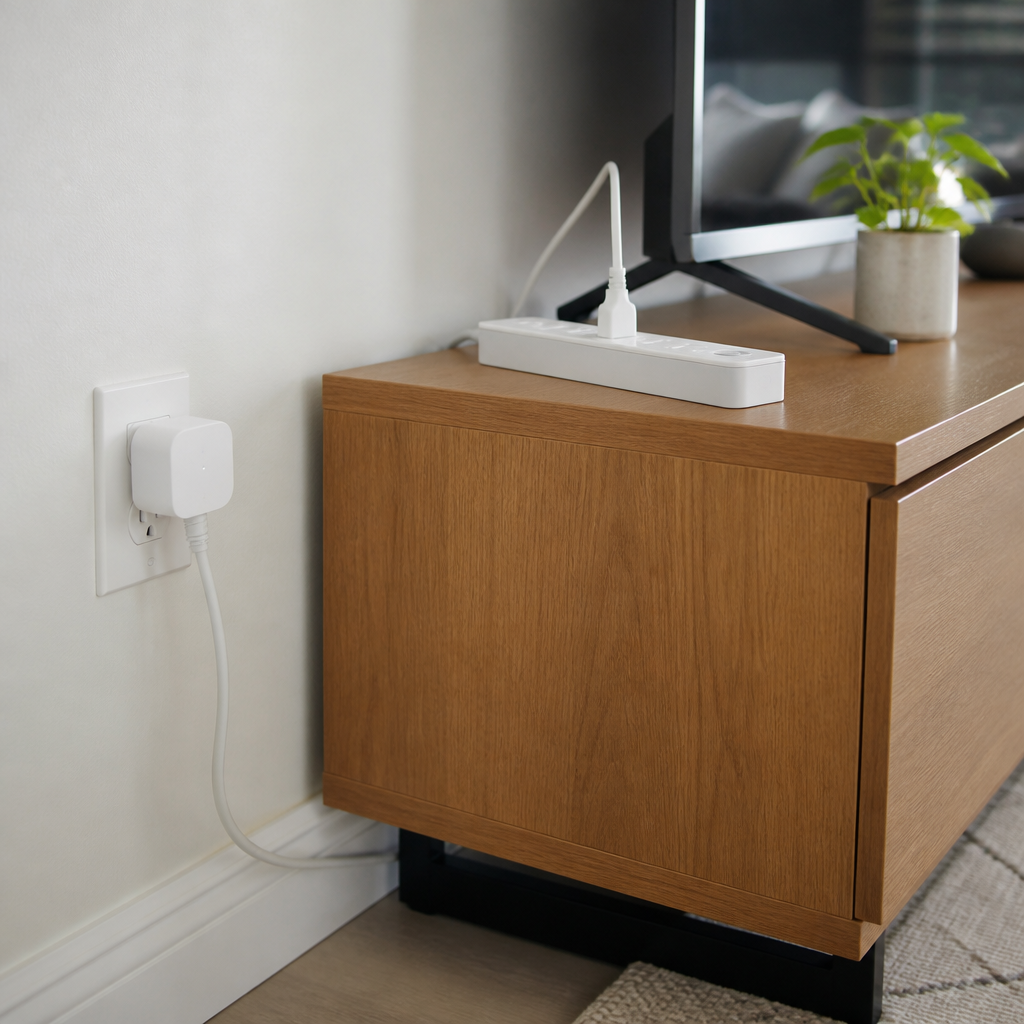
How to Cut Standby Power Easily (Smart Plugs and Power Strips)
Many gadgets quietly sip electricity even when they look switched off. The good news is that one click or a simple schedule can put them truly to sleep, so your home stays just as comfy and your energy dollars stay with you.
What Is Standby Power, Anyway?
Gather round, class. Standby power (some folks call it “phantom” power) is the small amount of electricity that many devices use while they are plugged in but not doing anything useful. That glowing clock on the microwave, the little red light on the TV, the charger left in the wall: each one is ready and waiting, and waiting uses a bit of energy. One device alone is tiny. A whole house full of them, running all day and all night, can add up over a year.
How to Find and Tame Your Energy Sippers
- Do a glow walk. Some evening, turn off the main lights and stroll through your home. Every little light or warm power brick is a clue.
- Group by spot. Most homes have a few clusters: the TV corner, the computer desk, the kitchen counter, and the nightstand. These are your best places to save.
- Sort what can sleep. Game consoles, sound bars, DVD players, printers, speakers, and phone chargers can usually be fully off when not in use.
- Know what should stay on. Keep the refrigerator, freezer, medical equipment, internet router (if you need it overnight), security devices, and anything that must keep a schedule plugged in and powered.
- Unplug chargers when the battery is full. It is a tiny habit with a nice tidy feeling, too.
Try It Free First
You may already own the tools for this lesson. Many homes have an ordinary power strip with an on and off switch tucked behind the TV. Plug your entertainment gear into it, then flip the switch off at bedtime. Also peek in your device menus. Many TVs and game systems have an “energy saving” or “eco” setting that reduces what they use while waiting. Turning those on costs nothing at all.
Where Smart Plugs and Switched Power Strips Fit In
If reaching behind furniture is not your idea of fun, these handy helpers do the remembering for you.
- Switched power strips put a big, easy-to-reach switch on a group of devices. Some have individual switches for each outlet, so you can leave one device on and turn the rest off.
- Smart plugs plug into the wall, and you plug a device into them. Using a phone app or a voice assistant, you can set schedules, like turning the coffee maker corner off at night and the lamp on at dusk. Some models even show how much energy a device uses, which makes a fun little science project.
- Advanced or “smart” power strips can sense when a main device, like a TV, turns off, and then switch off the extras plugged in with it.
Smart plugs suit folks who enjoy using a phone app, while a simple switched strip is perfect for anyone who likes things easy and app-free. Either way, the goal is the same: off really means off.
What to Look For When Comparing
- Safety listing: look for a recognized safety certification mark such as UL or ETL.
- Power rating: make sure the plug or strip handles the devices you plan to connect.
- Switch placement: a switch on top or on a remote is easier to reach than one on the back.
- App and Wi-Fi needs: for smart plugs, check that it works with your phone and home network.
- Size: slim plugs leave room for the second outlet.
- Reviews and return terms: compare a few listings before choosing.
Professor Ima’s Wrap-Up
Every gadget deserves a good night’s sleep, and so does your budget. Take a glow walk, group your devices, and let a switch or a schedule tuck them in. Small savings that happen every hour of every day are my very favorite kind. Gold star for you!
As an Amazon Associate, Cheap101 earns from qualifying purchases, at no extra cost to you. Browse more handy finds in the Student Store.
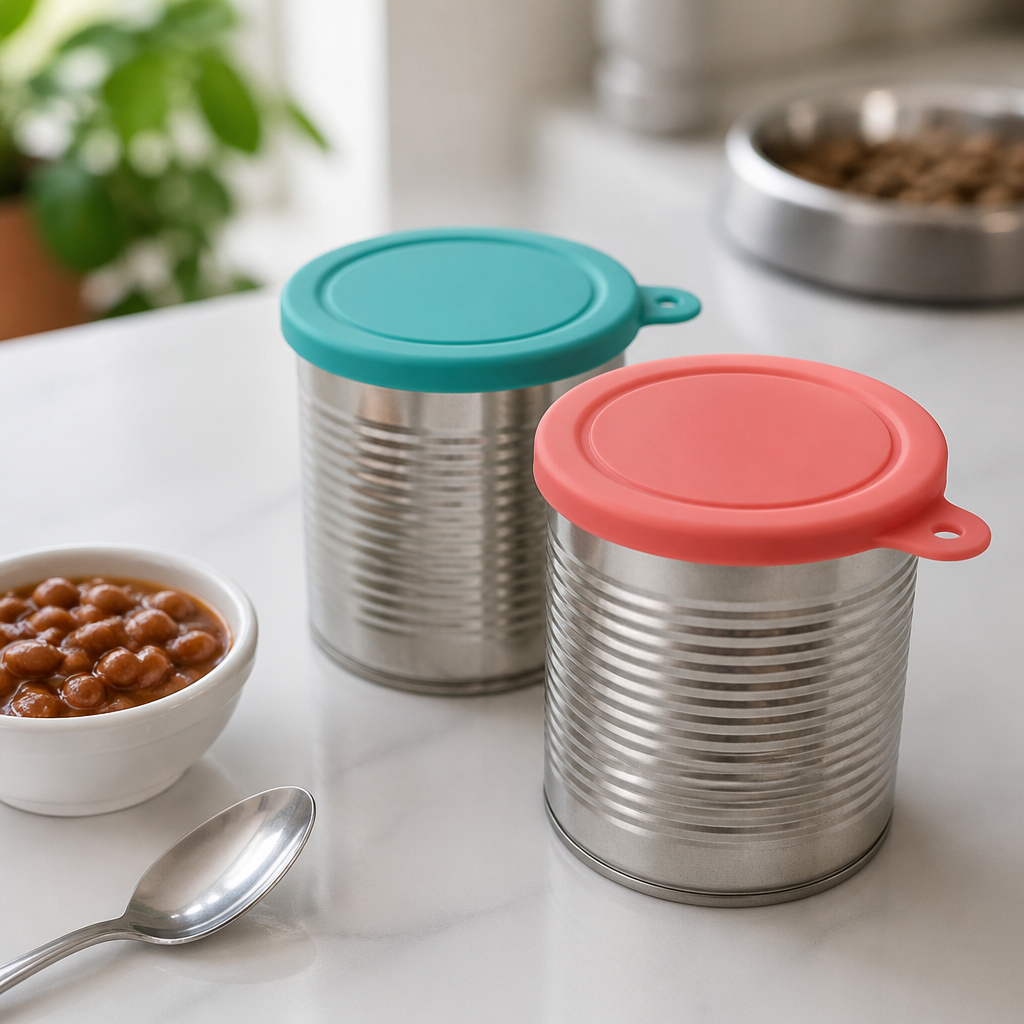
How to Store Leftover Canned Food and Pet Food (Hello, Can Covers)
Half a can of beans, tomato paste or the cat’s dinner can become tomorrow’s meal instead of a waste. With a few easy storage habits and a snug silicone can cover, every can you open goes the whole distance.
Good day, class! Canned goods are pantry heroes. They are affordable, they keep a long time on the shelf, and they make quick meals easy. The only trick is that many recipes call for half a can. Today Professor Ima will show you how to keep that other half tasty and ready for its big moment.
How to Store Leftover Canned Food
Food safety agencies, including the USDA, generally recommend refrigerating opened canned food promptly and moving high-acid foods, such as tomatoes and fruit, into a glass or plastic container for best flavor. Here are some easy habits to follow:
- Chill it soon. Pop leftovers in the fridge shortly after opening.
- Cover it well. A tight cover keeps food from drying out and from picking up other fridge flavors.
- Transfer acidic foods. Tomato sauce, pineapple and similar foods taste best stored in a glass jar or container.
- Use it within a few days. Check the label and food safety guidance for specific foods, and enjoy leftovers while they are fresh.
- Freeze small amounts. Tomato paste, coconut milk and broth can be frozen by the spoonful in an ice cube tray, then stored in a bag for future recipes.
- Keep it front and center. Put opened items at eye level in the fridge so they get used first.
Tasty Ways to Use Up Half a Can
- Stir extra beans into soup, salad, tacos or scrambled eggs.
- Blend leftover pumpkin into oatmeal, pancakes or a smoothie.
- Add spare corn or peas to rice, pasta or a casserole.
- Spoon extra diced tomatoes onto toast with a drizzle of olive oil.
Leftover Pet Food, Kept Fresh
Larger cans of wet pet food are often a better value per ounce than tiny single-serve cans, and many pets only eat part of a can at each meal. Cover the opened can, refrigerate it, and follow the storage directions on the label. Some pets prefer their food not straight from the fridge, so a few minutes on the counter before serving can make dinner extra appealing. Keep a dedicated spoon for pet food so mealtime is quick and tidy.
Try It Free First
You can cover a can today with what is already in your kitchen. A small plate or saucer set on top, a piece of foil pressed snugly around the rim, or a clean jar for transferring food all work nicely. A beeswax wrap or a bowl cover works too. If you find yourself doing this often, a reusable can cover makes it faster and neater.
Where Silicone Can Covers Fit In
Silicone can covers are flexible lids that press onto the rim of an opened can for a snug fit. Many are designed with stepped rings so one cover can fit several common can sizes, from small soup cans to larger pet food cans. They are reusable, easy to wash, and many are labeled dishwasher safe. They suit pet owners, home cooks who use a lot of canned staples, and anyone who loves a tidy fridge.
For leftovers in bowls and on cut fruit and veggies, see our guide to silicone stretch lids and food huggers. The button on this page is a search for can covers, so compare listings, reviews, sizes and return terms before choosing.
What to Look For When Comparing
- Sizes: Check which can diameters each cover fits, and measure the cans you buy most.
- Food-grade material: Look for food-safe silicone.
- Snug seal: Reviews often mention how well the cover stays put.
- Easy cleaning: Dishwasher safe covers save time.
- Set size and colors: Different colors can help you keep pet food covers separate from people food covers.
Professor Ima’s Wrap-Up
Every can you open is a little investment, so let’s enjoy every spoonful! Cover it, chill it, and plan a happy use for it. Your fridge will look organized, your pets will be well fed, and your grocery money will stretch just a little further. Class dismissed!
As an Amazon Associate, Cheap101 earns from qualifying purchases, at no extra cost to you. Browse more handy finds in the Student Store.
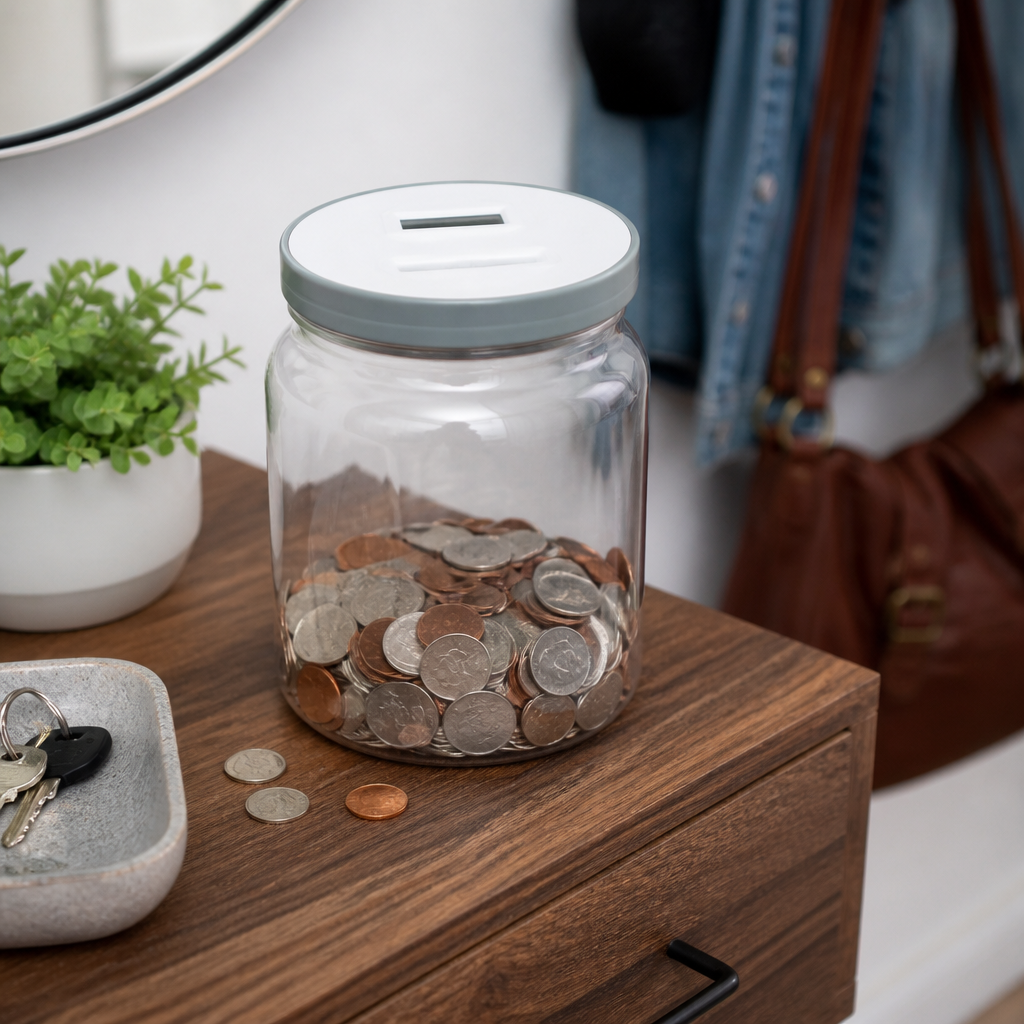
How to Save Spare Change (and Why a Counting Coin Bank Helps)
Spare change is the easiest money you will ever save, because you have already spent it once without missing it. Toss those coins somewhere smart, let them pile up, and you may be delighted by what a few months of jingling can become.
How to Turn Spare Change Into Real Savings
Welcome, class! Today’s lesson is about the humble coin. A quarter here and a dime there may not look like much, but coins are sneaky. They pile up in pockets, cup holders, and the bottom of purses. Gather them in one place with a plan, and they turn into a cheerful little fund.
Build the habit
- Empty your pockets every evening. Pick one spot by the door or on the dresser and make it the coin’s new home.
- Pay with cash now and then. Breaking a bill for small purchases naturally brings home change.
- Do a house sweep. Check the couch cushions, car console, coat pockets, and junk drawer. It is a little treasure hunt.
- Add a bonus rule. Some savers toss in every $1 bill too, or every five dollar bill. That speeds things up nicely.
- Give it a goal. Label your jar “Beach Trip” or “Holiday Gifts” so each coin has a purpose.
Cash it in the smart way
When the bank is full, you have choices. Many banks and credit unions accept rolled coins from their customers, and some still offer free coin counting for account holders, so it is worth asking at your branch. Self-service coin kiosks in stores are convenient, but many charge a fee for cash, so read the screen carefully. Some kiosks skip the fee if you choose a gift card instead, which can be handy if it is a store you already use.
Once your coins become dollars, move them straight into savings or spend them on the goal you picked. That way the fun ends with a reward, not a forgotten pile.
Pair coins with a digital round-up
If you mostly pay by card, you can still play. Some banks offer round-up features that move the difference from each purchase into savings. It is the modern cousin of the coin jar, and you can use both at once.
Try It Free First
A clean glass jar, coffee can, or old peanut butter container works perfectly well. Tape a slip of paper to the side and jot down a rough total each month, or simply enjoy watching the level rise. A clear jar has a lovely way of encouraging you to keep feeding it.
Where a Digital Counting Coin Bank Fits In
A digital coin bank counts as you drop coins in, showing a running total on a small screen. No more guessing or dumping everything on the table to count. Many are designed for United States coins and recognize pennies, nickels, dimes, and quarters by size.
It can suit anyone who likes seeing exact numbers, savers working toward a set goal, and grandkids who get a thrill from watching the total tick up. Counting accuracy varies by model, so treat the display as a helpful estimate and confirm the total when you cash in.
What to Look For When Comparing
- Coin types: make sure it counts the currency you use.
- Display: a large, clear screen is easier to read.
- Capacity: a bigger bank means fewer trips to empty it.
- Power: check the battery type and whether the total is saved if batteries are changed.
- Easy emptying: look for a simple bottom opening or removable lid.
- Reviews and returns: read recent reviews about counting accuracy and check return terms.
Professor Cheap’s Wrap-Up
Spare change is proof that saving does not need to be serious to be successful. A jar, a can, or a clever counting bank all do the job. Drop in your coins, watch them grow, and treat yourself to the goal when you get there. Jingle on, dear students!
As an Amazon Associate, Cheap101 earns from qualifying purchases, at no extra cost to you. Browse more handy finds in the Student Store.
Easy Clothing Mends Anyone Can Do (with a Basic Sewing Kit)
A loose button or a little open seam can be fixed in minutes, and your favorite clothes go right back into happy rotation. With a few simple stitches and a basic sewing kit, you can keep your wardrobe looking sharp for years.
The Mends Worth Knowing
Thread your needles, class! You do not need to be an expert seamstress to save money with a needle and thread. A handful of easy fixes covers most everyday mending, and each one keeps a perfectly good garment out of the donation bin.
How to Sew on a Button
- Thread your needle with about 18 inches of thread, double it, and knot the ends together.
- Push the needle up from the back of the fabric where the button belongs.
- Go up through one hole and down through the opposite hole. Repeat 5 or 6 times.
- For coat buttons, lay a toothpick across the top while sewing to leave a little “shank” of space, then wrap thread around the stitches under the button.
- Finish on the back with a few small stitches and a knot.
How to Close a Small Seam
Turn the garment inside out and find the open section of the seam. Using a simple backstitch, start a little before the opening and finish a little past it, following the original stitch line. A backstitch means each new stitch goes back into the end of the last one, making a strong line. Knot it well on the inside, and no one will ever know.
More Quick Fixes
- Fallen hems: a slip stitch or a quick touch of iron-on hem tape works wonders.
- Snags in knits: pull the loop gently to the inside with a needle or crochet hook instead of cutting it.
- Small holes: an iron-on patch or a cheerful embroidered patch can make a fun design feature.
Try It Free First
Check your drawers for the little extras that come with new clothes. Many shirts and coats arrive with a spare button and sometimes a bit of matching thread. Hotel sewing kits are also handy. Save them all in a small jar or tin. Your library may have beginner sewing books, and free online video tutorials can show you each stitch step by step.
Where a Basic Sewing Kit Fits In
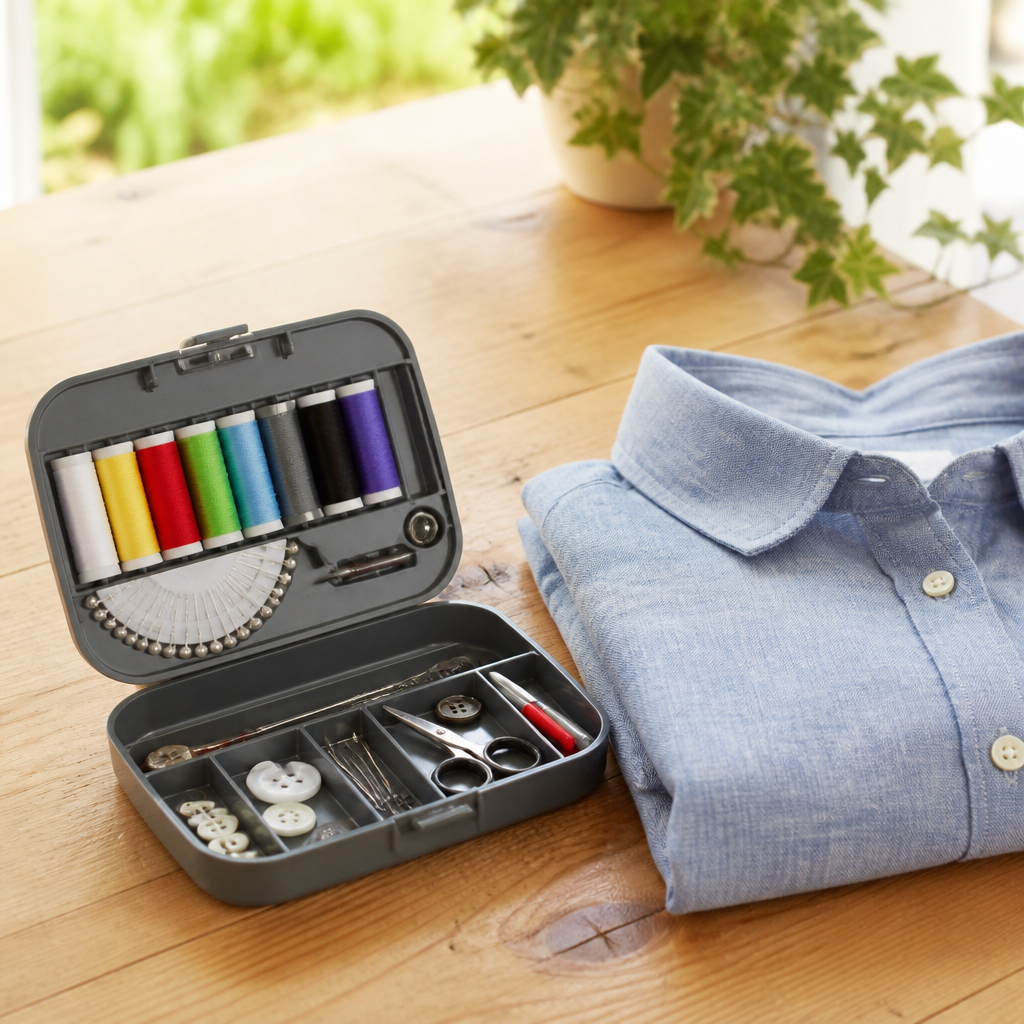
A basic sewing kit puts everything you need in one tidy place, so a five-minute fix stays a five-minute fix. Most include a range of thread colors, a few needle sizes, small scissors, pins, a measuring tape, a seam ripper, a thimble, and often a needle threader. That little wire threader is a real treasure for anyone who finds threading a needle fiddly. Kits make a thoughtful gift for students, newlyweds, and anyone setting up a new home.
What to Look For When Comparing
- Thread colors: look for basics like black, white, navy, gray, and tan.
- Needle threader: a must-have helper.
- Sharp scissors: small, sharp snips make neat work.
- Organized case: a case with compartments keeps things tidy.
- Size: a compact travel kit or a larger home kit.
- Reviews and return terms: check what others say about quality.
Professor Ima’s Wrap-Up
A stitch in time really does save nine, and a few dollars besides. Learn the button, the backstitch, and the hem, keep a tidy kit close by, and your clothes will thank you with years of good service. Now that is a lesson that sews up nicely!
As an Amazon Associate, Cheap101 earns from qualifying purchases, at no extra cost to you. Browse more handy finds in the Student Store.

How to Pay Every Bill on Time (and Why a Wall Calendar Helps)
There is a special kind of calm that comes from knowing every bill is handled before it is due. With a simple system and one glance at the wall, you can keep late fees away and enjoy a month that runs like clockwork.
Step One: Make a Master Bill List
Good morning, scholars! Every great bill system starts with a list. Sit down with a cup of something warm and write out each regular bill: rent or mortgage, utilities, phone, internet, insurance, credit cards, subscriptions, and any yearly or twice-yearly payments like property tax or car registration.
Next to each one, note the usual due date, the typical amount, and how you pay it. Bank and card statements from the last few months are a great way to catch anything you might forget.
Step Two: Put the Dates Where You Can See Them
Now copy each due date onto your calendar. Here are a few tricks that make it work beautifully:
- Write a “pay by” date a few days early. Mail and bank transfers can take time, so give yourself a cushion.
- Color code. One color for housing, another for utilities, another for cards. A quick look tells the whole story.
- Mark paydays too. Seeing income and bills side by side helps you plan which paycheck covers which bill.
- Check it off. A happy little checkmark when a bill is paid is very satisfying.
Step Three: Smooth Out the Month
Once the dates are in front of you, you may notice several bills bunched together. Many companies will let you change your due date if you call and ask, which can spread payments more evenly between paydays. It is a free phone call that can make the month feel much more relaxed.
You can also set up automatic payments for steady bills like insurance, while keeping an eye on the calendar so you always know when money is leaving your account.
Step Four: A Five-Minute Weekly Check-In
Pick one day a week, maybe Sunday morning, to glance at the next seven days. Which bills are coming? Is the money in the right account? This tiny habit keeps surprises away and builds a wonderful feeling of being in charge.
Try It Free First
Your phone already has a calendar app that can send reminders a few days before each due date. Many banks also offer free bill alerts. And free calendars often show up from local businesses, charities, and banks around the new year, so keep an eye out.
Where a Wall Calendar Fits In
A wall calendar keeps your whole month in plain sight. There is no app to open, no password, and no battery. Many people like that everyone in the household can see what is coming, and that writing dates by hand helps them remember.
It suits anyone who likes a visual plan, couples who share bill duties, and folks who simply enjoy the satisfying ritual of flipping to a fresh page each month.
What to Look for When Comparing
- Box size: large daily squares leave room for bill names and amounts.
- Large print: easy-to-read numbers are kind to every pair of eyes.
- Start month: some run January to December, others start mid-year, so pick what fits your timing.
- Paper finish: matte pages are usually easier to write on than glossy ones.
- Extras: a notes section or a next-month preview can be handy.
- Reviews and return terms: compare a few listings before you choose.
Professor Ima’s Wrap-Up
Late fees are money that does nothing for you, so let’s keep every penny working on your side. A master list, a few marked dates, and a weekly peek are all it takes. Pay on time, check it off, and enjoy that lovely feeling of a month well managed. Gold stars all around!
As an Amazon Associate, Cheap101 earns from qualifying purchases, at no extra cost to you. Browse more handy finds in the Student Store.