

Why flash a fancy card when you can swipe like it’s 1995? The Blockbuster Credit Card Cover turns your card into a nostalgic, budget-friendly icon. With its retro design and glossy, scratch-resistant finish, it says, “I save money-and I miss late fees.” Be kind, rewind… and keep ’em guessing how thrifty you really are.

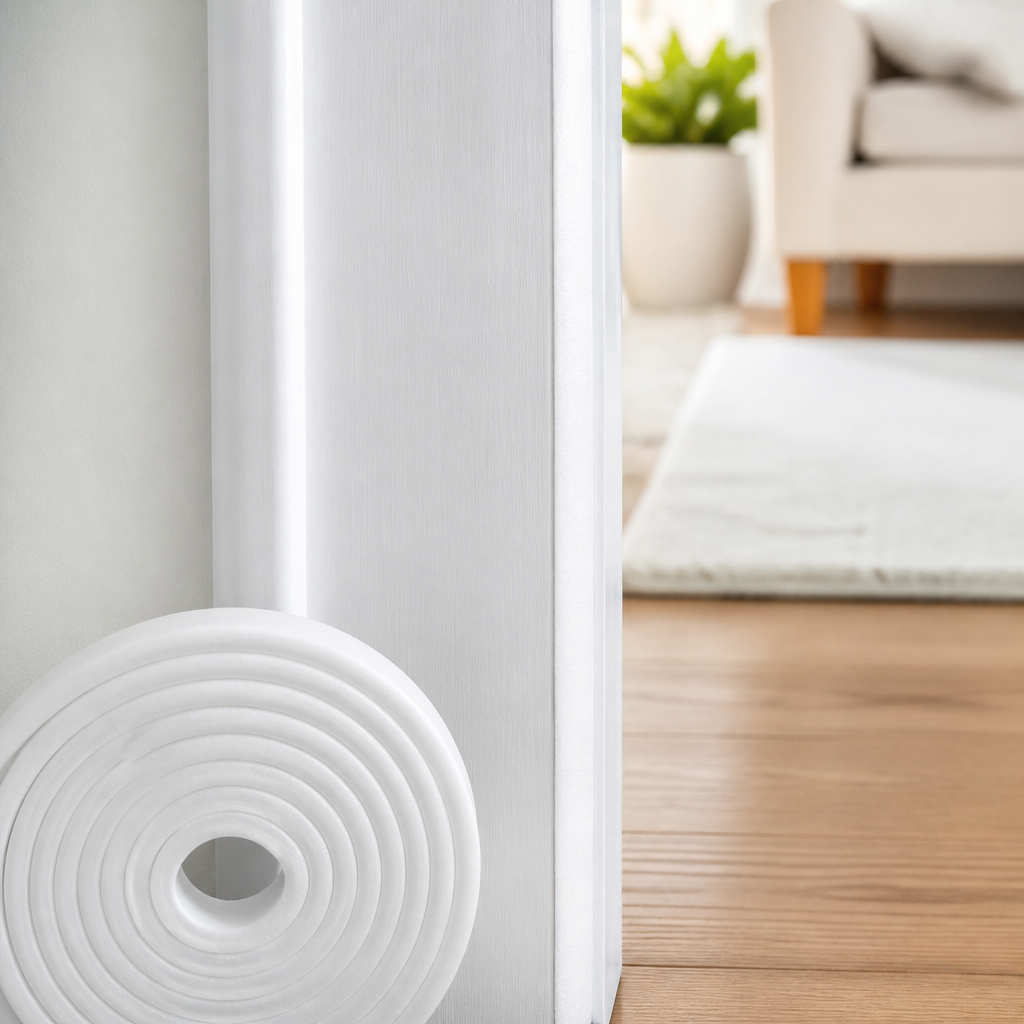
How to Weatherstrip Doors and Windows for a Snug Home
A snug, comfortable home can start with a simple roll of weatherstripping tape. In an afternoon, you can seal the little gaps around doors and windows, enjoy steadier temperatures in every season, and let your heating and cooling dollars go further.
Why Small Gaps Matter
Welcome, home improvement students! Doors and windows open and close, so they need a little space to move. Over time, that space can let air pass, carrying away the warmth or coolness you paid for. Weatherstripping fills those moving gaps with a soft, squishy seal. It is one of the most budget-friendly home projects around, and most of it needs no special tools.
Step by Step: Weatherstripping a Door
- Find the gaps. Close the door on a slip of paper at different spots along the frame. Where it slides out easily, a seal will help.
- Clean the surface. Wipe the door stop (the strip of the frame the door closes against) with soapy water, then let it dry fully. Adhesive loves a clean, dry surface.
- Measure and cut. Measure the top and both sides, then cut strips to length.
- Peel and press. Remove the backing a little at a time and press firmly as you go, keeping the strip straight.
- Test it. The door should close snugly but without a struggle. If it is too tight, a thinner strip may suit better.
Weatherstripping Windows
For windows that open, apply foam or rubber tape where the sash meets the frame when closed, such as along the bottom rail or where the two sashes meet on a sliding or double-hung window. Keep the tape out of any track the window slides in so it still moves smoothly. For windows you never open in winter, removable caulk is another tidy option you can peel off in spring.
Try It Free First
Before buying anything, check what you have. Many doors already have weatherstripping that just needs a refresh. Sometimes the old seal has simply come loose in one spot and can be pressed or tacked back into place. Also check that strike plates and hinges are snug, since a quick turn of a screwdriver can help a door close more tightly on its own. And a rolled towel at the base of the door is always a free and friendly helper.
Where Weatherstripping Tape Fits In
Self-adhesive weatherstripping tape comes on a roll and is about as easy as home projects get. Peel, stick, done. Common types include:
- Foam tape: inexpensive and easy, great for windows and irregular gaps.
- Rubber tape (often D, P, or E shaped): springier and usually longer lasting, great for doors.
- Silicone strips: flexible and durable in hot and cold weather.
Renters often love it because many types peel away when it is time to move. Check the package and test on a hidden spot if your paint is delicate.
What to Look For When Comparing
- Gap size: match the tape thickness to the gaps you measured.
- Material: foam, rubber, or silicone.
- Roll length: add up your door and window edges before buying.
- Adhesive strength: reviews often note how well it stays put.
- Color: white, black, gray, or brown to blend with your trim.
- Return terms: compare a few listings.
Professor Ima’s Wrap-Up
Find the gap, clean the spot, peel and press. That is a four-step lesson that keeps your home snug and comfy all year. A roll of tape and a free afternoon can feel like a brand-new house. Honor roll for you!
As an Amazon Associate, Cheap101 earns from qualifying purchases, at no extra cost to you. Browse more handy finds in the Student Store.
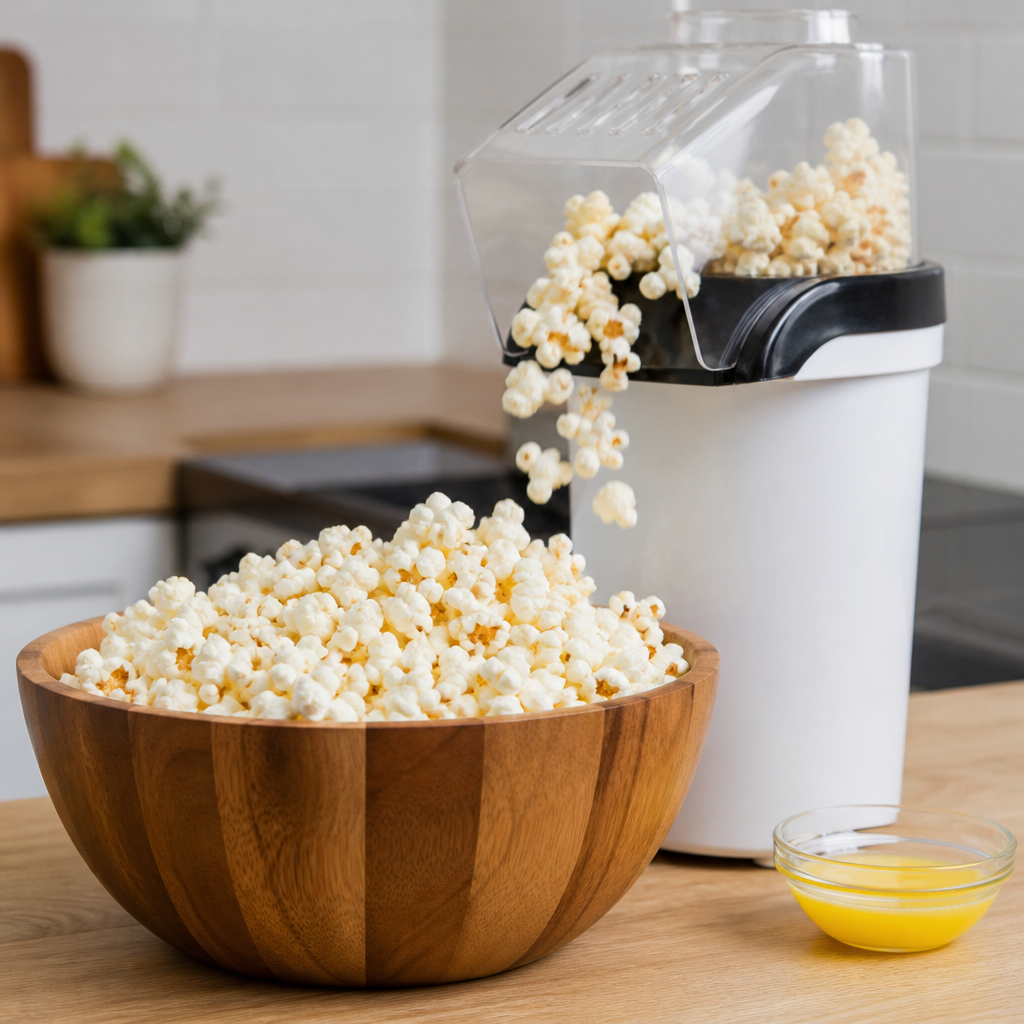
Fresh Popcorn for Pennies: A Guide to Air Popping at Home
Warm, fluffy popcorn is one of the most cheerful snacks around, and one of the thriftiest. A bag of plain kernels makes bowl after bowl, and air popping lets you choose exactly what goes on top, from a sprinkle of salt to cinnamon sugar.
Pull up a chair, class, because today’s lesson comes with a snack! Popcorn is a whole grain, it is fun to make, and plain kernels are among the most budget-friendly foods on the grocery shelf. Let Professor Ima show you how to turn a humble bag of kernels into movie-night magic.
Why Kernels Beat Microwave Bags
Microwave popcorn is handy, but each bag is a single portion with flavorings already chosen for you. A jar or bag of plain kernels can make many bowls, and you decide how much butter, oil or salt to add. Check the unit price on the shelf tag and you will usually see a happy difference.
How to Make Perfect Popcorn at Home
- Measure your kernels. Follow your popper’s directions. A few tablespoons of kernels can make a generous bowl.
- Keep kernels fresh. Store them in an airtight jar in the pantry. Fresh kernels pop up big and fluffy.
- Season while warm. A light mist of oil or a drizzle of melted butter helps seasonings stick. Toss in a big bowl as you sprinkle.
- Use a fine salt. Finely ground salt clings better than coarse salt. You can whirl regular salt in a spice grinder for a few seconds.
- Store leftovers well. Popped popcorn keeps its crunch for a day or two in a sealed container or bag.
Tasty Topping Ideas From Your Pantry
- Cinnamon and a little sugar for a sweet treat
- Garlic powder and grated Parmesan for a savory bowl
- Chili powder and a squeeze of lime for a zesty kick
- Nutritional yeast for a cheesy flavor many people love
- Dried Italian herbs with a little olive oil
- A handful of raisins or peanuts mixed in for a homemade snack mix
Try It Free First
You can pop kernels with what you already own. On the stove, warm a little oil in a large pot with a lid, add a few test kernels, and when they pop, pour in a single layer of kernels. Cover, shake the pot now and then, and take it off the heat when the popping slows. Another popular trick is putting a small amount of kernels in a plain brown paper lunch bag, folding the top over, and microwaving until the pops slow down. Stay nearby and listen carefully either way.
Where an Air Popcorn Popper Fits In
A hot air popper uses swirling heated air instead of oil to pop kernels. You pour kernels in, set a bowl under the chute, switch it on, and fluffy popcorn tumbles out in a few minutes. Since no oil is needed for popping, you choose how much, if any, to add afterward. Many people like poppers because they are quick, simple and easy to put away.
An air popper suits families who enjoy movie nights, anyone who snacks on popcorn often, and folks who like a light, wholesome treat. The button here is a search for this type of product, so compare listings, reviews, sizes and return terms before you pick one.
What to Look For When Comparing
- Batch size: Check how many cups it pops at once for your household.
- Measuring cup: Many include a cup that doubles as a butter melter.
- Easy cleanup: Removable parts that wipe or wash easily are a plus.
- Compact storage: Note the size if cupboard space is precious.
- Cord and switch: A simple on and off switch and a comfortable cord length are handy.
Professor Ima’s Wrap-Up
Some of life’s best treats are also the simplest. A bag of kernels, a few pantry seasonings and a big bowl add up to a cozy evening for very little money. So queue up a favorite movie, invite a friend, and let the popping begin. Class dismissed, and save me a handful!
As an Amazon Associate, Cheap101 earns from qualifying purchases, at no extra cost to you. Browse more handy finds in the Student Store.
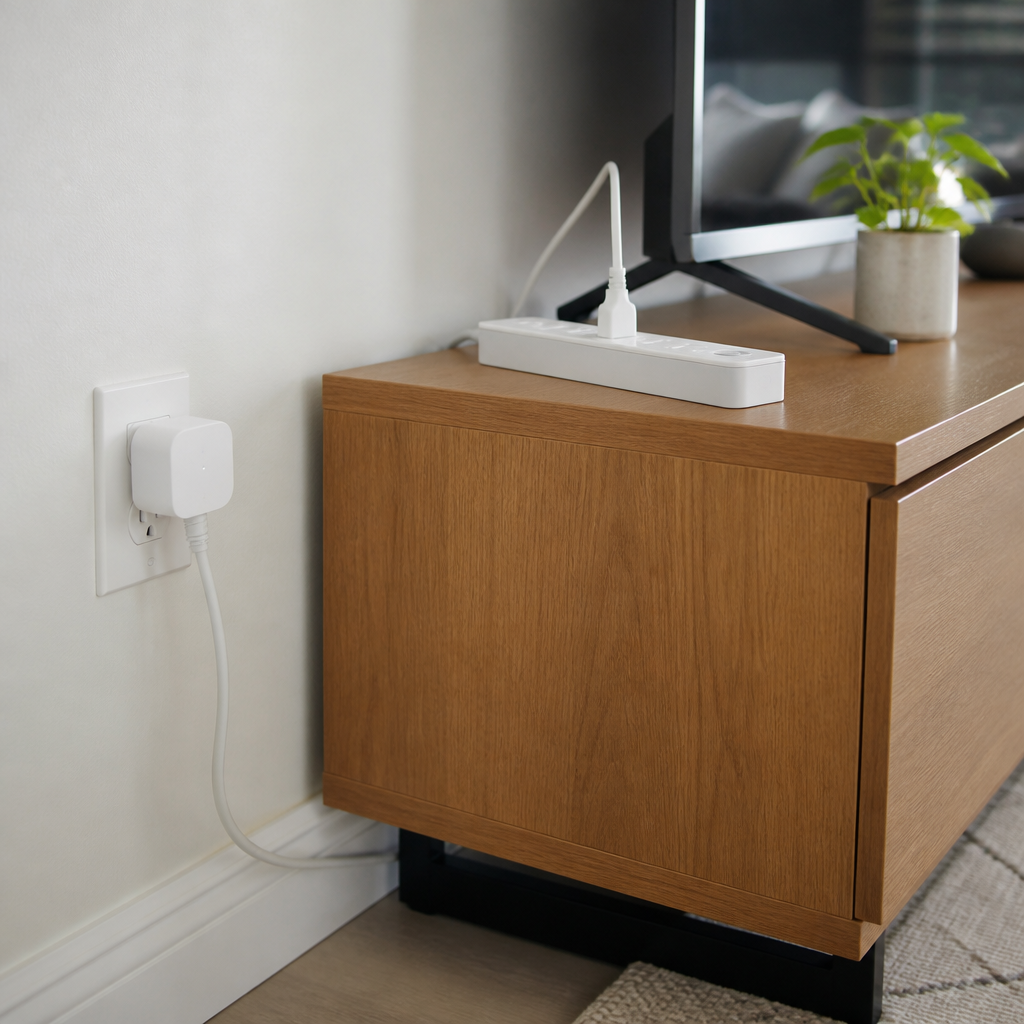
How to Cut Standby Power Easily (Smart Plugs and Power Strips)
Many gadgets quietly sip electricity even when they look switched off. The good news is that one click or a simple schedule can put them truly to sleep, so your home stays just as comfy and your energy dollars stay with you.
What Is Standby Power, Anyway?
Gather round, class. Standby power (some folks call it “phantom” power) is the small amount of electricity that many devices use while they are plugged in but not doing anything useful. That glowing clock on the microwave, the little red light on the TV, the charger left in the wall: each one is ready and waiting, and waiting uses a bit of energy. One device alone is tiny. A whole house full of them, running all day and all night, can add up over a year.
How to Find and Tame Your Energy Sippers
- Do a glow walk. Some evening, turn off the main lights and stroll through your home. Every little light or warm power brick is a clue.
- Group by spot. Most homes have a few clusters: the TV corner, the computer desk, the kitchen counter, and the nightstand. These are your best places to save.
- Sort what can sleep. Game consoles, sound bars, DVD players, printers, speakers, and phone chargers can usually be fully off when not in use.
- Know what should stay on. Keep the refrigerator, freezer, medical equipment, internet router (if you need it overnight), security devices, and anything that must keep a schedule plugged in and powered.
- Unplug chargers when the battery is full. It is a tiny habit with a nice tidy feeling, too.
Try It Free First
You may already own the tools for this lesson. Many homes have an ordinary power strip with an on and off switch tucked behind the TV. Plug your entertainment gear into it, then flip the switch off at bedtime. Also peek in your device menus. Many TVs and game systems have an “energy saving” or “eco” setting that reduces what they use while waiting. Turning those on costs nothing at all.
Where Smart Plugs and Switched Power Strips Fit In
If reaching behind furniture is not your idea of fun, these handy helpers do the remembering for you.
- Switched power strips put a big, easy-to-reach switch on a group of devices. Some have individual switches for each outlet, so you can leave one device on and turn the rest off.
- Smart plugs plug into the wall, and you plug a device into them. Using a phone app or a voice assistant, you can set schedules, like turning the coffee maker corner off at night and the lamp on at dusk. Some models even show how much energy a device uses, which makes a fun little science project.
- Advanced or “smart” power strips can sense when a main device, like a TV, turns off, and then switch off the extras plugged in with it.
Smart plugs suit folks who enjoy using a phone app, while a simple switched strip is perfect for anyone who likes things easy and app-free. Either way, the goal is the same: off really means off.
What to Look For When Comparing
- Safety listing: look for a recognized safety certification mark such as UL or ETL.
- Power rating: make sure the plug or strip handles the devices you plan to connect.
- Switch placement: a switch on top or on a remote is easier to reach than one on the back.
- App and Wi-Fi needs: for smart plugs, check that it works with your phone and home network.
- Size: slim plugs leave room for the second outlet.
- Reviews and return terms: compare a few listings before choosing.
Professor Ima’s Wrap-Up
Every gadget deserves a good night’s sleep, and so does your budget. Take a glow walk, group your devices, and let a switch or a schedule tuck them in. Small savings that happen every hour of every day are my very favorite kind. Gold star for you!
As an Amazon Associate, Cheap101 earns from qualifying purchases, at no extra cost to you. Browse more handy finds in the Student Store.
How to Start a Grocery Price Book and Spot a Real Deal
A grocery price book is a frugal shopper’s secret weapon. Jot down what your favorite items cost at different stores, and soon you will know a true bargain the moment you see it. It is simple, satisfying, and keeps more money in your purse.
What a Price Book Does
Welcome, class! Stores love big yellow sale signs, but a “sale” is not always a deal. A price book is your personal record of what things really cost. Once you know your lowest usual price for coffee or chicken, you can stock up confidently when it appears and skip the so-so “sales” in between.
How to Start Your Price Book
- List your top 20 to 30 items. Start with things you buy often: milk, eggs, bread, coffee, chicken, rice, canned tomatoes, toilet paper.
- Give each item its own page or section. Alphabetical order makes flipping quick.
- Record the details. Date, store, brand or store brand, size, price, and unit price.
- Use receipts and ads. Your old receipts and weekly store flyers are a quick way to fill in early prices.
- Circle the best price. Over time, mark your lowest price for each item. That becomes your “buy price.”
Unit price is the real star
Package sizes shift around, so compare by unit price: price per ounce, per pound, or per count. Simply divide the price by the amount. A 24 ounce jar for $3.60 is 15 cents an ounce. Now you can compare it fairly with any other size.
Watch for patterns
After a few months, you may notice that certain items go on sale in a regular rhythm. Baking supplies often dip around the holidays, and grilling foods around summer holidays. When your favorite item hits its buy price, pick up enough to last until the next sale, as long as it fits your storage and stays fresh.
Keep it manageable
You do not need every item in the store. Focus on what you buy most and what costs the most. Update prices when you shop, and a few minutes each week keeps the book fresh.
Try It Free First
An index card for each item, kept with a rubber band, makes a perfectly good price book. A small spiral notebook works too, or a notes app or free spreadsheet on your phone. Many store apps also show current prices, which helps you fill in your book from the couch.
Where a Price Book Notebook Fits In
A dedicated pocket notebook or small tabbed book gives your price records a permanent, portable home. Some are made specifically for price tracking with ready columns for item, store, size, and price. A small size slips into a purse so you can check it right in the aisle.
It can suit shoppers who like paper, anyone who visits several stores, and folks who enjoy the game of finding the best price. Alphabetical tabs make it extra quick to use.
What to Look For When Comparing
- Size: pocket or purse sized for shopping trips.
- Tabs: alphabetical or category tabs help you find items fast.
- Columns: room for store, size, price, and unit price.
- Durable cover: a sturdy cover survives purse life.
- Page count: enough pages for your main items plus updates.
- Reviews and returns: compare listings and check return terms.
Professor Cheap’s Wrap-Up
A price book turns you into the smartest shopper in the store. Start with a handful of favorite items, track for a few weeks, and watch your confidence grow. Soon you will spot a real deal from across the aisle. Now that is what I call an A plus!
As an Amazon Associate, Cheap101 earns from qualifying purchases, at no extra cost to you. Browse more handy finds in the Student Store.
The Frugal Kitchen Guide to Reusable Silicone Stretch Lids and Food Huggers
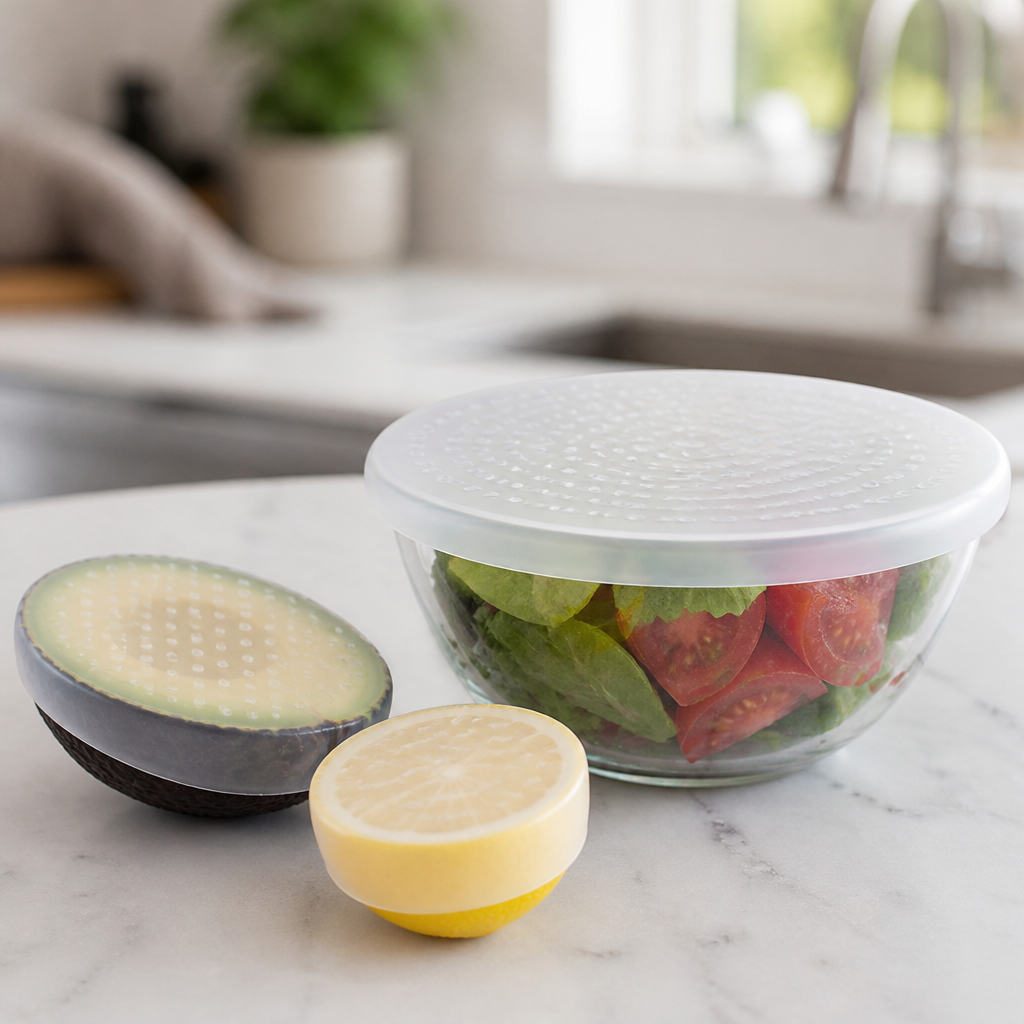
Half an avocado, half a lemon, half an onion: now they all get to shine another day. Reusable silicone stretch lids and food huggers seal snugly over bowls and cut produce, so your leftovers keep their good looks and your wallet keeps its cash.
Welcome to module seven of the Cheap101.com student store field guide series. In household management, single-use kitchen wraps represent an ongoing, silent budget leak. Every week, rolls of disposable plastic cling wrap and aluminum foil are torn off, stretched over bowls or cut fruits, and discarded into the trash just hours later. Beyond the environmental burden of single-use plastics, this habit forces you to repurchase consumable packaging rolls continuously throughout the year while failing to keep cut produce fresh.
When you cut into an onion, lemon, tomato, or avocado, exposure to atmospheric oxygen triggers rapid cellular browning and moisture loss. Makeshift coverings like loose foil or plastic bags allow air to circulate around the exposed flesh, turning expensive produce dry and unusable within forty-eight hours. Reusable silicone stretch lids and nested food huggers solve both problems at once by forming an airtight, flexible barrier directly over cut foods and rimmed containers. Today’s guide explores the mechanics of food-grade silicone covers, outlines the key features to look for, and provides actionable routines to stop grocery waste permanently.
1. Why Disposable Food Wraps Waste Household Capital
Traditional kitchen wraps were designed for manufacturer convenience rather than consumer thrift. Evaluating their real costs reveals significant financial drawbacks:
- The Consumable Repurchase Cycle: A typical household spends thirty to sixty dollars annually on disposable plastic wrap, parchment paper, and aluminum foil rolls. Over five years, that disposable habit diverts hundreds of dollars away from your emergency fund or investment accounts.
- Poor Seal Integrity: Standard plastic cling film bunches up, sticks to itself, and rarely creates a true hermetic seal over glass bowls, ceramic dishes, or metal cans. Ambient air enters the container, accelerating food spoilage.
- Produce Discard Losses: Throwing away the second half of a red onion, half an avocado, or half a lemon because it dried out adds five to ten dollars in needless food waste to your weekly grocery tab. Over twelve months, this waste equals hundreds of dollars in lost produce.
Investing in durable, food-grade silicone lids replaces recurring rolls with a one-time purchase that lasts for years of daily kitchen use.
2. The Two Essential Silicone Cover Styles for Every Kitchen
To outfit your kitchen for maximum savings and food preservation, combine these two complementary styles of reusable silicone covers:
A. Circular and Rectangular Silicone Stretch Lids: These flat, elastic silicone discs feature raised pull tabs along the rim. Crafted from high-tensile food-grade silicone, they stretch over round bowls, rectangular glass meal prep containers, mixing bowls, melon halves, and opened soup or pet food cans. The tension creates a leakproof, airtight suction seal that prevents liquid spills and keeps leftovers fresh inside the refrigerator.
B. Nested Silicone Food Huggers: Specifically engineered to cap cut fruits and vegetables directly without needing a storage bowl. These cup-shaped silicone caps feature a stepped inner lip that grips firmly onto the curved exterior of cut citrus, tomatoes, cucumbers, apples, and onions. By hugging the cut surface closely, the silicone seals out oxygen and locks in natural juices, preventing dehydration and discoloration for days.
3. Key Quality Features to Demand in Reusable Silicone
Not all silicone kitchen tools offer the same durability. When shopping for stretch lids and produce covers, prioritize these core manufacturing standards:
A. 100 Percent Platinum Food-Grade Silicone: Ensure the products are manufactured from premium platinum silicone certified BPA-free, lead-free, and phthalate-free. Platinum silicone does not contain plastic fillers, resists staining from acidic tomato sauces, and remains supple without tearing when stretched over wide containers.
B. Broad Temperature Tolerance: High-grade silicone withstands extreme temperature shifts ranging from forty degrees below zero in the freezer to over four hundred degrees in the oven or microwave. This versatility allows you to take covered leftovers straight from the refrigerator to the microwave for reheating without swapping containers.
C. Reinforced Rim Tabs and Multiple Diameter Sizes: Look for stretch lid sets that include at least six distinct diameter sizes (from two-and-a-half inches for soda cans up to eight inches for large salad bowls). Sturdy, molded pull tabs around the perimeter ensure you can grip and stretch the lids smoothly without slipping.
D. Dishwasher-Safe Durability: Easy cleanup is vital for maintaining a reusable habit. Quality silicone covers can be placed directly on the top rack of your dishwasher without warping, shrinking, or losing elasticity.
4. Best Practices for Getting an Airtight Seal Every Time
Achieving a reliable vacuum seal with silicone lids requires a simple adjustment to your kitchen habits:
- Ensure Edges Are Completely Dry: Silicone relies on friction to grip container walls. If the rim of your bowl or the outside peel of your fruit is wet with water or oil, the silicone may slide off. Wipe the rim with a clean kitchen towel before stretching the lid.
- Start from the Far Edge: Anchor one side of the silicone lid over the far lip of the bowl, then gently pull the opposite tabs toward you to stretch the cover across the opening.
- Press Down to Expel Trapped Air: Once the lid is securely seated on the container, gently press down on the center of the silicone disc to burp out excess air before releasing. This creates a gentle vacuum that keeps food significantly fresher.
Ditch Single-Use Plastic Wrap for Good
Explore durable silicone stretch lid sets and nested food huggers to keep cut produce fresh and eliminate consumable wrap expenses.
Swapping disposable cling film for reusable silicone stretch lids and food huggers delivers immediate savings on paper goods and stops cut produce from spoiling in your crisper drawer. Make this simple kitchen upgrade today to permanently lower your household grocery expenses.

Get What’s Yours: A Friendly Guide to Social Security Choices
Get What’s Yours by Laurence Kotlikoff, Philip Moeller, and Paul Solman explains Social Security in plain, friendly language. It helps readers understand their claiming options so they can feel confident about one of retirement’s biggest choices.
Social Security has a lot of moving parts, and these three authors make a delightful team for explaining it. Laurence Kotlikoff is an economist at Boston University, Philip Moeller is a longtime retirement journalist, and Paul Solman is the business and economics correspondent for the PBS NewsHour. Together they wrote Get What’s Yours: The Secrets to Maxing Out Your Social Security.
What the Book Is About
The book walks through how benefits are calculated and how the timing of a claim can affect lifetime income. It covers retirement benefits, spousal benefits, survivor benefits, benefits for divorced spouses, and how work and taxes interact with Social Security. The authors write with humor and plenty of real-life examples, which makes a complex topic much easier to follow.
The Big Ideas
- Timing is a big decision. Monthly benefits grow for each year you wait past your earliest eligibility, up to age 70, so the claiming age deserves careful thought.
- Couples can coordinate. Spouses may be able to plan their claims together to support the household and a surviving partner.
- Know every benefit you may qualify for. Spousal, survivor, and divorced spouse benefits are often overlooked.
- Ask good questions. The authors encourage readers to understand the rules well enough to confirm details with the Social Security Administration.
A helpful note: Social Security rules change from time to time, and some claiming strategies in early printings were changed by law in 2015. The authors released a revised edition to reflect this, so the newest edition is the best choice, and readers should double check current rules at the official Social Security website.
Who Will Enjoy It
It is ideal for anyone in their fifties or sixties thinking about when to claim, married couples planning together, widows and widowers, divorced readers, and adult children helping parents with their paperwork.
Ideas Readers Can Consider Today
- Create or log in to your my Social Security account on the official SSA website and review your earnings record.
- Look at your estimated benefit at several claiming ages to see the range of options.
- If you are married, sit down together and compare both records.
- Write down your questions before calling or visiting the Social Security office.
These are ideas readers can consider, not personal financial advice. The Social Security Administration and a trusted professional can help confirm what applies to you.
Try It Free First
Many public libraries carry Get What’s Yours in print, and some offer the ebook or audiobook through Libby. The Social Security website also has free calculators and plain-language guides that pair nicely with the book.
Why Some Readers Like Owning a Copy
Claiming decisions often unfold over several years, so many readers like keeping a copy to revisit as each birthday milestone approaches. When comparing listings, look for the revised edition and check publication dates on used copies.
Professor Ima’s Wrap-Up
You worked hard for those benefits, and understanding them is time well spent. A little homework now can bring confidence for many years to come. That is a lesson worth every minute!
As an Amazon Associate, Cheap101 earns from qualifying purchases, at no extra cost to you. Browse more handy finds in the Student Store.

Good and Cheap by Leanne Brown: Eat Well on a Small Food Budget
Leanne Brown created Good and Cheap to show that a tiny daily food budget can still mean bright, satisfying meals. Her joyful cookbook is full of simple recipes, flexible techniques, and plenty of encouragement.
Leanne Brown wrote Good and Cheap: Eat Well on $4/Day as a graduate student project, inspired by the daily food budget of people using SNAP benefits. She first shared it as a free download, it spread far and wide, and it later became a published cookbook. Professor Ima loves a book with a generous heart, and this one has a big one.
What the Cookbook Is About
Good and Cheap is less about rigid rules and more about building kitchen confidence. Brown focuses on fresh vegetables, eggs, grains, and beans, and she teaches flexible methods that work with whatever is on sale or already in the fridge. The photos are bright and inviting, and the recipes feel achievable for any home cook.
The Big Ideas
- Techniques over strict recipes. Learn a method, like a frittata or a stir fry, and you can make it a dozen ways.
- Eggs are a thrifty hero. Many dishes use eggs for an affordable, satisfying meal.
- Vegetables take center stage. Seasonal produce can be both affordable and delicious.
- Build a basic pantry gradually. A few spices, oils, and staples go a very long way.
- Cooking is a source of joy. Her tone celebrates good food for everyone, at any budget.
Who Will Enjoy It
It is wonderful for beginning cooks, families on SNAP or tight grocery budgets, students, and anyone who wants to eat more vegetables in a cheerful, affordable way. Community groups and food pantries also like sharing it.
Ideas Readers Can Try Today
- Make a vegetable frittata using whatever vegetables are in your crisper drawer, and serve it with a slice of crusty bread.
- Choose one seasonal vegetable at the market this week and try it two different ways.
- Add one versatile spice to your pantry, like smoked paprika or cumin.
- Turn leftover vegetables into a quick soup or fried rice.
Try It Free First
Here is happy news for thrifty readers: Leanne Brown has long offered a free PDF version of Good and Cheap on her website, and many libraries carry the printed book too. Check Libby or Hoopla for ebook copies, and keep an eye out for used ones.
Why Some Readers Like Owning a Copy
The printed edition is a pleasure to cook from, with large photos and pages that stay open on the counter. The publisher has also shared copies with people in need through buy one, give one programs over the years. When comparing listings, look at the edition, the format, and used copy condition.
Professor Ima’s Wrap-Up
Good food is for everyone, and this cookbook proves it page after page. Crack a few eggs, chop a few vegetables, and enjoy a meal that tastes like a million bucks for just a few. Delicious homework, class!
As an Amazon Associate, Cheap101 earns from qualifying purchases, at no extra cost to you. Browse more handy finds in the Student Store.
Enjoy Your Single-Serve Brewer for Less with Reusable Coffee Pods
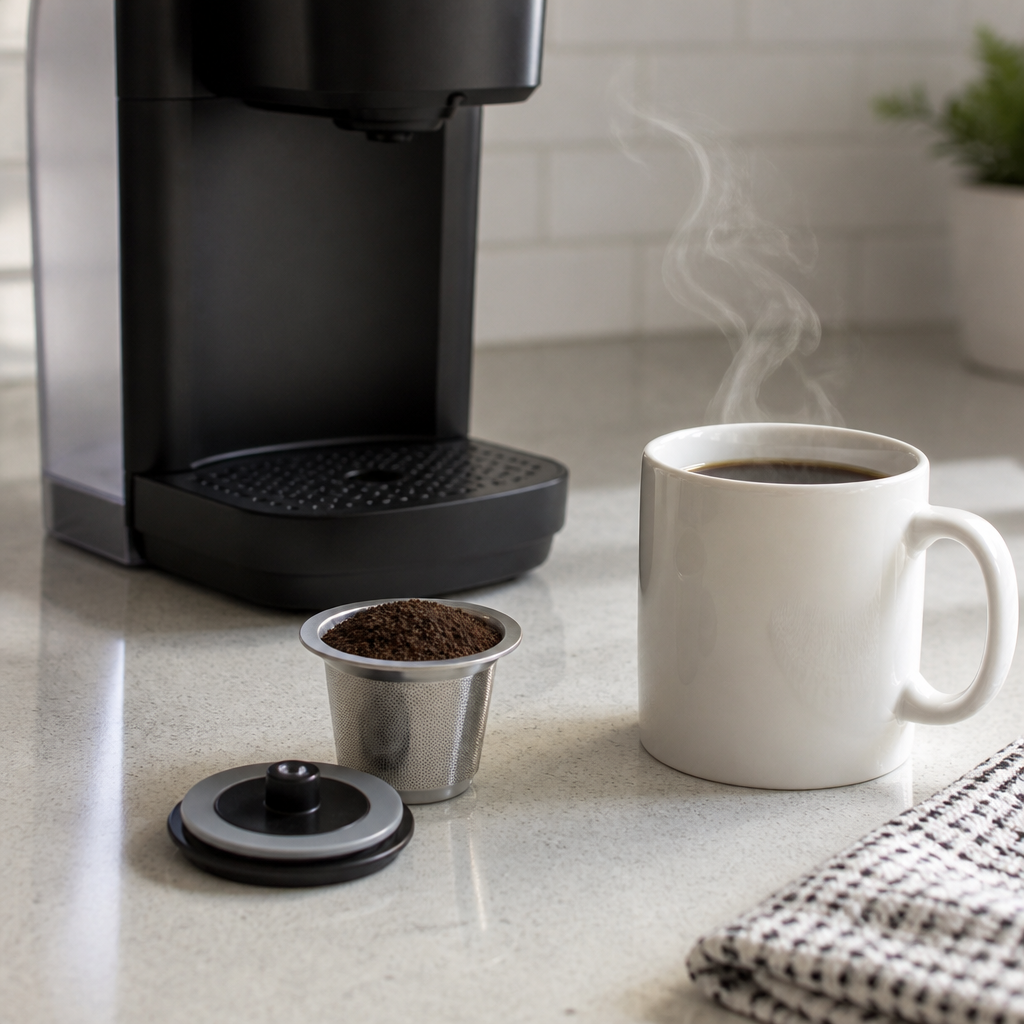
Keep the quick, one-cup convenience you love and brew it with any coffee you choose. A refillable pod and a bag of your favorite grounds can turn your morning cup into one of the best bargains of the day.
Do the Cup Math
Here is a fun bit of homework. Take the price of a box of pods and divide by the number of pods to get your cost per cup. Then take the price of a bag of ground coffee, divide by its ounces, and multiply by the amount you would use for one cup (many people use about 2 level tablespoons, roughly a third of an ounce). Most people find bagged coffee comes out noticeably lower per cup, but run your own numbers with your own store’s prices.
How to Brew a Great Cup with a Refillable Pod
- Choose the right grind. A medium grind, a little coarser than standard drip, usually flows best. Very fine coffee can slow the brew or let grounds slip through.
- Fill, do not pack. Spoon coffee in to the fill line and level it gently. Pressing it down can slow the water.
- Pick your cup size. Smaller brew settings tend to taste stronger. Experiment to find your sweet spot.
- Empty and rinse right away. Tap the grounds into the compost or garden, rinse the filter, and let it dry.
- Deep clean now and then. A soak in warm water with a little baking soda keeps the mesh flowing freely.
- Keep two pods. One to brew while the other dries makes busy mornings smooth.
Bonus: refillable pods also brew loose-leaf tea, so one little gadget covers both morning moods.
Try It Free First
If you have a regular drip coffee maker, a French press, or a saucepan, you can already make wonderful coffee for very little. A pot brewed in the morning can be poured over ice in the afternoon for a refreshing treat. And keep an eye out for free coffee days at the library, senior center or community events. Good company makes coffee taste even better.
Where Reusable Coffee Pods Fit In
Reusable pods are small refillable cups, usually with a fine stainless steel mesh, that fit in place of disposable pods in single-serve brewers. They are a lovely fit for anyone who enjoys the speed of a one-cup machine and wants the freedom to brew any coffee.
- Any coffee you like: store brand, local roaster, decaf or a special blend.
- Less trash: no single-use pods going into the bin.
- Adjustable strength: add a bit more or less coffee to taste.
- Long lasting: a well-cared-for pod can be used many, many times.
Honest note: refilling takes an extra minute, and the fit depends on your brewer model. Some machines are pickier than others, so double-check compatibility before you buy.
What to Look for When Comparing
- Brewer compatibility: match the pod to your exact machine model.
- Filter material: fine stainless steel mesh tends to last and rinse clean.
- Lid design: a secure hinged or screw lid keeps grounds inside.
- Capacity: some hold more coffee for larger mugs.
- Dishwasher safe: check the care instructions.
- Reviews and returns: compare listings, read recent reviews and check the return terms.
Professor Cheap’s Wrap-Up
Students, a happy morning cup is worth protecting, and so is your coffee budget. Do the cup math, fill a little pod with your favorite grounds, and sip knowing you have brewed yourself a bargain.
As an Amazon Associate, Cheap101 earns from qualifying purchases, at no extra cost to you. Browse more handy finds in the Student Store.
Make Hand Soap Last Longer With Refillable Foaming Dispensers
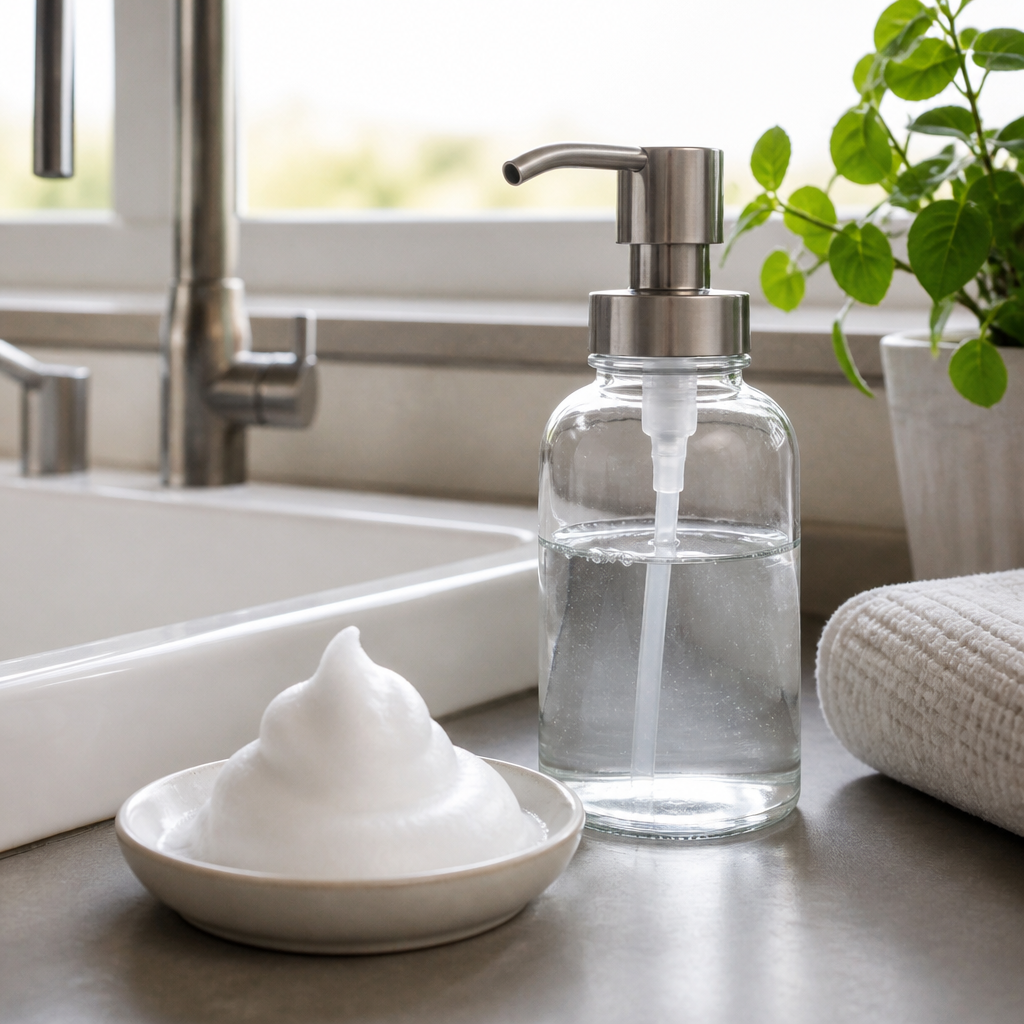
Rich, fluffy foam at every sink, and one bottle of soap that lasts and lasts. Mixing your own foaming hand soap in a refillable dispenser is easy, cheerful and kind to the budget, and your bathroom counter will look lovely too.
Hello, class! Today’s lesson is a bubbly one. Foaming hand soap feels luxurious, but the secret is that the foam is mostly air and water. A special pump mixes them with a little soap as you press. That means you can make your own at home and enjoy the same fluffy lather for a fraction of the cost per wash.
How to Mix Your Own Foaming Hand Soap
This is about as easy as recipes get:
- Add water first. Fill your foaming dispenser most of the way with water. Adding water first keeps the soap from bubbling up as you pour.
- Add a little liquid soap. Many people use roughly 1 part liquid hand soap or castile soap to about 4 or 5 parts water. Start there and adjust to your liking.
- Swirl gently. Put the pump back on and tip the bottle softly to mix. Shaking hard makes extra bubbles inside the bottle.
- Test and tweak. If the foam is too thin, add a bit more soap. If the pump feels stiff, add a bit more water.
- Make small batches. Mix only what you will use in a few weeks so every refill is fresh.
More Ways to Stretch Your Soap
- Buy refill jugs. Large bottles of liquid hand soap or castile soap usually cost less per ounce than small pump bottles.
- One pump is plenty. Foam spreads easily, so a single press is usually enough for clean hands.
- Use up the ends. Add a splash of water to a nearly empty soap bottle, swirl, and pour it into your foamer.
- Keep pumps clean. Rinse the pump with warm water between batches so it keeps working smoothly.
- Add a pleasant scent. Choose a refill soap with a fragrance you love, and every hand wash becomes a little treat.
Try It Free First
If you already have an empty store-bought foaming soap bottle, you own a foaming dispenser! Rinse it out, fill it with your homemade mix, and you are in business. Those pumps are designed for thin soap, so they work beautifully with a watered-down mix. Regular thick-soap pumps will not foam, so be sure to reuse a foaming one.
Where Refillable Foaming Dispensers Fit In
Refillable foaming dispensers are bottles made to be filled again and again. Many come in glass or sturdy plastic with stainless or matte pumps, so they look tidy beside the kitchen sink or in the bathroom. Some sets include matching bottles for every sink in the house, which makes refilling day quick and easy.
They suit families, anyone hosting guests, and folks who enjoy a coordinated, uncluttered counter. The button on this page is a search for this type of product, so compare listings, reviews, sizes and return terms before choosing.
What to Look For When Comparing
- Foaming pump: Make sure it is a true foaming pump, not a standard lotion pump.
- Material: Glass looks elegant; sturdy plastic can be a good pick for busy homes.
- Capacity: Larger bottles mean fewer refills.
- Wide opening: Makes filling easy and spill-free.
- Rust-resistant pump: Helpful for bottles that live by a wet sink.
- Stable base: A weighted or non-slip bottom keeps it steady.
Professor Ima’s Wrap-Up
Clean hands, happy sinks and a soap supply that keeps going: now that is a lesson worth lathering up about. Mix a batch, swirl it gently, and enjoy that cloud of foam knowing your budget is smiling right along with you. Class dismissed!
As an Amazon Associate, Cheap101 earns from qualifying purchases, at no extra cost to you. Browse more handy finds in the Student Store.
How to Air Dry Laundry Easily (and Why a Folding Rack Helps)
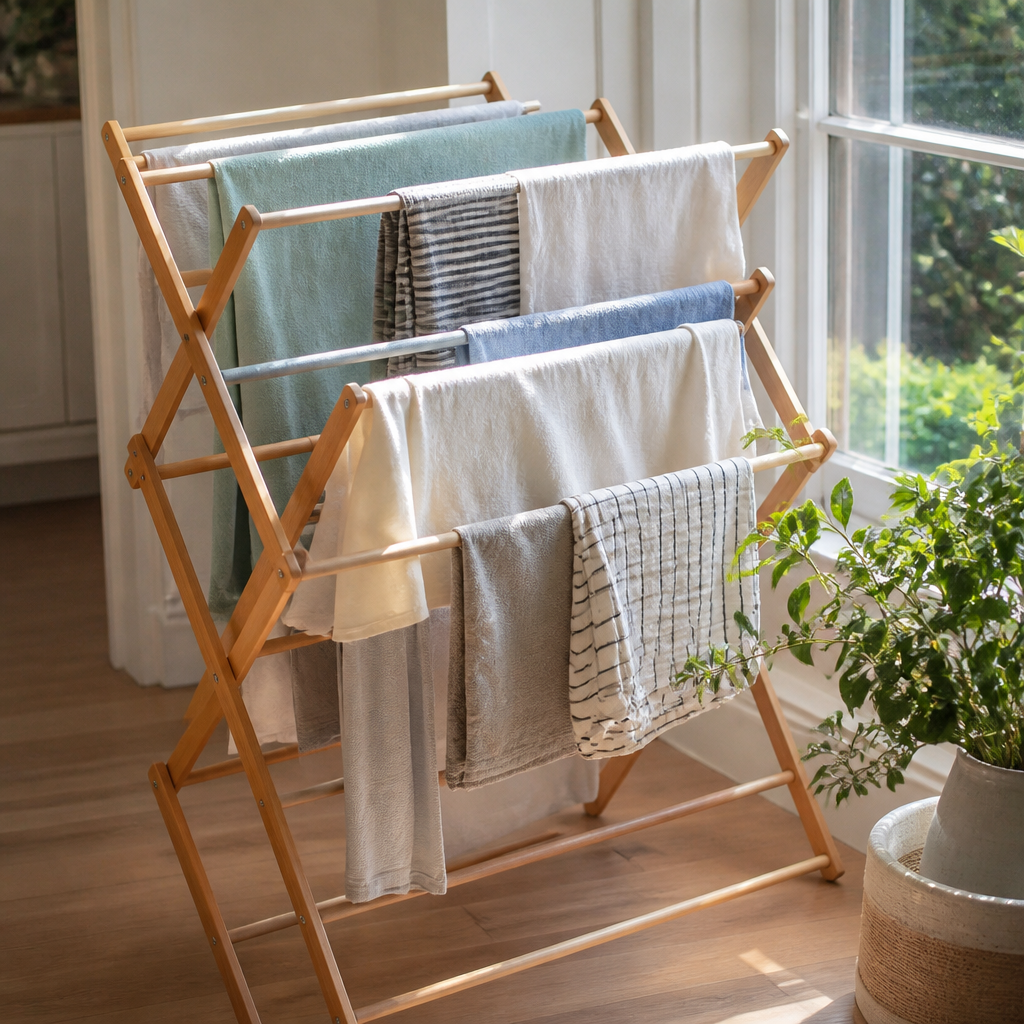
Fresh, soft laundry can dry for free with nothing but a little air and time. A folding drying rack and a few clever tricks help your clothes last longer, keep their shape, and give your dryer a nice long rest.
Why Air Drying Is a Thrifty Classic
Hello again, class! Our grandmothers knew this one well. Clothes dryers use quite a bit of energy, and every load you air dry is a load that costs nothing to dry. As a bonus, gentle air drying is kinder to fabrics. All that lint in your dryer filter? That is bits of your clothes. Air drying helps them stay nice longer.
Tips for Fast, Fresh Air Drying
- Use an extra spin. Choosing a high spin or an extra spin cycle removes more water, so clothes dry faster.
- Shake it out. A good snap before hanging smooths wrinkles and fluffs fibers.
- Give each piece space. Air needs room to move, so avoid crowding.
- Find good airflow. Near an open window, a ceiling fan, or a sunny spot works beautifully.
- Dry sweaters flat. Lay knits flat so they keep their shape.
- Turn darks inside out when drying in sunshine to help keep colors bright.
- Soften towels. If you like fluffy towels, a few minutes in the dryer after air drying, or a good shake, softens them nicely.
Try It Free First
Look around and you will find drying spots everywhere. A shower curtain rod is perfect for shirts on hangers. Plastic hangers on a door frame, the back of a chair, or a sturdy towel bar can all hold a few items. If you have a yard or patio and your community allows it, a simple clothesline gives you that lovely sunshine-fresh scent at no cost.
Where Folding Drying Racks Fit In
A folding drying rack gives you lots of hanging space that tucks away flat when you are done. It is a wonderful fit for apartments, condos, and communities where outdoor lines are not allowed. Many people set one up in a laundry room, a spare room, or on a balcony.
- Accordion style racks are compact and classic, often made of wood or metal.
- Gullwing racks have wings that fold up and down, giving a lot of space for a full load.
- Wall-mounted or over-the-door racks save floor space entirely.
What to Look For When Comparing
- Drying space: check the total length of hanging rails.
- Folded size: make sure it fits where you will store it.
- Material: rust-resistant metal, coated steel, or wood.
- Weight capacity: important for heavy towels and jeans.
- Stability and ease of setup: reviews often mention this.
- Return terms: compare listings before buying.
Professor Ima’s Wrap-Up
Sunshine and fresh air are free, and they are wonderful at drying laundry. Spin well, hang with space, and let a handy rack hold the load. Your clothes stay lovely and your energy bill stays light. Hang on to that lesson, students!
As an Amazon Associate, Cheap101 earns from qualifying purchases, at no extra cost to you. Browse more handy finds in the Student Store.