

Why give a boring card when you can give a cheddar-printed masterpiece? 🧀 With the Cheese Printer, you can turn a cheap cheese sandwich into a hilarious, heartfelt, and slightly melty gift. Snap a selfie, send it to a slice, and voilà-your lunch is now a personalized dairy tribute. It’s the gouda way to say “I love you” without spending a lot of cheddar.

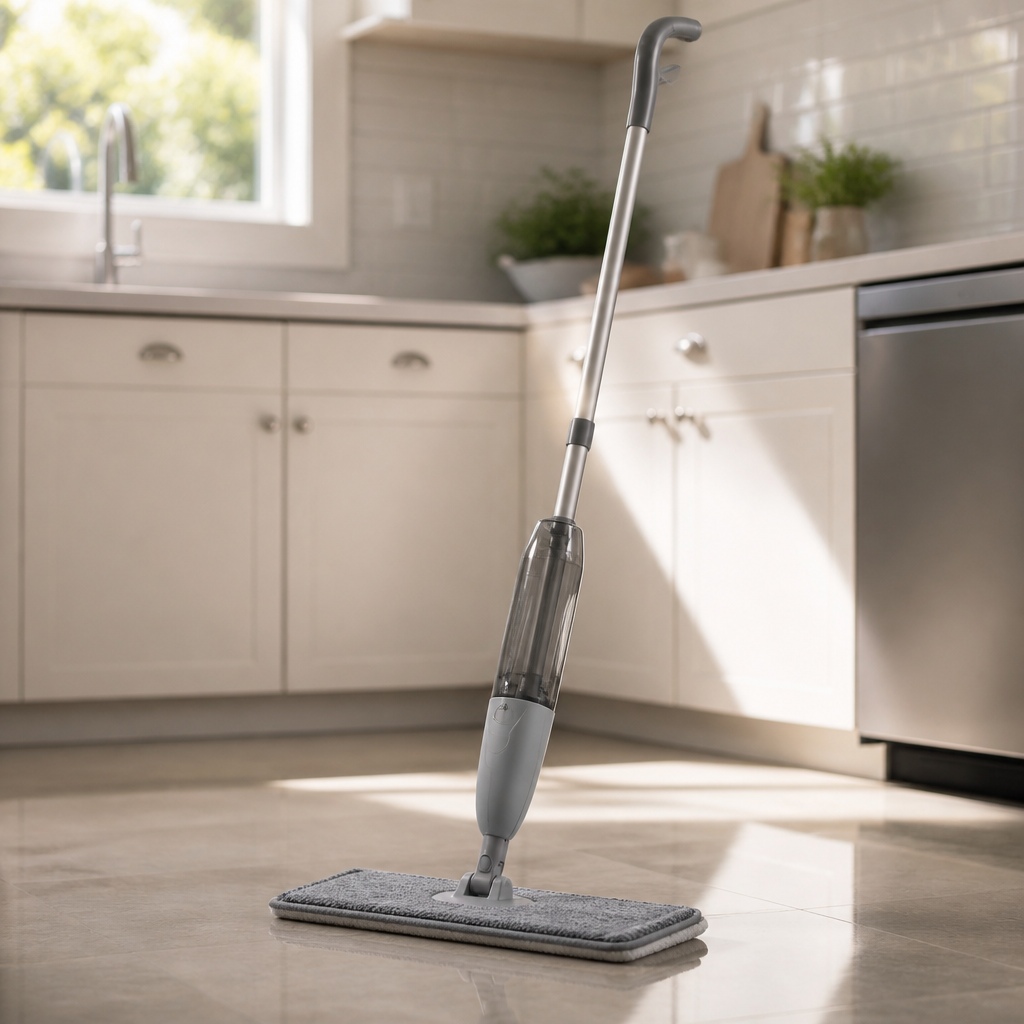
How to Mop for Less (Refillable Spray Mops and Washable Pads)
Sparkling floors can be quick, easy, and wonderfully thrifty. A refillable spray mop with washable pads lets you fill it with your own cleaner, toss the pads in the laundry, and enjoy a fresh shine again and again without buying refills.
The Thrifty Way to Clean Floors
Welcome back, class! Many popular floor mops are designed around disposable pads and special bottles of solution that you buy again and again. The mop itself might be cheap, but the refills keep calling your wallet. Today we learn how to keep the convenience and skip the repeat purchases.
Steps for Clean Floors in Less Time
- Sweep or vacuum first. Picking up crumbs and grit before mopping keeps your pad cleaner and your floor shinier.
- Go light on liquid. A fine mist is usually all you need. Less water means faster drying and no streaks.
- Work toward the door. Start in the far corner and mop your way out so you never step on a wet floor.
- Use a figure-eight motion. It gathers dirt into the pad rather than pushing it around.
- Swap pads for big rooms. Having two or three pads lets you switch to a fresh one halfway through.
- Do little and often. A quick five-minute mop of the kitchen keeps it looking lovely between deeper cleans.
A Simple Homemade Floor Spray
For many sealed floors, plain warm water with a few drops of dish soap works nicely. Keep it light so it does not leave a film. Always check your flooring maker’s care advice first. Some floors, like natural stone, do best with gentle, pH-neutral cleaners rather than vinegar, and waxed or unsealed wood floors usually prefer very little water. When in doubt, test a small hidden spot.
Try It Free First
Already own a disposable-pad mop? You may be able to give it a second life. Many people wrap an old washcloth, a cut-up towel, or a worn cotton sock around the head and tuck the edges into the grippers. Pair it with a clean spray bottle of your own cleaner and you have a refillable system for free.
Where Refillable Spray Mops Fit In
A refillable spray mop has a built-in bottle on the handle that you fill yourself, plus a trigger that mists the floor ahead of you. The pads are washable and reusable, so you simply pop them in the washing machine. Many people like how light these mops are, how little water they use, and how quickly the floor dries. They suit small kitchens, bathrooms, and anyone who wants a quick clean without hauling a bucket.
What to Look For When Comparing
- Refillable bottle: make sure it can be filled with any cleaner you choose.
- Extra washable pads: sets with several pads save you from washing mid-clean.
- Handle length and weight: a comfortable height makes the job easy.
- Swivel head: helps reach under furniture and around corners.
- Floor type: check that it suits your surfaces.
- Reviews and return terms: compare listings before you choose.
Professor Ima’s Wrap-Up
Clean floors, happy feet, and a budget that shines just as bright. Sweep first, mist lightly, and let washable pads do the work over and over. That is a lesson worth mopping up an A for!
As an Amazon Associate, Cheap101 earns from qualifying purchases, at no extra cost to you. Browse more handy finds in the Student Store.
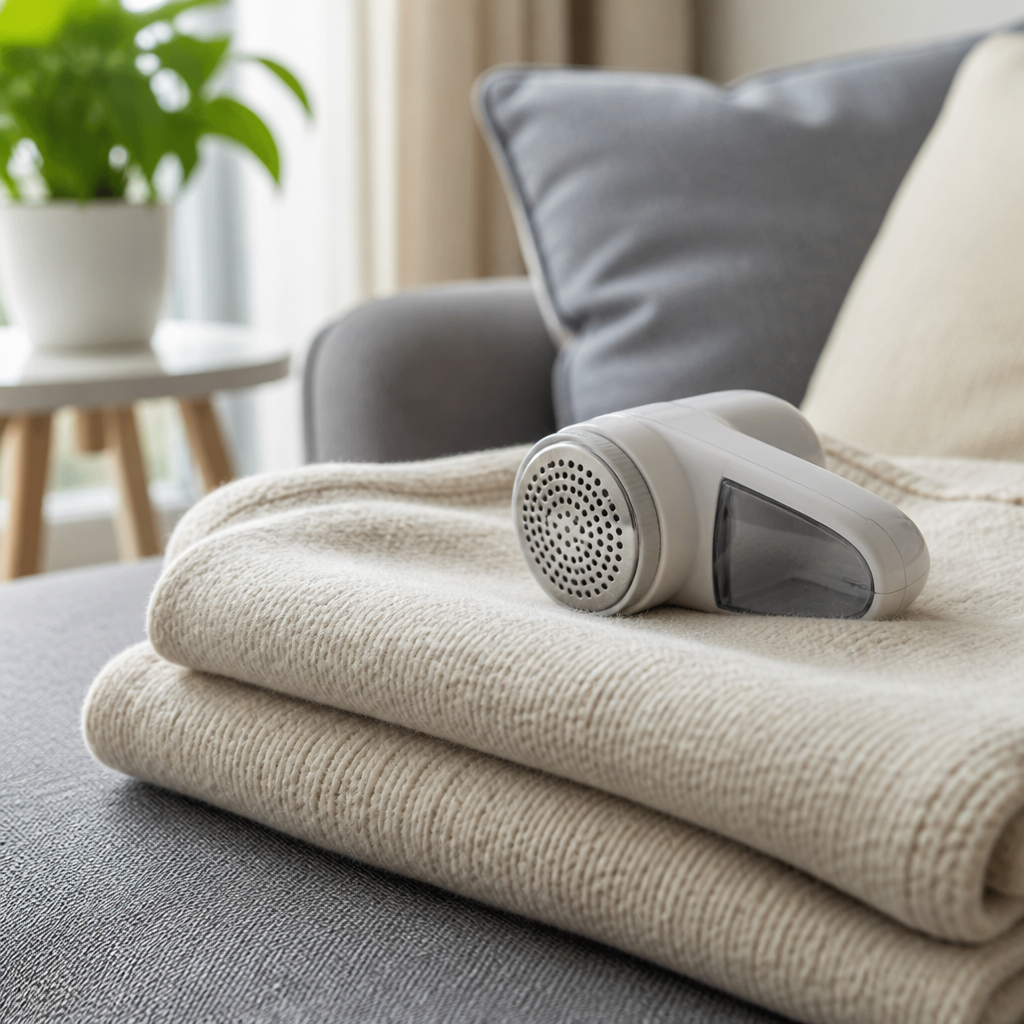
How to Make Sweaters and Couches Look New Again (Fabric Shavers)
Your favorite sweater and comfy couch can look fresh and smooth again in just minutes. With a little know-how and a handy fabric shaver, those tiny fuzz balls whisk away, and the things you love get many more happy years.
What Are Those Little Fuzz Balls?
Gather round, fashion students! Those tiny balls on knits and upholstery are called “pills.” They form when short fibers rub, tangle together, and knot up on the surface. Areas that get lots of friction, like sweater underarms, sleeves, and couch cushions, are where they like to gather. The fabric itself is usually still in fine shape underneath. It just needs a fresh shave.
How to Keep Fabrics Smooth Longer
- Turn knits inside out before washing to reduce rubbing on the outside.
- Use a gentle cycle and cold water for sweaters and delicate knits.
- Wash like with like. Keep sweaters away from rough items like jeans and towels.
- Try a mesh laundry bag for your softest pieces.
- Air dry flat. It is gentler than the dryer and helps sweaters keep their shape.
- Rotate your favorites so no one sweater gets all the wear.
How to De-Pill the Right Way
- Lay the item flat on a table or ironing board so the fabric is smooth and taut.
- Work in small sections with light pressure, using gentle circles or short strokes.
- Test on a hidden spot first, like the inside hem.
- Take your time on delicate knits. A light touch is the secret.
Try It Free First
You might already have a de-piller in your bathroom! Many people carefully glide a clean, new disposable razor across a sweater laid flat, using very light strokes. Others use a fine-tooth comb or a rough kitchen sponge (the scrubby side, used gently) to lift pills away. Go slowly and test a hidden area first, especially on thin or loosely knit fabrics.
Where Fabric Shavers Fit In
A fabric shaver is a small handheld gadget with spinning blades hidden behind a protective mesh guard. You glide it over fabric, and it neatly trims off pills, collecting the fuzz in a little catch container. Many people find it faster and more even than the razor trick, especially for big jobs like couch cushions, blankets, and coats.
Some are battery powered, and others are rechargeable through a USB cord. Many have adjustable height guards so you can choose a gentler setting for delicate knits. It is a lovely way to give a beloved sweater or a thrift store find a fresh new look.
What to Look For When Comparing
- Power source: rechargeable or replaceable batteries.
- Adjustable height settings: helpful for different fabrics.
- Shaving head size: larger heads cover couches and blankets faster.
- Lint catcher: an easy-to-empty container is a plus.
- Replacement blades included: extends its life.
- Reviews and return terms: compare a few listings.
Professor Ima’s Wrap-Up
The thriftiest sweater is the one you already own. Wash gently, store it nicely, and give it a quick shave now and then, and it will keep you cozy for seasons to come. Same goes for your couch! That is a fashion lesson with a frugal twist. Class dismissed, my stylish students!
As an Amazon Associate, Cheap101 earns from qualifying purchases, at no extra cost to you. Browse more handy finds in the Student Store.

Die With Zero by Bill Perkins: Spend on Memories at the Right Time
Bill Perkins’ Die With Zero is a cheerful nudge to turn your money into wonderful memories while you can enjoy them most. Here are its big ideas, who will love it, and simple ways to start planning your own memory-rich life.
Here at Cheap101 we love a good savings habit. But Professor Ima also believes money is a tool, and tools are meant to be used. That is exactly the conversation Bill Perkins starts in Die With Zero, and it makes a refreshing addition to any frugal bookshelf.
What the Book Is About
Bill Perkins is a hedge fund manager and energy trader who noticed that many careful savers end their lives with large sums they never got to enjoy. His book argues that the real goal of earning and saving is a rich life full of experiences, and that money left unspent at the end represents hours of work that never turned into joy.
He is not telling anyone to be reckless. He still wants readers to be secure, and he talks about tools like annuities and careful planning for later years. His point is about balance and timing: matching your spending to the seasons of your life.
The Big Ideas
- Memories pay dividends. A great experience keeps giving every time you remember it or share the story, so investing in memories early lets them grow in value over the years.
- Time buckets. Perkins suggests sketching your life in five or ten year blocks and writing down what you would love to do in each. Some adventures fit best while you are young and nimble, others shine in later years.
- Health, time, and money work together. Each season of life offers a different mix of the three. The sweet spot is spending money when you also have the time and energy to enjoy it.
- Give while you are here. Instead of leaving everything as an inheritance, he encourages giving to children and causes when the gift can make the biggest difference and you can see it land.
Who Will Enjoy It
This book is a treat for super savers who find it hard to spend on themselves, for retirees deciding how to enjoy what they have built, and for families thinking about when to help the next generation. Younger readers will find it a lovely reminder that a few well-chosen experiences now can be worth a lot.
Ideas Readers Can Consider Today
- Draw a simple time bucket chart on a sheet of paper and list a few dream experiences for each decade ahead.
- Pick one experience that fits best right now and look for a thrifty way to make it happen, like an off-season trip or a local adventure.
- Make a memory jar: a small savings fund set aside just for experiences.
- Talk with loved ones about the gifts or help that would mean the most to them now.
These are ideas to think over, not personal financial advice. Everyone’s situation is different, so readers planning big changes may want to talk with a trusted financial professional.
Try It Free First
Your library card is a frugal superpower. Many libraries offer Die With Zero as an ebook or audiobook through the Libby app, and some carry it on Hoopla too. You can also place a hold on a print copy, or look for a gently used one at a thrift store or library book sale.
Why Some Readers Like Owning a Copy
The time bucket exercise is the kind of thing many people like to revisit every year or two, and having your own copy means you can underline, jot notes in the margins, and lend it to a friend. When comparing listings, look at paperback versus hardcover prices, used copy condition, and whether an audiobook or ebook edition suits you better.
Professor Ima’s Wrap-Up
Being thrifty is about getting the most value from every dollar, and a cherished memory may be the best value of all. Die With Zero is a happy reminder to save wisely and then go live a little. Class dismissed, adventurers!
As an Amazon Associate, Cheap101 earns from qualifying purchases, at no extra cost to you. Browse more handy finds in the Student Store.

Cozy Rooms All Year: How Thermal Insulated Curtains Can Help
Curtains can do more than look pretty. The right ones help hold winter warmth inside and keep summer sun at bay, so your rooms feel comfortable and your heating and cooling can take it a little easier.
Welcome, class! Today we are talking about windows, those lovely openings that bring in sunshine and scenery. Windows are also where a lot of a room’s warmth comes and goes. The U.S. Department of Energy notes that window coverings, used well, can help with heating and cooling. Let’s learn how to make your curtains part of your comfort plan.
How to Use Curtains for Comfort, Season by Season
In cooler months:
- Open curtains on sunny windows during the day to let free solar warmth in.
- Close them at dusk to help hold that warmth inside overnight.
- Keep curtains close to the window and let them reach the sill or floor for a snugger fit.
In warmer months:
- Close curtains on windows that get strong afternoon sun, often those facing south and west.
- Open them in the cool evening and early morning to enjoy fresh air.
- Light-colored backings can help reflect sunshine away from the room.
Hanging Tips That Make a Difference
- Mount the rod higher and wider. Extending the rod a few inches past each side of the frame lets curtains cover the whole window and makes it look larger, too.
- Go long. Curtains that reach the floor or the sill help create a calm pocket of air by the glass.
- Close the gaps. A wraparound rod or a couple of small hooks can hold curtain edges close to the wall.
- Layer up. Pair thermal curtains with blinds or sheer panels for flexible light and privacy.
- Keep vents clear. Make sure curtains do not cover heating or cooling vents.
Try It Free First
Start with the curtains you have. Simply opening and closing them at the right times of day costs nothing. You can also hang a spare quilt, a heavy blanket or a fleece throw behind existing curtains on a chilly night, using a tension rod or clip rings. Thrift stores and yard sales often have lined drapes for a song. For an extra boost in winter, see our guide to window insulation film.
Where Thermal Insulated Curtains Fit In
Thermal insulated curtains are made with thicker, layered fabric or a special backing designed to slow the movement of heat through the window. Many also block a good deal of light, which makes them popular for bedrooms and for daytime sleepers. People also like that they can soften outside noise and add a cozy, finished look to a room.
How much difference they make depends on your windows, your climate and how you use them, so think of them as one helpful piece of a comfortable home. The button here is a search for this type of product. Compare listings, reviews, sizes and return terms to find a good match.
What to Look For When Comparing
- Measurements: Measure width and length carefully. Many people choose panels that together are about 1.5 to 2 times the window width for a full look.
- Layers and backing: Check whether the curtain is triple-weave, lined or foam-backed.
- Light control: Decide if you want full blackout or room darkening.
- Hanging style: Grommets, rod pockets or back tabs, and whether they suit your rod.
- Care: Machine washable panels are easy to keep fresh.
- Color: Choose a shade you love, since you will see it every day.
Professor Ima’s Wrap-Up
A cozy home is one of life’s sweetest comforts, and your curtains can help make it happen. Open them for sunshine, close them for snugness, and hang them high and long. Your rooms will feel inviting in every season, and that is a lesson worth framing. Class dismissed!
As an Amazon Associate, Cheap101 earns from qualifying purchases, at no extra cost to you. Browse more handy finds in the Student Store.
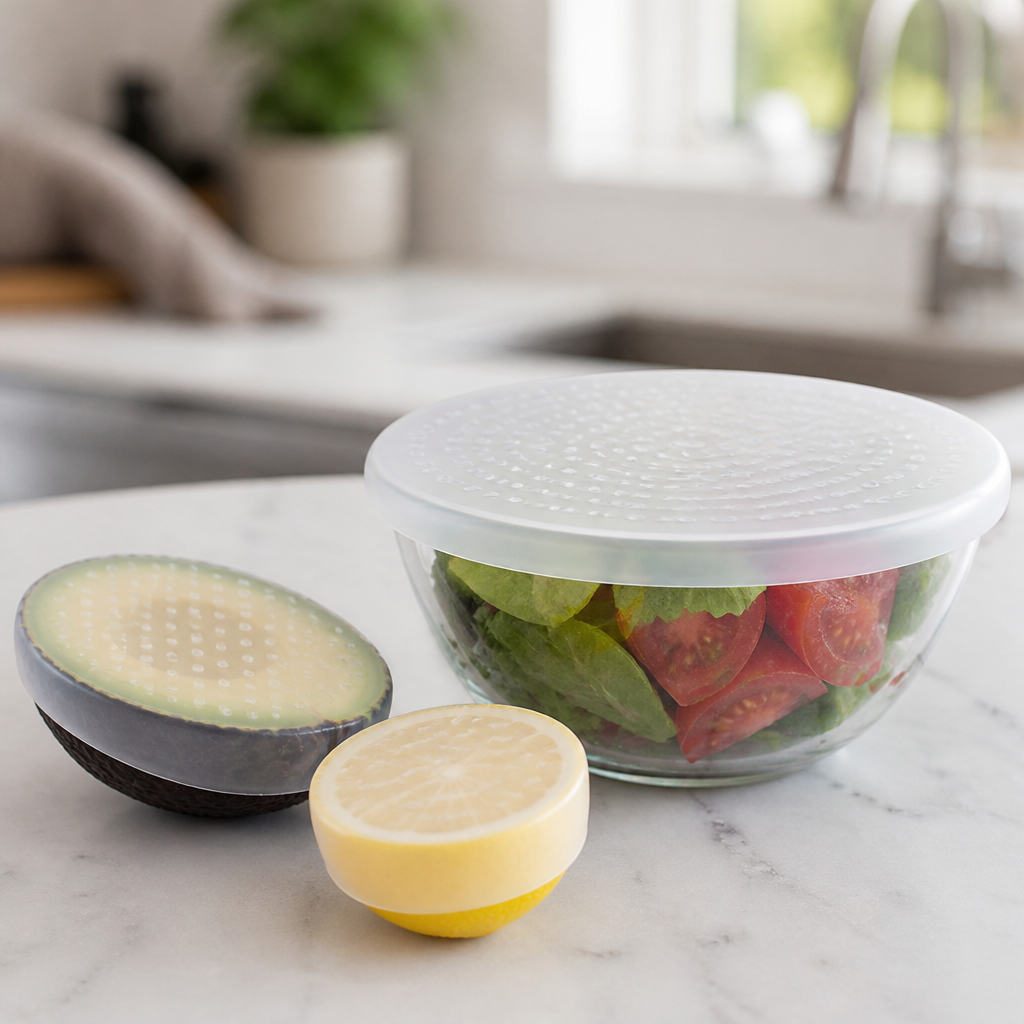
The Frugal Kitchen Guide to Reusable Silicone Stretch Lids and Food Huggers
Half an avocado, half a lemon, half an onion: now they all get to shine another day. Reusable silicone stretch lids and food huggers seal snugly over bowls and cut produce, so your leftovers keep their good looks and your wallet keeps its cash.
Welcome to module seven of the Cheap101.com student store field guide series. In household management, single-use kitchen wraps represent an ongoing, silent budget leak. Every week, rolls of disposable plastic cling wrap and aluminum foil are torn off, stretched over bowls or cut fruits, and discarded into the trash just hours later. Beyond the environmental burden of single-use plastics, this habit forces you to repurchase consumable packaging rolls continuously throughout the year while failing to keep cut produce fresh.
When you cut into an onion, lemon, tomato, or avocado, exposure to atmospheric oxygen triggers rapid cellular browning and moisture loss. Makeshift coverings like loose foil or plastic bags allow air to circulate around the exposed flesh, turning expensive produce dry and unusable within forty-eight hours. Reusable silicone stretch lids and nested food huggers solve both problems at once by forming an airtight, flexible barrier directly over cut foods and rimmed containers. Today’s guide explores the mechanics of food-grade silicone covers, outlines the key features to look for, and provides actionable routines to stop grocery waste permanently.
1. Why Disposable Food Wraps Waste Household Capital
Traditional kitchen wraps were designed for manufacturer convenience rather than consumer thrift. Evaluating their real costs reveals significant financial drawbacks:
- The Consumable Repurchase Cycle: A typical household spends thirty to sixty dollars annually on disposable plastic wrap, parchment paper, and aluminum foil rolls. Over five years, that disposable habit diverts hundreds of dollars away from your emergency fund or investment accounts.
- Poor Seal Integrity: Standard plastic cling film bunches up, sticks to itself, and rarely creates a true hermetic seal over glass bowls, ceramic dishes, or metal cans. Ambient air enters the container, accelerating food spoilage.
- Produce Discard Losses: Throwing away the second half of a red onion, half an avocado, or half a lemon because it dried out adds five to ten dollars in needless food waste to your weekly grocery tab. Over twelve months, this waste equals hundreds of dollars in lost produce.
Investing in durable, food-grade silicone lids replaces recurring rolls with a one-time purchase that lasts for years of daily kitchen use.
2. The Two Essential Silicone Cover Styles for Every Kitchen
To outfit your kitchen for maximum savings and food preservation, combine these two complementary styles of reusable silicone covers:
A. Circular and Rectangular Silicone Stretch Lids: These flat, elastic silicone discs feature raised pull tabs along the rim. Crafted from high-tensile food-grade silicone, they stretch over round bowls, rectangular glass meal prep containers, mixing bowls, melon halves, and opened soup or pet food cans. The tension creates a leakproof, airtight suction seal that prevents liquid spills and keeps leftovers fresh inside the refrigerator.
B. Nested Silicone Food Huggers: Specifically engineered to cap cut fruits and vegetables directly without needing a storage bowl. These cup-shaped silicone caps feature a stepped inner lip that grips firmly onto the curved exterior of cut citrus, tomatoes, cucumbers, apples, and onions. By hugging the cut surface closely, the silicone seals out oxygen and locks in natural juices, preventing dehydration and discoloration for days.
3. Key Quality Features to Demand in Reusable Silicone
Not all silicone kitchen tools offer the same durability. When shopping for stretch lids and produce covers, prioritize these core manufacturing standards:
A. 100 Percent Platinum Food-Grade Silicone: Ensure the products are manufactured from premium platinum silicone certified BPA-free, lead-free, and phthalate-free. Platinum silicone does not contain plastic fillers, resists staining from acidic tomato sauces, and remains supple without tearing when stretched over wide containers.
B. Broad Temperature Tolerance: High-grade silicone withstands extreme temperature shifts ranging from forty degrees below zero in the freezer to over four hundred degrees in the oven or microwave. This versatility allows you to take covered leftovers straight from the refrigerator to the microwave for reheating without swapping containers.
C. Reinforced Rim Tabs and Multiple Diameter Sizes: Look for stretch lid sets that include at least six distinct diameter sizes (from two-and-a-half inches for soda cans up to eight inches for large salad bowls). Sturdy, molded pull tabs around the perimeter ensure you can grip and stretch the lids smoothly without slipping.
D. Dishwasher-Safe Durability: Easy cleanup is vital for maintaining a reusable habit. Quality silicone covers can be placed directly on the top rack of your dishwasher without warping, shrinking, or losing elasticity.
4. Best Practices for Getting an Airtight Seal Every Time
Achieving a reliable vacuum seal with silicone lids requires a simple adjustment to your kitchen habits:
- Ensure Edges Are Completely Dry: Silicone relies on friction to grip container walls. If the rim of your bowl or the outside peel of your fruit is wet with water or oil, the silicone may slide off. Wipe the rim with a clean kitchen towel before stretching the lid.
- Start from the Far Edge: Anchor one side of the silicone lid over the far lip of the bowl, then gently pull the opposite tabs toward you to stretch the cover across the opening.
- Press Down to Expel Trapped Air: Once the lid is securely seated on the container, gently press down on the center of the silicone disc to burp out excess air before releasing. This creates a gentle vacuum that keeps food significantly fresher.
Ditch Single-Use Plastic Wrap for Good
Explore durable silicone stretch lid sets and nested food huggers to keep cut produce fresh and eliminate consumable wrap expenses.
Swapping disposable cling film for reusable silicone stretch lids and food huggers delivers immediate savings on paper goods and stops cut produce from spoiling in your crisper drawer. Make this simple kitchen upgrade today to permanently lower your household grocery expenses.
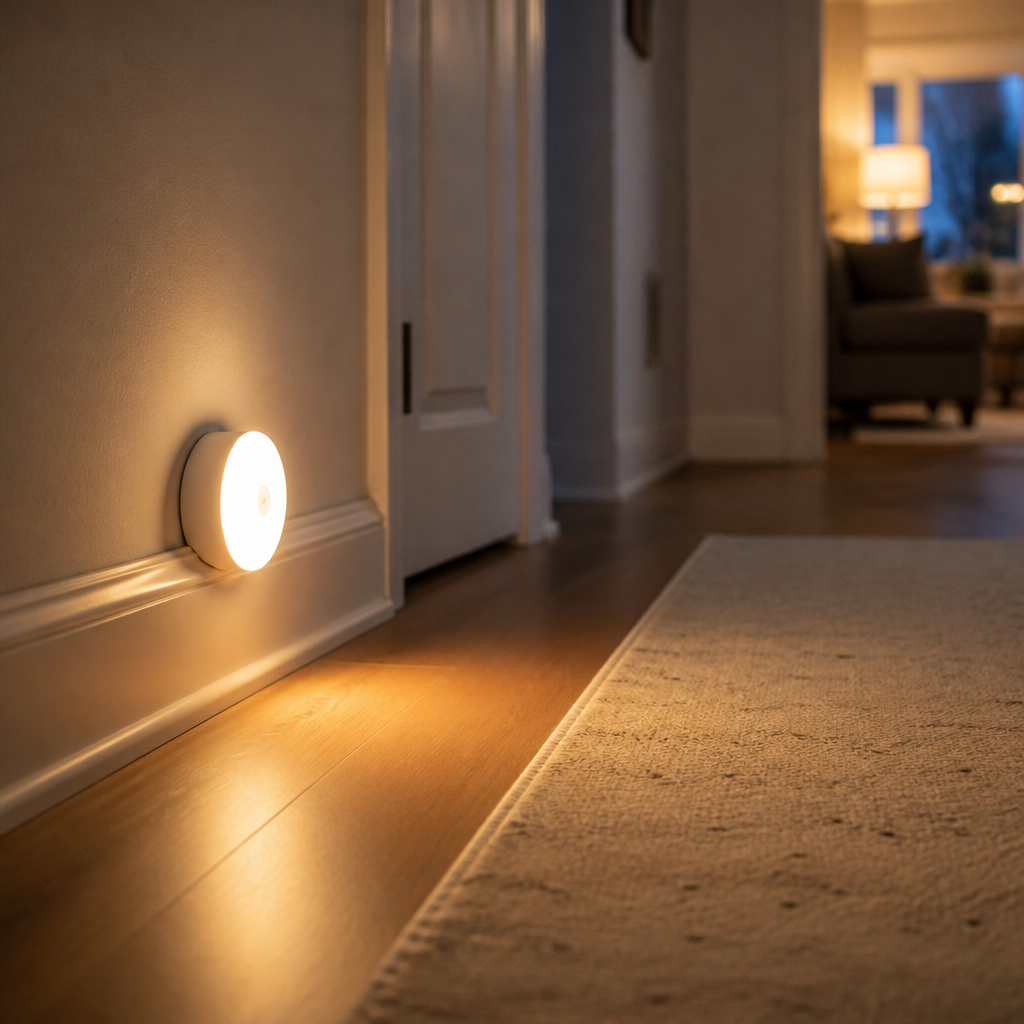
Light the Way at Night for Pennies With Motion-Sensor Night Lights
A soft glow that greets you in the hallway at night, then quietly turns itself off. Motion-sensor night lights make late-night trips to the kitchen or bathroom easy and confident, and many use very little energy along the way.
Good evening, class! Today’s lesson is a bright idea, quite literally. Lighting the path through your home at night is one of the simplest ways to make it feel welcoming and easy to move through after dark. Best of all, it can be done for very little money.
How to Light Your Home Smartly at Night
- Trace your nighttime path. Walk the route you take most often at night, such as bedroom to bathroom or bedroom to kitchen, and note where a little light would help.
- Light low. Lights placed near the floor brighten the walking surface without shining in your eyes.
- Choose a warm, gentle glow. Many people find softer, warmer light more pleasant at night and easier on sleepy eyes.
- Cover the key spots. Hallways, stairways, bathrooms, entryways and the kitchen are favorite places.
- Keep the path clear. A tidy walkway, with cords tucked away and rugs lying flat, pairs perfectly with good lighting.
- Think inside cabinets and closets. Small lights make it easy to find things in deep closets and under the sink.
Why Motion Sensors Are So Handy
Regular night lights stay on all night long. Motion-sensor versions switch on when they detect movement and turn off on their own after a short time. That means light exactly when you want it and no glow when the room is empty. Many also have a light sensor so they only switch on when it is dark. LED bulbs are known for using little electricity, so a few small LED night lights can brighten your home at a very modest cost.
Try It Free First
Look around for light you already own. A small lamp on a timer, a plug-in night light tucked in a drawer, or leaving a bathroom light on with the door partly open can all light the way. A flashlight kept on the nightstand is handy, too. Notice which spots you like lit, and you will know exactly where a motion-sensor light would be most useful.
Where Motion-Sensor Night Lights Fit In
Motion-sensor night lights come in a few styles. Plug-in models fit right into an outlet. Battery-powered or rechargeable versions stick or screw onto walls, stair edges, closets and cabinets, so you can place them anywhere, even where there is no outlet. Light strips can glow under a bed frame or along a hallway baseboard.
They suit households with early risers and night owls, families with kids, guests staying over, and anyone who likes a gentle glow without hunting for a switch. The button on this page is a search for this type of product, so compare listings, reviews, sizes and return terms before choosing.
What to Look For When Comparing
- Power source: Plug-in, battery or USB rechargeable, depending on where it will go.
- Light color: Warm white for a soft glow, cool white for a brighter look.
- Brightness settings: Adjustable levels let you fine-tune each spot.
- Sensor range and timer: Check how far it detects motion and how long it stays on.
- Dusk-to-dawn sensor: Keeps lights off during daylight.
- Mounting: Adhesive, magnetic or screw-in options for walls and cabinets.
Professor Ima’s Wrap-Up
A home that greets you with a gentle glow at midnight is a home that feels cared for. Trace your path, light it low and warm, and let the sensors do the rest. Sweet dreams, class, and see you bright and early for the next lesson!
As an Amazon Associate, Cheap101 earns from qualifying purchases, at no extra cost to you. Browse more handy finds in the Student Store.
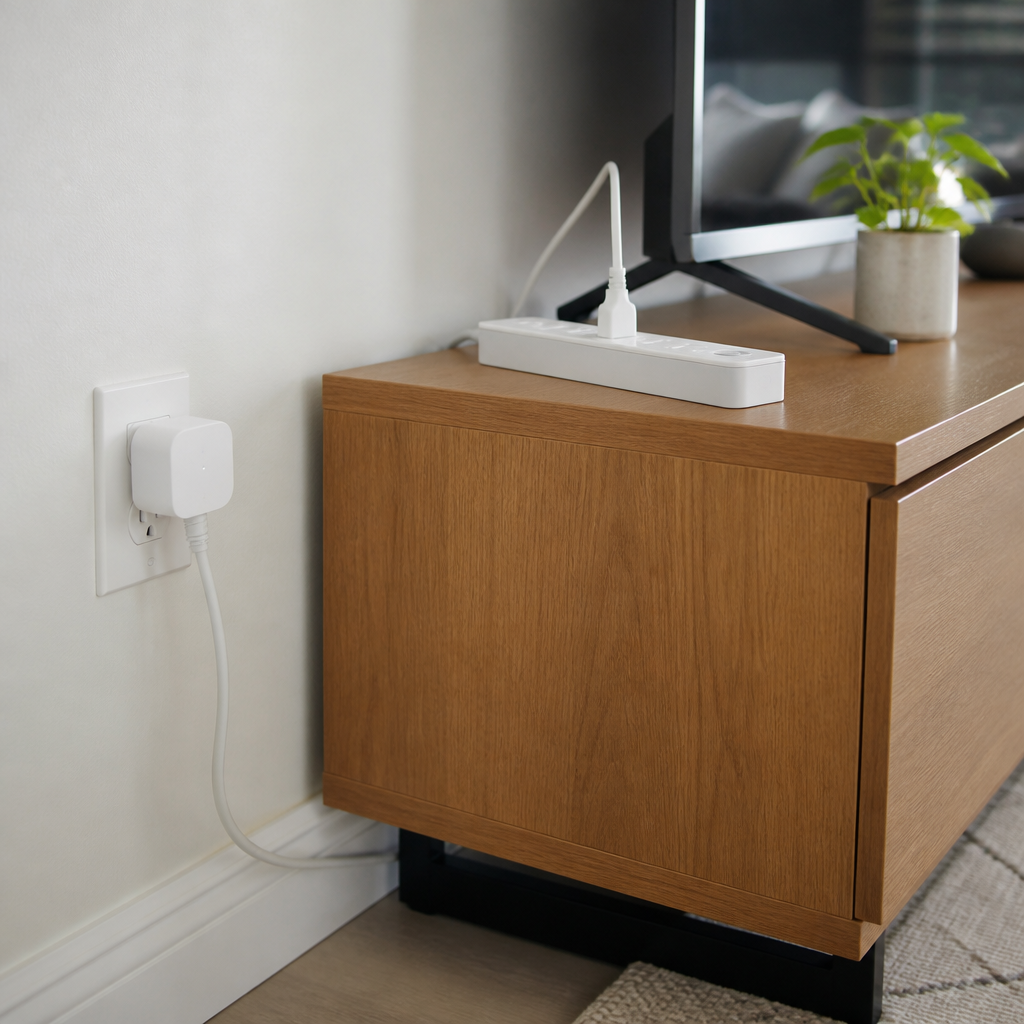
How to Cut Standby Power Easily (Smart Plugs and Power Strips)
Many gadgets quietly sip electricity even when they look switched off. The good news is that one click or a simple schedule can put them truly to sleep, so your home stays just as comfy and your energy dollars stay with you.
What Is Standby Power, Anyway?
Gather round, class. Standby power (some folks call it “phantom” power) is the small amount of electricity that many devices use while they are plugged in but not doing anything useful. That glowing clock on the microwave, the little red light on the TV, the charger left in the wall: each one is ready and waiting, and waiting uses a bit of energy. One device alone is tiny. A whole house full of them, running all day and all night, can add up over a year.
How to Find and Tame Your Energy Sippers
- Do a glow walk. Some evening, turn off the main lights and stroll through your home. Every little light or warm power brick is a clue.
- Group by spot. Most homes have a few clusters: the TV corner, the computer desk, the kitchen counter, and the nightstand. These are your best places to save.
- Sort what can sleep. Game consoles, sound bars, DVD players, printers, speakers, and phone chargers can usually be fully off when not in use.
- Know what should stay on. Keep the refrigerator, freezer, medical equipment, internet router (if you need it overnight), security devices, and anything that must keep a schedule plugged in and powered.
- Unplug chargers when the battery is full. It is a tiny habit with a nice tidy feeling, too.
Try It Free First
You may already own the tools for this lesson. Many homes have an ordinary power strip with an on and off switch tucked behind the TV. Plug your entertainment gear into it, then flip the switch off at bedtime. Also peek in your device menus. Many TVs and game systems have an “energy saving” or “eco” setting that reduces what they use while waiting. Turning those on costs nothing at all.
Where Smart Plugs and Switched Power Strips Fit In
If reaching behind furniture is not your idea of fun, these handy helpers do the remembering for you.
- Switched power strips put a big, easy-to-reach switch on a group of devices. Some have individual switches for each outlet, so you can leave one device on and turn the rest off.
- Smart plugs plug into the wall, and you plug a device into them. Using a phone app or a voice assistant, you can set schedules, like turning the coffee maker corner off at night and the lamp on at dusk. Some models even show how much energy a device uses, which makes a fun little science project.
- Advanced or “smart” power strips can sense when a main device, like a TV, turns off, and then switch off the extras plugged in with it.
Smart plugs suit folks who enjoy using a phone app, while a simple switched strip is perfect for anyone who likes things easy and app-free. Either way, the goal is the same: off really means off.
What to Look For When Comparing
- Safety listing: look for a recognized safety certification mark such as UL or ETL.
- Power rating: make sure the plug or strip handles the devices you plan to connect.
- Switch placement: a switch on top or on a remote is easier to reach than one on the back.
- App and Wi-Fi needs: for smart plugs, check that it works with your phone and home network.
- Size: slim plugs leave room for the second outlet.
- Reviews and return terms: compare a few listings before choosing.
Professor Ima’s Wrap-Up
Every gadget deserves a good night’s sleep, and so does your budget. Take a glow walk, group your devices, and let a switch or a schedule tuck them in. Small savings that happen every hour of every day are my very favorite kind. Gold star for you!
As an Amazon Associate, Cheap101 earns from qualifying purchases, at no extra cost to you. Browse more handy finds in the Student Store.

How to Make Saving Fun With Goal Trackers and Scratch-Off Posters
Saving money can feel like a game when you can see your progress. Coloring in a chart, filling a thermometer, or scratching off a square each time you set money aside turns every deposit into a small celebration. Here is how to make saving fun.
Why Seeing Progress Feels So Good
Hello, class! Saving can sometimes feel invisible. The money goes into an account, and you do not see much happen. A visual tracker changes that. Each little square you fill shows you are moving closer to your goal, and that cheerful feeling encourages you to keep going.
How to Set Up a Fun Savings Goal
- Pick something exciting. A trip to see family, a new recliner, a holiday fund, or a cozy emergency cushion.
- Put a number on it. Decide the total, like $600 or $1,500.
- Break it into chunks. Divide the total into squares. A $1,000 goal could be 50 squares of $20 each.
- Choose a deadline. Divide the total by the number of weeks or months to see how much to save each time.
- Post it where you will see it. The fridge, a closet door, or right by your desk.
- Mark every deposit. Color, sticker, check, or scratch. Make it a little ritual.
Fun ideas to try
- Thermometer chart: color it up as you save, just like a fundraiser.
- Random squares: fill a grid with different amounts ($5, $10, $25) and pick whichever fits your week.
- Picture puzzle: print a photo of your goal, cut it into pieces, and add a piece each time you save.
- Milestone treats: celebrate every 25 percent with a free reward, like a picnic or movie night at home.
Save as a team
Couples, roommates, and families can share one chart for a group goal. Grandkids especially love coloring squares. It turns saving into something everyone enjoys together.
Try It Free First
Draw your own chart on plain paper with a ruler and crayons or colored pencils. Graph paper works great for grids. Many free printable savings trackers are available online too. Tape it up and start coloring today.
Where Savings Trackers and Scratch-Off Posters Fit In
Ready-made savings tracker charts and scratch-off posters come pre-printed with goal amounts and fun designs. Scratch-off versions have a coating you rub away, like a lottery ticket, revealing a color or picture underneath. That little reveal can make each deposit feel extra rewarding.
They can suit visual people, families saving together, and anyone who wants a cheerful reminder on the wall. Some come in sets with several goals, which is handy if you are saving for more than one thing at once.
What to Look For When Comparing
- Goal amounts: preset totals, or blank versions you fill in yourself.
- Size: poster size for walls, or smaller cards for binders.
- Style: scratch-off, coloring, or sticker designs.
- Number included: sets with several charts let you track multiple goals.
- Reviews and returns: check photos and reviews for scratch quality, and read return terms.
Professor Cheap’s Wrap-Up
Who says saving cannot be playful? A little color, a chart on the wall, and a goal you are excited about can turn money habits into pure joy. Pick your goal, grab your crayons or a scratch-off poster, and start filling those squares. I am cheering you on from the front of the class!
As an Amazon Associate, Cheap101 earns from qualifying purchases, at no extra cost to you. Browse more handy finds in the Student Store.

Tactical Cargo Socks
Looking for a gift that’s both brilliantly practical and budget-friendly? These Tactical Cargo Socks check all the boxes-and then some. They’re the ultimate cheap-yet-genius gift for any outdoorsy friend… or for your own frugal feet. With cozy warmth and built-in waterproof pockets, they let you stash your essentials right in your socks (because who needs a fancy bag?). Whether you’re hiking a trail or sneaking snacks into the movies, these socks prove you don’t have to spend big to think smart.
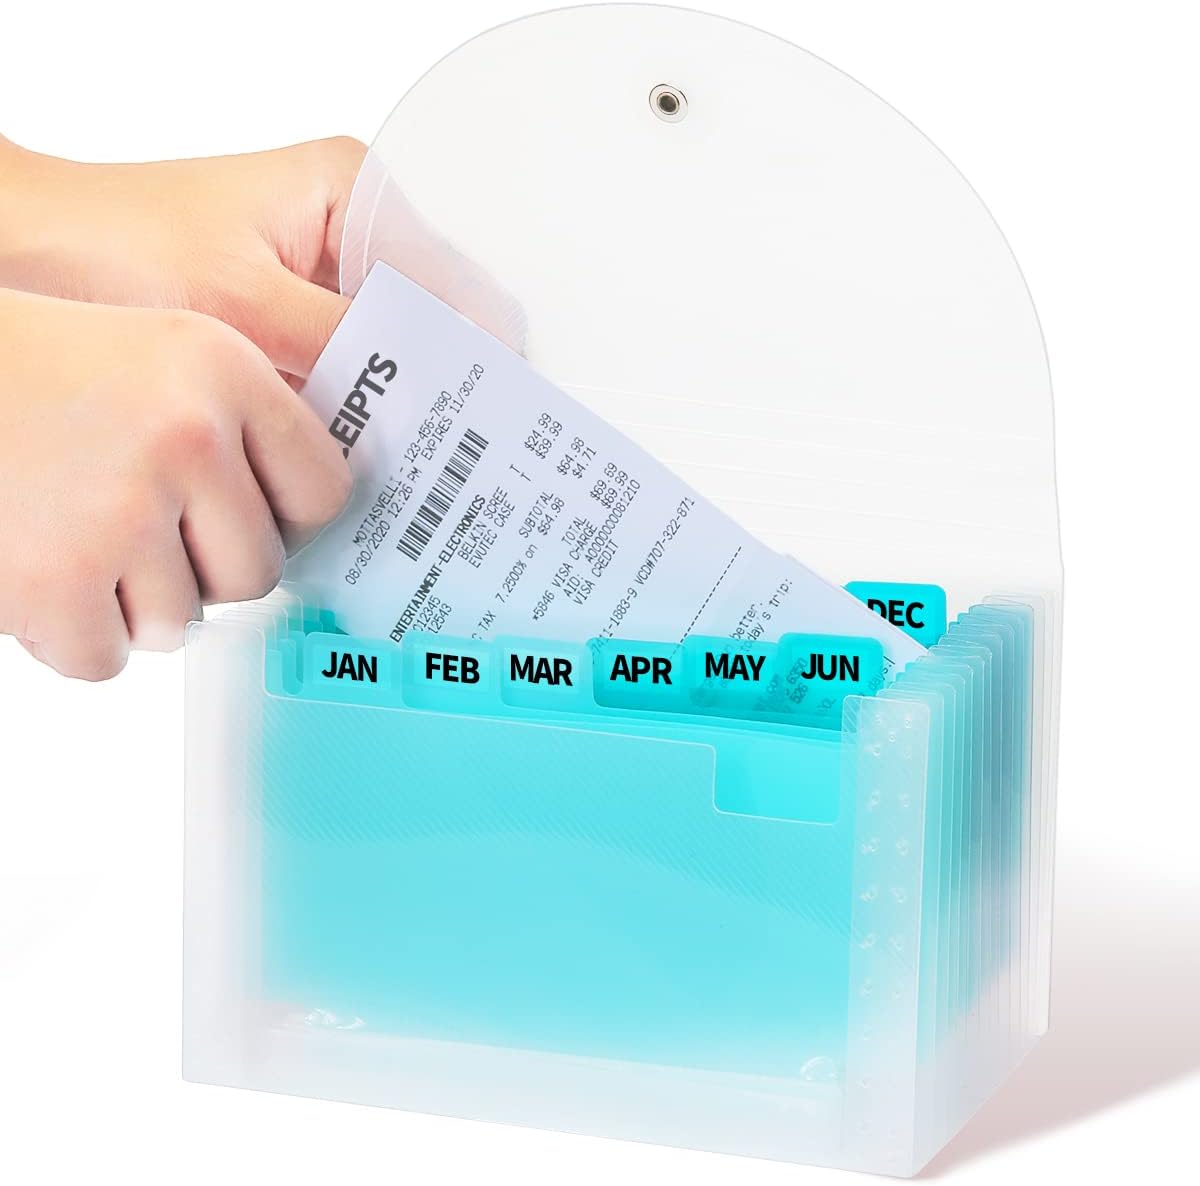
H4D Coupon & Receipt Organizer
A coupon is a little gift to your future self, and this pocket-sized H4D accordion organizer keeps those gifts sorted and close at hand. With 13 pockets and handy labels, your next-trip coupons and receipts stay together for a smooth, happy checkout.
A coupon only helps when you remember it before checkout. A small organizer can give paper coupons and shopping receipts a consistent home, without requiring a bulky coupon binder.
A product to consider: H4D Coupon Receipt Holder
The linked H4D organizer is listed as a 13-pocket accordion file measuring approximately 7 by 4.5 inches. It has a polypropylene cover, an elastic-and-button closure, and alphabetical, monthly, and blank labels. Cheap101 has not personally tested this item; the features come from its product listing.
Who may find it useful
Consider this if you regularly use paper coupons, save receipts for returns, or shop at several stores. If you mostly use digital coupons, a shopping list and your store app may be enough.
Make the pockets work for your shopping
Use only a few labels at first: groceries, household supplies, personal care, store offers, and receipts. Set aside one pocket for coupons you expect to use on your next trip. Review the contents weekly and recycle expired offers.
Before leaving home, match coupons to items already on your list. Read the offer’s size, quantity, and expiration conditions. At checkout, keep the relevant coupons together so you are not searching through every pocket.
Before you buy
Measure your longest coupons and the space in your bag. This is a small organizer, so larger receipts may need folding. Consider whether the closure will be comfortable for your hands. Check the selected variant and current listing details before ordering.
Buying an extra item solely because you have a coupon can increase your total spending. Compare the final cost with the option you would otherwise buy.
A free way to start
Reuse envelopes labeled by store or category. If those already work well, there is no need to replace them.
Check Amazon for current price and availability. For more practical advice, visit Coupons & Codes.
Explore more Money-Saving Tools.