
Welcome to the Cheap Store – where clever meets thrifty!
Discover fun, functional, and downright quirky products that won’t break the bank. Perfect for gifts, laughs, or just treating your cheap self. 💸😄

How to Teach Kids and Grandkids to Save (With a Clear Piggy Bank)
Few things light up a young face like watching their own coins pile higher and higher. Teaching kids and grandkids to save can be joyful, hands-on fun, and a clear piggy bank lets them see every bit of progress they make.
Why Seeing the Money Matters
Welcome, junior scholars and the grown-ups who love them! For young children, money can feel like an idea floating in the air. When they can actually see coins stacking up, saving becomes real. Each nickel dropped in is a tiny victory they can watch happen.
Simple Ways to Make Saving a Happy Habit
Pick a goal together. A new book, a kite, or a trip for ice cream. Let the child choose. A photo or drawing of the goal taped near the bank keeps the excitement alive.
Try the three-jar idea. Many families like dividing money into Save, Spend, and Share. Saving for a goal, spending a little now, and giving a little to others teaches balance and kindness at the same time.
Count it together. Sorting pennies, nickels, dimes, and quarters is a sneaky little math lesson. Younger kids can learn coin names, while older kids can add up totals and figure out how much more they need.
Make deposits a ritual. Birthday money, chore coins, or loose change found in the couch can all go in. A regular deposit day, like every Saturday, makes saving feel like a fun tradition.
Offer a little match. Some grandparents love adding a bonus, such as a dime for every dollar saved. It is a gentle first lesson in how savings can grow, much like interest at a bank.
Celebrate the finish line. When the goal is reached, make the purchase a happy event. Talk about how good it feels to buy something with money you saved yourself.
Ideas by Age
- Ages 3 to 5: focus on dropping coins in and watching the pile grow. Short goals work best.
- Ages 6 to 9: add counting, coin values, and a goal a few weeks away.
- Ages 10 and up: try bigger goals, simple record keeping, and a visit to open a real savings account.
Try It Free First
A clean glass jar or a clear plastic peanut butter jar works wonderfully. Cut a coin slot in the lid with adult help, or simply leave it open on a shelf. Let the child decorate a label for the lid with stickers or markers. It costs nothing and gives you the same see-through magic.
Where a Clear Piggy Bank Fits In
A clear piggy bank adds a dash of charm to the lesson. The classic pig shape is fun to hold and makes a cheerful gift for a birthday or holiday. Because it is see-through, kids can admire every coin, and many styles have a stopper on the bottom so grown-ups can open it easily when goal day arrives.
It suits grandparents looking for a meaningful little gift, parents starting the money conversation, and anyone who wants a sturdier option than a glass jar for little hands.
What to Look for When Comparing
- Material: shatter-resistant plastic is often a better choice than glass for small children.
- Opening: check for an easy-to-remove stopper so you never have to break the bank.
- Slot size: some slots fit only coins, while others also fit folded bills.
- Size: a medium bank fills up fast enough to feel rewarding.
- Age guidance and reviews: read listing details and buyer comments about durability.
- Return terms: compare a few listings before you decide.
Professor Ima’s Wrap-Up
Every great saver started with a single coin and someone who cheered them on. Whether you use a jar from the recycling bin or a shiny clear pig, the real treasure is the time you spend counting, dreaming, and celebrating together. That is a lesson worth more than any allowance!
As an Amazon Associate, Cheap101 earns from qualifying purchases, at no extra cost to you. Browse more handy finds in the Student Store.
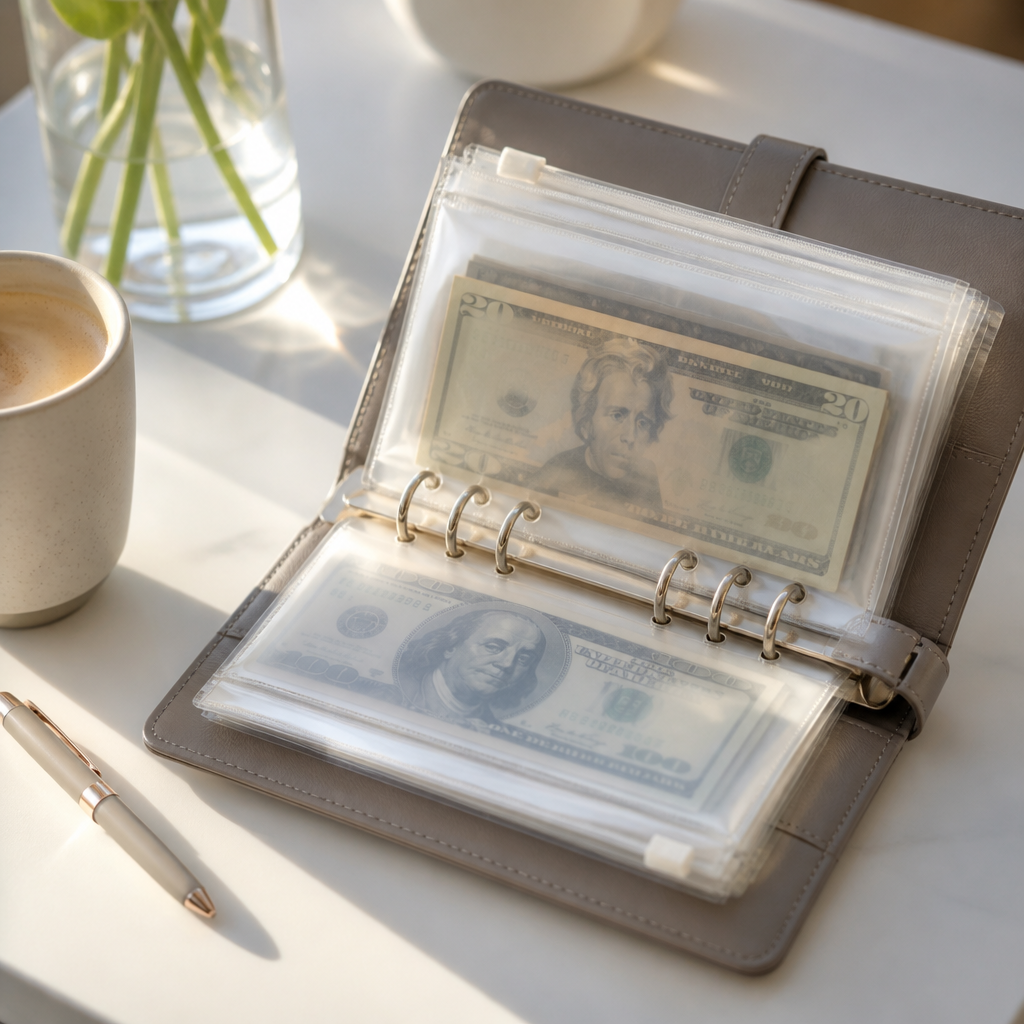
The Complete Guide to Cash Envelope Wallets and Cash Stuffing Binders
Picture every dollar with its own cozy little home. A six-ring cash envelope wallet with clear zippered pockets lets you see your grocery and fun money at a glance, and Professor Ima walks you through your very first cash stuffing session on payday.
Welcome to module two of the Cheap101.com student store field guide series. In an era dominated by tap-to-pay smartphones, one-click online checkout buttons, and contactless credit cards, staying within a monthly household budget has become remarkably challenging. Digital payments remove physical friction from the act of purchasing, leading to insidious overspending on groceries, dining out, and impulse shopping. To regain absolute control over personal cash flow, millions of disciplined savers are turning back to a tangible classic: the cash envelope wallet system.
Popularized by traditional debt-elimination programs and modern cash stuffing communities, the envelope method relies on a simple rule: when the physical paper cash allocated to a specific spending category runs out, spending stops until the next pay cycle. Today’s guide explores the mechanics of modern budget binders, details what to look for in a durable wallet system, and walks you through setting up your first zero-based cash budget.
1. The Psychology Behind Cash Stuffing
Modern behavioral finance proves that human beings process cash transactions far differently than digital card swipes. When you hand a cashier a fifty-dollar paper bill, your brain registers immediate loss aversion. You physically observe your resources shrinking, which prompts natural hesitation and encourages conscious spending decisions.
When you swipe a plastic card, that friction vanishes entirely. You do not see the loss of funds until an electronic statement arrives weeks later. Cash envelope budgeting reintroduces healthy boundaries to your most vulnerable budget categories:
- Groceries and Household Supplies: Eliminates spontaneous cart additions and luxury impulse snacks.
- Dining Out and Takeout: Sets a firm, tangible limit on restaurant spending.
- Personal Discretionary Spending: Allocates guilt-free fun money without threatening essential household bill obligations.
- Sinking Funds: Builds dedicated savings reserves for predictable non-monthly expenses like vehicle maintenance, holiday gifts, and pet checkups.
2. Anatomy of an Effective Cash Envelope Wallet
Early iterations of the envelope system relied on flimsy white bank envelopes that tore easily and spilled coins. Today’s modern systems are built around specialized, all-in-one organizer wallets and binders designed for durability and security:
A. Six-Ring Refillable Binder Architecture: The premier standard for cash management is the A6 six-ring binder. The ring mechanism allows you to add, remove, or rearrange envelopes effortlessly as your monthly budget priorities evolve.
B. Clear Zippered PVC or Vellum Envelopes: High-grade cash envelopes feature transparent, waterproof PVC with secure slide zippers. Transparent walls let you check your remaining cash balance at a glance without opening the pouch, while smooth zippers keep bills and coins securely enclosed inside your purse or backpack.
C. Integrated Card Slots and RFID Protection: A functional budget wallet should replace your everyday handbag wallet completely. Look for models crafted from durable synthetic leather that include built-in debit card slots, pen loops, receipt pockets, and RFID-blocking liners to protect your essential payment cards from electronic scanning.
D. Dual-Sided Expense Tracker Sheets: Quality budget systems include heavy-stock ledger cards that slide directly inside each envelope. Every time you remove cash to make a purchase, jot down the date, store name, and remaining balance. This creates continuous accountability throughout the pay cycle.
3. Step-by-Step Setup: Your First Cash Stuffing Session
Setting up your wallet takes less than thirty minutes on payday. Follow this reliable four-step protocol:
- Identify Your Variable Categories: Keep fixed expenses (such as rent, mortgage, utilities, and insurance) in your bank account for automated online bill pay. Use cash envelopes strictly for variable categories where you frequently overspend (groceries, dining out, gas, entertainment, and clothing).
- Label Your Envelope Tabs: Use the included adhesive label stickers to mark each clear envelope with your designated categories. Write clearly and keep categories broad to prevent micromanagement fatigue.
- Withdraw Exact Denominations: Calculate your exact bi-weekly cash allocation. Visit your local bank teller and request specific denominations (tens, twenties, and fives) so you can stuff each envelope with the exact balance required.
- Respect the Empty Envelope Boundary: If your dining-out envelope is empty by Wednesday night, cook a meal using pantry staples at home. Never borrow cash from the grocery envelope to fund restaurant dining. Maintaining category integrity is the secret to building lasting financial discipline.
Ready to Take Control of Your Daily Spending?
Explore our curated collection of top-rated A6 cash envelope wallets, budget binders, and all-in-one cash stuffing systems.
Transforming your financial life does not require complex spreadsheets or restrictive deprivation. By swapping thoughtless card taps for intentional cash stuffing, you give every single dollar a clear purpose and watch your savings account grow week after week.

The Frugal Homeowner’s Guide to Mechanical Non-Electric Bidet Attachments
Here is a bathroom upgrade with a fresh, clean finish and a happy wallet. A non-electric bidet attachment runs on your regular water pressure, installs in about twenty minutes with basic tools, and can trim your toilet paper use way down.
Welcome to module eight of the student store gear guide series for the Masters in Savings program at Cheap101.com. In household budget audits, recurring paper goods represent one of the steadiest, least flexible expenses on the monthly receipt. Every supermarket trip includes multi-packs of bath tissue, paper towels, and wipes that command premium prices on retail shelves. Over the course of a single year, an average household spends between one hundred fifty and three hundred dollars solely on toilet paper, flushing that money directly down the plumbing.
Beyond the recurring out-of-pocket financial cost, paper dependency leaves households vulnerable to supply chain disruptions, retail price spikes, and plumbing clogs that require expensive emergency service calls. Installing a mechanical, non-electric bidet attachment provides an elegant, high-return solution. By utilizing fresh household water pressure, a bidet attachment delivers superior personal cleanliness while cutting household toilet paper consumption by seventy to eighty percent. Today’s guide explores the financial return of bidet systems, breaks down the key mechanical features to look for, and walks through a straightforward twenty-minute home installation.
1. The Financial Return of Bidet Attachments
Few bathroom upgrades deliver a faster, more measurable return on investment than a non-electric bidet toilet seat attachment:
- Direct Grocery Savings: A family of four typically consumes one large pack of premium toilet paper every three weeks. By switching primary cleaning from dry friction paper to water washing, toilet paper use drops to just a few drying squares per visit. A twenty-five to thirty-five dollar bidet attachment pays for itself entirely within two to four months of regular use.
- Zero Ongoing Electrical Costs: Unlike expensive luxury bidet seats that require dedicated electrical outlets, internal heating coils, and constant phantom power draw, mechanical bidet attachments operate strictly on the existing water pressure in your municipal water line. They add zero dollars to your monthly electric utility statement.
- Plumbing Protection and Clog Prevention: Heavy toilet paper and supposedly flushable wipes are the leading cause of residential sewer line blockages and septic tank backups. Reducing paper volume protects your home’s drainage lines, avoiding emergency plumber charges that easily run several hundred dollars.
2. Critical Mechanical Features to Look For
Modern non-electric bidet attachments are reliable, streamlined devices engineered for universal toilet compatibility. When browsing options, look for these durable mechanical components:
A. Precision Pressure Control Dial: Avoid basic on-off toggle switches that blast water unpredictably. High-quality units feature a smooth, progressive rotary dial that gives you complete manual control over water spray intensity, allowing you to select a gentle mist or a concentrated stream suited to your personal comfort.
B. Retractable Dual Nozzle System with Self-Cleaning Gate: The best bidet attachments include dual nozzles: one calibrated for general rear washing and a separate forward-angled nozzle optimized for feminine hygiene. When not active, both nozzles retract behind a protective hygienic guard gate. Look for a dial setting with a dedicated nozzle cleaning mode that rinses the spray heads with fresh water before and after each use.
C. Solid Brass T-Adapter Valve and Braided Metal Hose: Cheap plastic plumbing connectors are prone to cross-threading, cracking under water pressure, and causing costly bathroom water damage. Insist on models that include a solid brass T-valve and a flexible, braided stainless steel water supply hose. Metal fittings provide a secure, watertight connection that lasts for decades.
D. Ultra-Slim Structural Profile (Under One-Quarter Inch): Older bidet models were bulky plastic plates that tilted the toilet seat forward, creating an awkward gap and placing stress on seat hinges. Modern ultra-slim designs measure under six millimeters thick, allowing your existing toilet seat to rest completely flat without needing extra bumper pads.
3. Step-by-Step DIY Installation in Under Twenty Minutes
You do not need a professional plumber or specialized tools to install a mechanical bidet attachment. The entire installation takes roughly fifteen to twenty minutes using standard household tools:
- Shut Off the Water Supply and Drain the Tank: Turn the chrome water valve behind your toilet clockwise until fully closed. Flush the toilet once and hold the handle down to empty all remaining water from the ceramic tank.
- Remove the Existing Toilet Seat: Use a standard flathead screwdriver or wrench to unbolt the two mounting screws holding your toilet seat in place. Lift the seat off the bowl and wipe down the ceramic surface.
- Connect the Metal T-Valve: Disconnect the flexible water supply line from the base of the toilet tank. Thread the included solid brass T-adapter onto the tank fill valve, ensuring the rubber sealing washer is seated firmly inside. Reattach the original water supply line to the bottom port of the T-valve.
- Position the Bidet and Reinstall the Seat: Place the bidet attachment over the toilet bowl holes, adjusting the sliding brackets until the spray nozzle is centered. Place your toilet seat back over the bidet brackets and tighten the mounting bolts securely.
- Attach the Bidet Hose and Test: Connect the braided stainless steel hose from the lateral port of the T-valve to the bidet inlet. Slowly turn the water supply valve back on and inspect all connections for leaks. Test the self-cleaning dial setting over the bowl to verify smooth operation.
Cut Toilet Paper Costs from Your Monthly Budget
Browse top-rated ultra-slim non-electric bidet attachments with brass valves, dual nozzles, and quick DIY installation.
Installing a non-electric bidet attachment is one of the highest-return household upgrades available. For a modest one-time investment and twenty minutes of simple DIY work, you permanently eliminate recurring paper expenses and protect your bathroom plumbing for years to come.

How to Budget by Hand (and Why an Undated Budget Book Helps)
There is something wonderfully calming about planning your money with pen and paper. Budgeting by hand slows you down just enough to make thoughtful choices, and an undated budget book lets you start fresh any month you like.
How to Make a Monthly Budget by Hand
Gather round, class! A budget is simply a plan for your money before the month begins. Doing it by hand helps the numbers stick in your memory, and it feels a bit like writing a letter to your future self.
Step 1: Write down your income
List every dollar you expect this month: paychecks, Social Security, pension, side gigs, or anything else. If your income varies, use a careful, lower estimate. Pleasant surprises are much nicer than short months.
Step 2: List your fixed bills
These stay about the same each month: rent or mortgage, HOA dues, insurance, phone, internet, and loan payments. Write the amount and due date for each.
Step 3: Plan your flexible spending
Groceries, gas, household supplies, eating out, and gifts change month to month. Look at what you spent recently and choose a comfortable amount for each.
Step 4: Pay your savings
Treat savings like a bill you pay to yourself. Even a small amount each month builds a lovely cushion over time.
Step 5: Make it balance
Subtract all your planned spending and savings from your income. Many people like to aim for zero, giving every dollar a job. If there is money left over, assign it to savings or a goal. If the plan runs over, trim a flexible category until it fits.
Step 6: Check in weekly
Once a week, compare what you planned with what you spent. Adjust as needed. At month’s end, jot a few notes about what went well. Next month’s budget gets easier each time.
Try It Free First
A plain sheet of paper works perfectly. Draw a line down the middle: income on the left, spending and savings on the right. Many libraries and nonprofit credit counseling groups also share free printable budget worksheets. Use one for a month or two and see how you like the rhythm.
Where an Undated Monthly Budget Book Fits In
An undated budget book has pre-printed pages for income, bills, spending, and savings, but no dates printed on them. That means you can start in March or November and never waste a page. Many include bill trackers, savings goal pages, and yearly overviews all in one tidy place.
It can suit people who love paper planning, anyone who wants all their money notes in one book, and folks who like flipping back to see how far they have come. It can also make a thoughtful gift for a graduate or newlywed.
What to Look For When Comparing
- Page layout: sample photos show whether the sections match how you think.
- Number of months: 12 months is common; some include more.
- Writing space: roomy lines are easier to fill in.
- Extras: bill trackers, savings pages, and debt payoff pages can be handy.
- Binding: spiral or lay-flat books stay open on the table.
- Reviews and returns: compare a few listings and check return terms.
Professor Cheap’s Wrap-Up
Budgeting by hand is a gentle, satisfying ritual. A pen, a page, and a few quiet minutes are all you need to give your money a clear plan. Whether you use scrap paper or a pretty budget book, the result is the same: more control and more peace of mind. Gold star for you!
As an Amazon Associate, Cheap101 earns from qualifying purchases, at no extra cost to you. Browse more handy finds in the Student Store.

Debt-Free Forever by Gail Vaz-Oxlade: A Clear Plan to Freedom
Gail Vaz-Oxlade’s Debt-Free Forever is a no-nonsense, step by step plan for owning every dollar you earn. With her famous jar system and a clear roadmap, it helps readers picture a future of zero balances and money left over.
Gail Vaz-Oxlade is a beloved Canadian money writer and the former host of the television show Till Debt Do Us Part. Her style is direct, practical, and full of tough love, and Debt-Free Forever puts her whole approach into one handy book.
What the Book Is About
The book walks readers through taking a full, honest look at their money, building a budget that actually matches real life, and paying balances down in an organized way. Along the way she covers credit scores, savings, and the everyday habits that keep a fresh start going strong.
The Big Ideas
- Know your numbers. List every balance, interest rate, and monthly payment so you can see the whole picture at once.
- Track real spending. Writing down where money goes for a while shows you where your budget can work harder.
- The jar system. Her signature idea: take out cash for weekly variable spending, like groceries and fun, and divide it into labeled jars or envelopes. When a jar is empty, that category is done for the week.
- A plan with an end date. She encourages a payoff schedule so you know exactly when each balance will reach zero.
- Save as you go. Building an emergency fund alongside payoff helps keep new balances from appearing.
Who Will Enjoy It
Readers who appreciate straight talk and clear assignments will love it. It suits couples who want to get on the same page, anyone who likes a hands-on cash system, and fans of her TV show. Some figures are Canadian, but the principles travel well anywhere.
Ideas Readers Can Consider Today
- Make a one page list of every balance with its interest rate and minimum payment.
- Try a jar system for one month using a few labeled jars or envelopes for groceries, gas, and fun money.
- Choose a target date for your first paid-off balance and mark it on the calendar.
- Keep a small savings cushion going so surprise expenses have a home.
These are ideas readers can consider, not personal financial advice. For help with a specific situation, many communities offer free or low-cost nonprofit credit counseling.
Try It Free First
Check your library catalog and the Libby app for an ebook or audiobook copy. Used paperback copies are also common online and at thrift stores, which suits the spirit of the book perfectly.
Why Some Readers Like Owning a Copy
The book includes worksheets and exercises, and many people like having a copy they can write in and return to as they make progress. When comparing listings, look at edition dates, used copy condition, and the ebook price.
Professor Ima’s Wrap-Up
There is something wonderfully satisfying about a plan with a finish line. Fill your jars, follow the map, and enjoy watching each balance shrink. That zero at the end is the prettiest number in all of math!
As an Amazon Associate, Cheap101 earns from qualifying purchases, at no extra cost to you. Browse more handy finds in the Student Store.
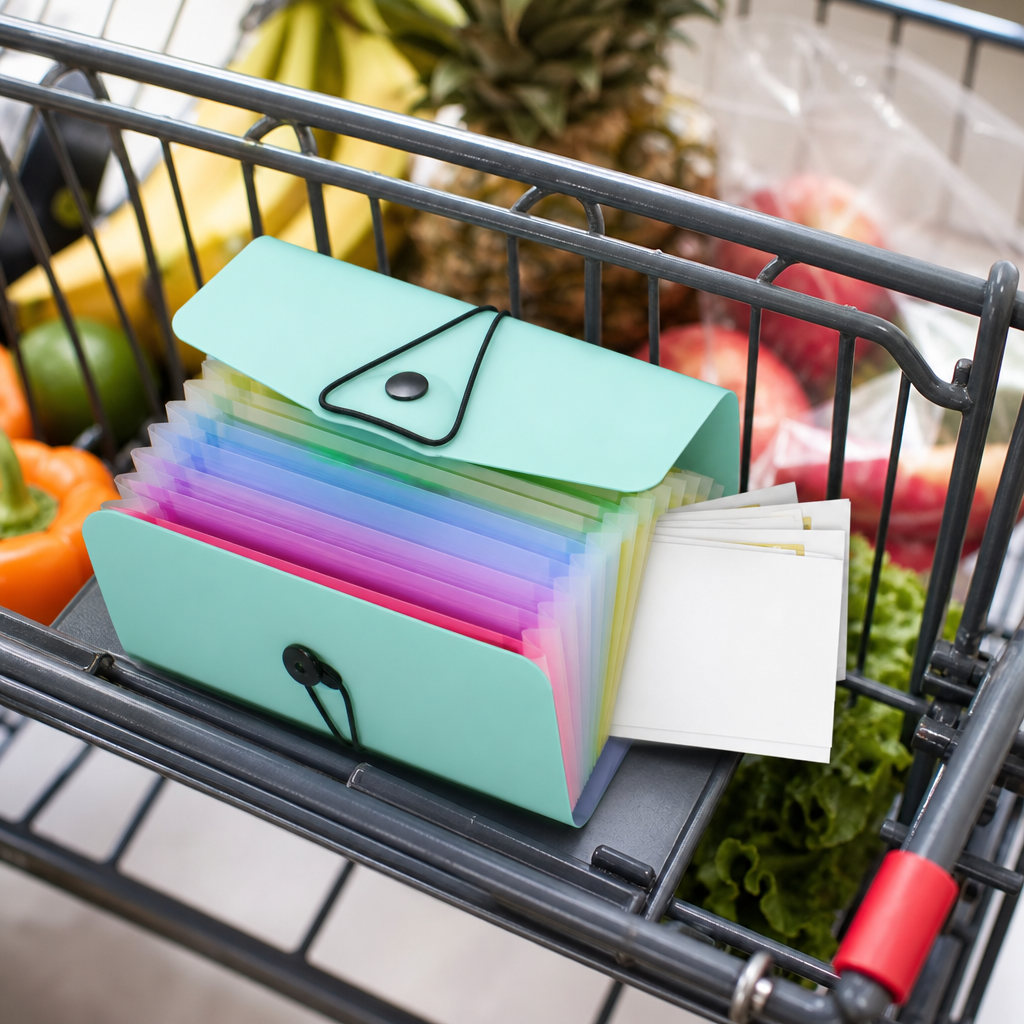
The Frugal Shopper’s Field Guide to Coupon Organizers and Accordion Files
Checkout can be the happiest moment of your shopping trip. With a compact 13-pocket accordion coupon file sorted to match your store aisles, every discount is right where you need it, and Professor Ima’s five-minute Sunday ritual keeps the savings rolling in.
Welcome to the student gear guide for the Masters in Savings program at Cheap101.com. Every experienced deal hunter knows that finding valuable manufacturer discounts and circular coupons is only half the battle. The true failure point for most aspiring couponers occurs right at the grocery store checkout counter. You stand before the cashier, line piling up behind you, desperately digging through crumpled paper vouchers stuffed inside envelopes, pockets, or purse bottoms, only to discover that your best five-dollar coupon expired yesterday or was left on the kitchen counter.
Disorganization is the single greatest enemy of consistent savings. A dedicated, structured coupon organizer transforms coupon clipping from a messy chore into a streamlined, high-speed routine. In this buyer’s field guide, we examine why physical sorting systems outshine makeshift envelopes, detail the critical features to look for in a durable accordion file, and establish a five-minute weekly sorting system that guarantees you never miss a checkout discount.
1. Why Makeshift Envelopes Fail at the Checkout Counter
When beginners start couponing, they often rely on standard white mailing envelopes or paper clips. While this zero-cost method seems resourceful initially, it breaks down quickly in real-world retail environments:
- The Shuffling Trap: Stacking twenty loose coupons in a single paper envelope requires pulling the entire pile out and shuffling through them under bright fluorescent lights while items roll down the conveyor belt.
- Premature Wear and Tear: Standard paper envelopes rip after two shopping trips, scattering vouchers onto car seats or wet grocery conveyor belts.
- Hidden Expirations: Without visible indexing tabs, expiring coupons migrate to the bottom of the pile and quietly turn into useless scrap paper before you remember to redeem them.
Investing in a dedicated handheld accordion organizer provides rigid protection, water-resistant exterior walls, and indexed dividers that display every coupon category at a single glance.
2. Key Features to Look for in a Quality Coupon File
Not all expanding files are designed for rapid in-store navigation. When browsing options, prioritize these four mechanical specifications:
A. Thirteen-Pocket Divider Architecture: The sweet spot for grocery and pharmacy navigation is thirteen expandable pockets with twelve internal index tabs. This provides enough distinct compartments to mirror standard supermarket aisles (produce, dairy, pantry dry goods, paper products, frozen items, personal care, and household cleaning) without adding excessive bulk.
B. Compact Handheld Dimensions (Approximately 10 by 5 Inches): Avoid full-size letter document folders that require a tote bag. A proper coupon file measures roughly ten inches wide by five inches high. This compact form factor fits neatly inside a purse, glove compartment, or the child seat of a grocery cart, allowing you to browse compartments with one hand while pushing your cart with the other.
C. Durable Polypropylene Shell with Elastic Button Closure: Look for heavy-duty polypropylene plastic rather than paperboard. Polypropylene is tear-proof, repels grocery cart condensation, and wipes clean easily. An elastic cord and front button clasp provide secure closure that expands as your coupon collection thickens during peak circular weeks.
D. Pre-Printed and Blank Customizable Index Tabs: Ensure the organizer includes color-coded tab inserts. Having pre-printed alphabetical labels alongside blank customizable slips allows you to organize either by store aisle sequence or by brand name.
3. Establishing Your Weekly 5-Minute Aisle-Sorted System
Having a high-quality organizer is only effective if your sorting workflow is disciplined. Adopt this three-step management ritual every Sunday morning:
- Purge Expired Slips First: Pull every tab forward and inspect the expiration dates. Discard outdated paper slips immediately so your compartments hold only active, spendable discounts.
- Sort by Supermarket Walking Flow: Arrange your tabs to match the physical layout of your primary grocery store. If your local store begins with produce on the right, moves to dairy in the rear, and finishes with paper goods on the far left, order your pockets in that exact sequence. You will effortlessly retrieve coupons as you walk through each department.
- The Back Pocket Holding Zone: Designate the absolute last divider as your checkout pocket. As you place qualifying items into your physical shopping cart, move the matching coupon into this final pocket. When you arrive at the register, your entire batch of qualifying discounts is already consolidated and ready for the cashier in one smooth motion.
Ready to Upgrade Your Shopping Routine?
Explore our curated selection of top-rated, durable 13-pocket accordion coupon organizers designed for daily grocery runs.
Equipping your shopping kit with a dedicated coupon file puts an end to checkout anxiety and missed savings. Pick your preferred color, set up your aisle tabs this weekend, and keep every hard-earned dollar firmly in your budget.

Cash Envelope System
Your grocery money, your household money, your little treat money: each one gets its own zippered spot. This sky blue A6 budget binder with 12 cash envelopes and writable labels makes your weekly check-in quick, clear, and surprisingly satisfying.
A cash envelope system gives your spending categories a place of their own. If seeing what remains helps you stick to a plan, a small budget binder can keep your envelopes together and make a weekly check-in easier.
A product to consider: Antner A6 Budget Binder
The Sky Blue Antner set linked below is listed with a six-ring PU leather binder, 12 zipper cash envelopes, and 20 writable labels. The cover measures approximately 7.48 by 5.2 inches. These are listing-based features; Cheap101 has not personally tested this product.
Who may find it useful
This format may suit someone who pays cash for everyday purchases and wants separate categories for groceries, transport, household supplies, or a modest savings goal. It is less useful if nearly all your spending happens online.
Try a simple weekly routine
Choose three categories to start. Write a realistic spending allowance for each, place the corresponding cash in its envelope, and record purchases on a small sheet of paper. Check the remaining balance before your next shopping trip. If you move money between categories, write that down too.
For example, you might set aside $40 for a week of discretionary spending. The amount is your choice: the purpose is to make your own limit visible, rather than follow somebody else’s challenge.
Before you buy
Check the selected color, included accessories, delivery cost, and return terms on Amazon. Confirm refill dimensions and hole spacing before ordering extra inserts. A binder organizes cash; it does not protect it from theft. Carry only what you need, and keep money for essential payments separate.
A free way to start
Try three paper envelopes and a notebook first. If the routine helps but the envelopes become awkward to carry, a reusable binder may be a worthwhile upgrade.
Check Amazon for current price, availability, and the exact contents of the selected set.
Explore more Money-Saving Tools.
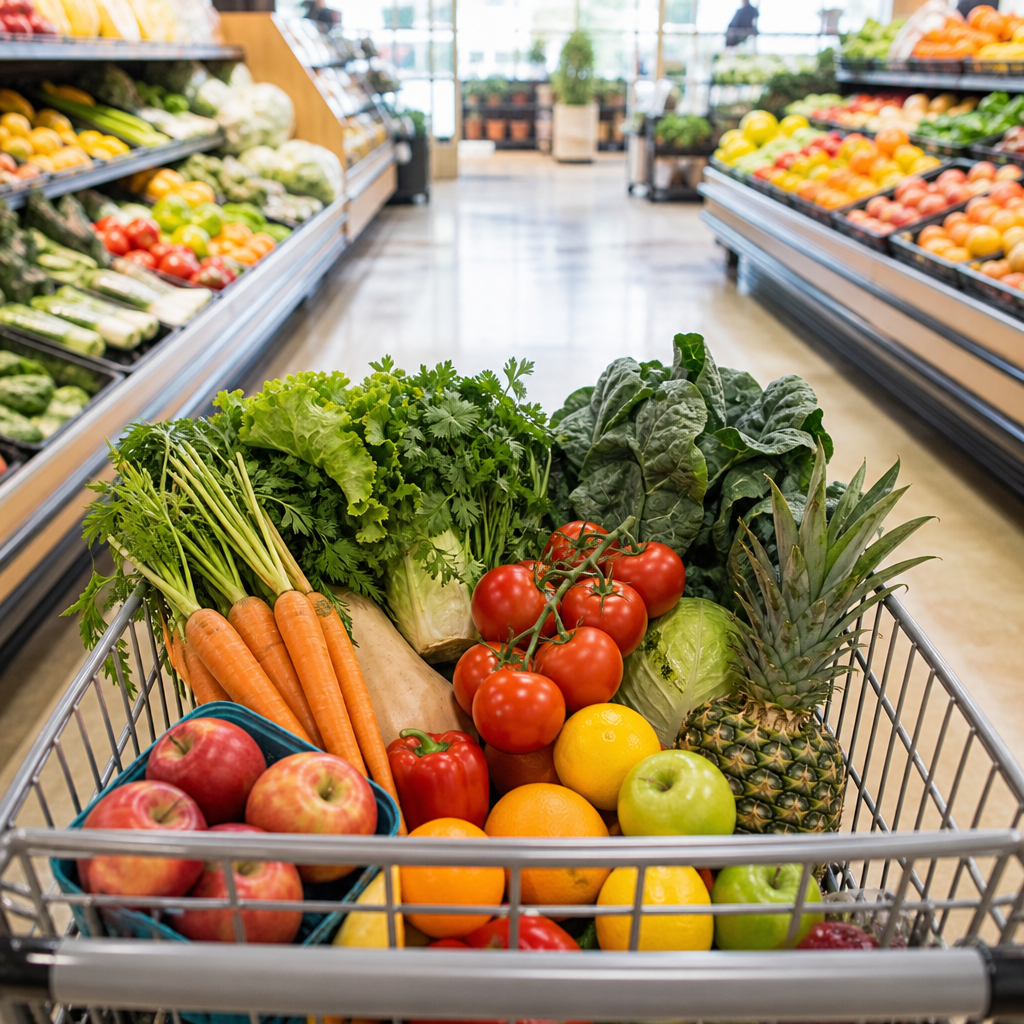
How to Start a Grocery Price Book and Spot a Real Deal
A grocery price book is a frugal shopper’s secret weapon. Jot down what your favorite items cost at different stores, and soon you will know a true bargain the moment you see it. It is simple, satisfying, and keeps more money in your purse.
What a Price Book Does
Welcome, class! Stores love big yellow sale signs, but a “sale” is not always a deal. A price book is your personal record of what things really cost. Once you know your lowest usual price for coffee or chicken, you can stock up confidently when it appears and skip the so-so “sales” in between.
How to Start Your Price Book
- List your top 20 to 30 items. Start with things you buy often: milk, eggs, bread, coffee, chicken, rice, canned tomatoes, toilet paper.
- Give each item its own page or section. Alphabetical order makes flipping quick.
- Record the details. Date, store, brand or store brand, size, price, and unit price.
- Use receipts and ads. Your old receipts and weekly store flyers are a quick way to fill in early prices.
- Circle the best price. Over time, mark your lowest price for each item. That becomes your “buy price.”
Unit price is the real star
Package sizes shift around, so compare by unit price: price per ounce, per pound, or per count. Simply divide the price by the amount. A 24 ounce jar for $3.60 is 15 cents an ounce. Now you can compare it fairly with any other size.
Watch for patterns
After a few months, you may notice that certain items go on sale in a regular rhythm. Baking supplies often dip around the holidays, and grilling foods around summer holidays. When your favorite item hits its buy price, pick up enough to last until the next sale, as long as it fits your storage and stays fresh.
Keep it manageable
You do not need every item in the store. Focus on what you buy most and what costs the most. Update prices when you shop, and a few minutes each week keeps the book fresh.
Try It Free First
An index card for each item, kept with a rubber band, makes a perfectly good price book. A small spiral notebook works too, or a notes app or free spreadsheet on your phone. Many store apps also show current prices, which helps you fill in your book from the couch.
Where a Price Book Notebook Fits In
A dedicated pocket notebook or small tabbed book gives your price records a permanent, portable home. Some are made specifically for price tracking with ready columns for item, store, size, and price. A small size slips into a purse so you can check it right in the aisle.
It can suit shoppers who like paper, anyone who visits several stores, and folks who enjoy the game of finding the best price. Alphabetical tabs make it extra quick to use.
What to Look For When Comparing
- Size: pocket or purse sized for shopping trips.
- Tabs: alphabetical or category tabs help you find items fast.
- Columns: room for store, size, price, and unit price.
- Durable cover: a sturdy cover survives purse life.
- Page count: enough pages for your main items plus updates.
- Reviews and returns: compare listings and check return terms.
Professor Cheap’s Wrap-Up
A price book turns you into the smartest shopper in the store. Start with a handful of favorite items, track for a few weeks, and watch your confidence grow. Soon you will spot a real deal from across the aisle. Now that is what I call an A plus!
As an Amazon Associate, Cheap101 earns from qualifying purchases, at no extra cost to you. Browse more handy finds in the Student Store.

Stanley Quencher H2.0 Tumbler
Yes, it’s the cup everyone on TikTok has. Yes, I finally caved. It keeps drinks cold for hours, fits in my cup holder, and has a handle so I can carry it like a responsible adult. Do I need a 30oz cup? No. Do I drink more water because of it? Actually yes. The hype is annoying but the cup is legit.

Rechargeable Mini Bag Heat Sealer & Cutter
Stop wasting money on stale chips, crackers, and cereal. The Rechargeable Mini Bag Heat Sealer creates an airtight seal on opened plastic and foil bags in seconds without requiring preheating. Powered by a built-in rechargeable battery with convenient USB charging, this handheld kitchen tool eliminates the recurring cost of replacement disposable batteries.
The integrated dual-action design includes a concealed safety cutter to slice open packaging cleanly and a magnetic backing that sticks right to your refrigerator door so it is always within reach. By keeping air and moisture out of pantry staples and frozen foods, this pocket-sized tool pays for itself after rescuing just a few bags of groceries from the trash.
As an Amazon Associate, Cheap 101 earns from qualifying purchases.