

Looking for a cheap gift that’s high on laughs and low on legality (just kidding-kind of)? These faux money rolling papers are perfect for the thrifty rebel with a sense of humor. Made with organic edible ink and designed to burn slow, they bring big Cartel vibes on a dollar store budget. Because nothing says “ballin’ on a budget” like pretending your stash is wrapped in hundreds… even if your wallet says otherwise. 💸😎

Buy in Bulk, Store It Beautifully: Mason Jars for the Pantry
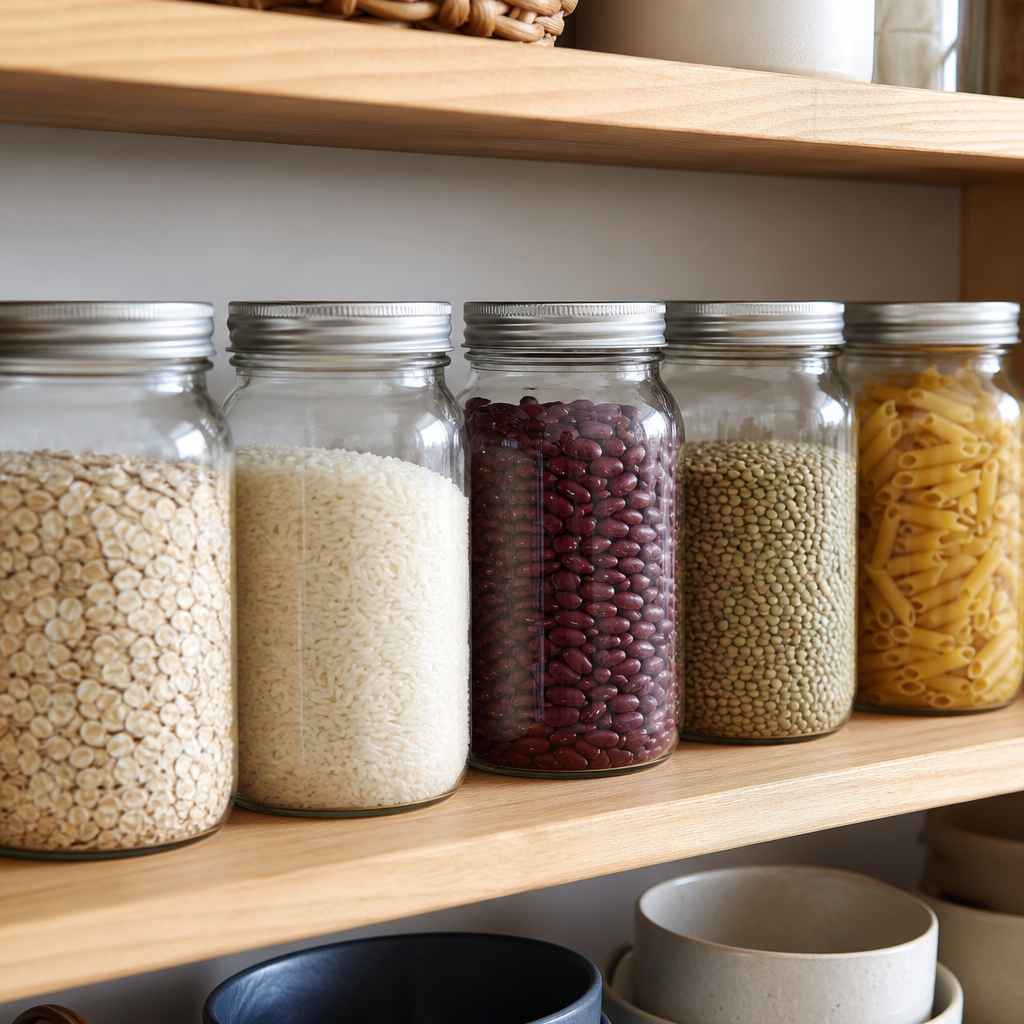
Rows of oats, beans, rice and pasta, all neatly lined up where you can see them. Buying pantry basics in bulk can stretch your grocery money, and clear jars turn those bargains into a pantry that looks as good as it works.
How to Buy in Bulk the Smart Way
Bulk buying is a classic frugal move, and it works best with a little planning. The goal is to buy more of what you truly use, at a lower price per ounce, and store it so it stays fresh until the last scoop.
- Check the unit price. Shelf tags usually show price per ounce or pound. Compare the bulk bin, the big bag and the regular package.
- Stick to your staples. Oats, rice, dried beans, lentils, pasta, flour, sugar and popcorn kernels are popular bulk buys because they keep well.
- Bring your own containers. Some stores with bulk bins let you weigh a jar first and fill it. Ask at the register.
- Freeze before storing. Many home cooks put flour or grains in the freezer for a few days after buying to help keep pantry pests away.
- Label and date. Write the item and purchase date on masking tape and stick it on the jar or lid.
- First in, first out. When refilling, pour the older food into a bowl, add the new food, then put the older food on top so it gets used first.
Whole-grain flours and nuts contain natural oils, so they stay freshest in the fridge or freezer. Keep jars in a cool, dark cupboard for the best results.
Try It Free First
Your recycling bin may hold a whole pantry system. Glass jars from pasta sauce, pickles, salsa, peanut butter and jam are perfect for storage once washed. Soak off the labels in warm, soapy water, and air the lids out with a little baking soda if they hold a scent. Many frugal pantries are built entirely from these free jars.
Where Mason Jars Fit In
Mason jars are sturdy glass jars with standard regular-mouth or wide-mouth openings. That standard size is their secret charm: lids, pour spouts and shaker tops made to fit those openings are easy to find, and a matching set gives your shelves a calm, tidy look.
- See everything at a glance: no more guessing how much rice is left.
- Many sizes: from small jelly jars for spices to half-gallon jars for flour.
- Multi-purpose: pantry storage, overnight oats, salads, leftovers, drinks and home canning.
- Long lasting: glass jars can serve for many years with gentle care.
Honest notes: glass is breakable, so keep heavy jars on lower shelves. If you plan to can at home, follow tested canning guidance and use new flat lids, since those are designed for one canning use.
What to Look for When Comparing
- Mouth size: wide-mouth jars are easier to scoop from and clean.
- Jar size: quart and half-gallon jars suit bulk staples. Pint jars fit smaller items.
- Lid type: two-piece metal lids, one-piece plastic storage lids or airtight lids with gaskets.
- Pack size: cases often bring the price per jar down.
- Packaging: reviews may mention how well jars were protected in shipping.
- Reviews and returns: compare listings, read recent reviews and check the return terms.
Professor Cheap’s Wrap-Up
Class, a well-stocked pantry is like a savings account you can eat. Buy what you love at a good unit price, tuck it into jars, and enjoy the simple pleasure of opening a cupboard that is full, neat and ready for supper.
As an Amazon Associate, Cheap101 earns from qualifying purchases, at no extra cost to you. Browse more handy finds in the Student Store.

Rechargeable Mini Bag Heat Sealer & Cutter
Stop wasting money on stale chips, crackers, and cereal. The Rechargeable Mini Bag Heat Sealer creates an airtight seal on opened plastic and foil bags in seconds without requiring preheating. Powered by a built-in rechargeable battery with convenient USB charging, this handheld kitchen tool eliminates the recurring cost of replacement disposable batteries.
The integrated dual-action design includes a concealed safety cutter to slice open packaging cleanly and a magnetic backing that sticks right to your refrigerator door so it is always within reach. By keeping air and moisture out of pantry staples and frozen foods, this pocket-sized tool pays for itself after rescuing just a few bags of groceries from the trash.
The Frugal Shopper’s Field Guide to Coupon Organizers and Accordion Files
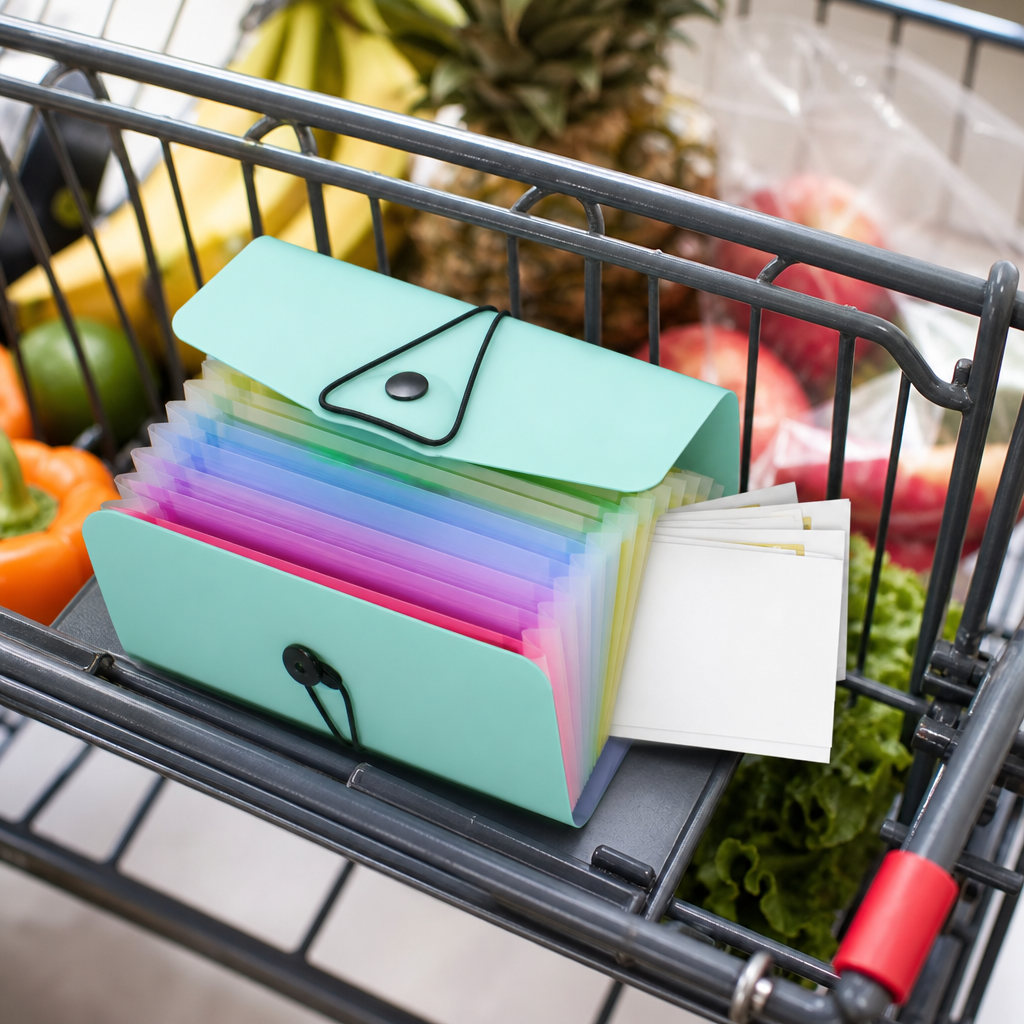
Checkout can be the happiest moment of your shopping trip. With a compact 13-pocket accordion coupon file sorted to match your store aisles, every discount is right where you need it, and Professor Ima’s five-minute Sunday ritual keeps the savings rolling in.
Welcome to the student gear guide for the Masters in Savings program at Cheap101.com. Every experienced deal hunter knows that finding valuable manufacturer discounts and circular coupons is only half the battle. The true failure point for most aspiring couponers occurs right at the grocery store checkout counter. You stand before the cashier, line piling up behind you, desperately digging through crumpled paper vouchers stuffed inside envelopes, pockets, or purse bottoms, only to discover that your best five-dollar coupon expired yesterday or was left on the kitchen counter.
Disorganization is the single greatest enemy of consistent savings. A dedicated, structured coupon organizer transforms coupon clipping from a messy chore into a streamlined, high-speed routine. In this buyer’s field guide, we examine why physical sorting systems outshine makeshift envelopes, detail the critical features to look for in a durable accordion file, and establish a five-minute weekly sorting system that guarantees you never miss a checkout discount.
1. Why Makeshift Envelopes Fail at the Checkout Counter
When beginners start couponing, they often rely on standard white mailing envelopes or paper clips. While this zero-cost method seems resourceful initially, it breaks down quickly in real-world retail environments:
- The Shuffling Trap: Stacking twenty loose coupons in a single paper envelope requires pulling the entire pile out and shuffling through them under bright fluorescent lights while items roll down the conveyor belt.
- Premature Wear and Tear: Standard paper envelopes rip after two shopping trips, scattering vouchers onto car seats or wet grocery conveyor belts.
- Hidden Expirations: Without visible indexing tabs, expiring coupons migrate to the bottom of the pile and quietly turn into useless scrap paper before you remember to redeem them.
Investing in a dedicated handheld accordion organizer provides rigid protection, water-resistant exterior walls, and indexed dividers that display every coupon category at a single glance.
2. Key Features to Look for in a Quality Coupon File
Not all expanding files are designed for rapid in-store navigation. When browsing options, prioritize these four mechanical specifications:
A. Thirteen-Pocket Divider Architecture: The sweet spot for grocery and pharmacy navigation is thirteen expandable pockets with twelve internal index tabs. This provides enough distinct compartments to mirror standard supermarket aisles (produce, dairy, pantry dry goods, paper products, frozen items, personal care, and household cleaning) without adding excessive bulk.
B. Compact Handheld Dimensions (Approximately 10 by 5 Inches): Avoid full-size letter document folders that require a tote bag. A proper coupon file measures roughly ten inches wide by five inches high. This compact form factor fits neatly inside a purse, glove compartment, or the child seat of a grocery cart, allowing you to browse compartments with one hand while pushing your cart with the other.
C. Durable Polypropylene Shell with Elastic Button Closure: Look for heavy-duty polypropylene plastic rather than paperboard. Polypropylene is tear-proof, repels grocery cart condensation, and wipes clean easily. An elastic cord and front button clasp provide secure closure that expands as your coupon collection thickens during peak circular weeks.
D. Pre-Printed and Blank Customizable Index Tabs: Ensure the organizer includes color-coded tab inserts. Having pre-printed alphabetical labels alongside blank customizable slips allows you to organize either by store aisle sequence or by brand name.
3. Establishing Your Weekly 5-Minute Aisle-Sorted System
Having a high-quality organizer is only effective if your sorting workflow is disciplined. Adopt this three-step management ritual every Sunday morning:
- Purge Expired Slips First: Pull every tab forward and inspect the expiration dates. Discard outdated paper slips immediately so your compartments hold only active, spendable discounts.
- Sort by Supermarket Walking Flow: Arrange your tabs to match the physical layout of your primary grocery store. If your local store begins with produce on the right, moves to dairy in the rear, and finishes with paper goods on the far left, order your pockets in that exact sequence. You will effortlessly retrieve coupons as you walk through each department.
- The Back Pocket Holding Zone: Designate the absolute last divider as your checkout pocket. As you place qualifying items into your physical shopping cart, move the matching coupon into this final pocket. When you arrive at the register, your entire batch of qualifying discounts is already consolidated and ready for the cashier in one smooth motion.
Ready to Upgrade Your Shopping Routine?
Explore our curated selection of top-rated, durable 13-pocket accordion coupon organizers designed for daily grocery runs.
Equipping your shopping kit with a dedicated coupon file puts an end to checkout anxiety and missed savings. Pick your preferred color, set up your aisle tabs this weekend, and keep every hard-earned dollar firmly in your budget.

Budgeting 101
Building a spending plan starts with the basics, and Budgeting 101 lays them out clearly. Michele Cagan covers tracking expenses, setting goals, reducing debt, and creating a budget you can revisit, one manageable habit at a time.
If budgeting feels like a pile of numbers with nowhere to start, a straightforward guide can help you organize the basics. Michele Cagan’s Budgeting 101 covers tracking expenses, setting financial goals, reducing debt, and developing a budget.
Who might enjoy this book
Consider this if you want an introduction to everyday money management. Read with your own spending records nearby, and choose one manageable habit to practice rather than trying to change everything at once.
Before you buy
Check the selected format and edition, and browse the sample pages or table of contents to see whether the book matches your needs. Compare the current price with your budget.
A free way to start
Check your local library or its ebook catalog before buying. If the book is available to borrow, you can explore its ideas without adding another expense.
Browse more in the Student Store.
How to Weatherstrip Doors and Windows for a Snug Home
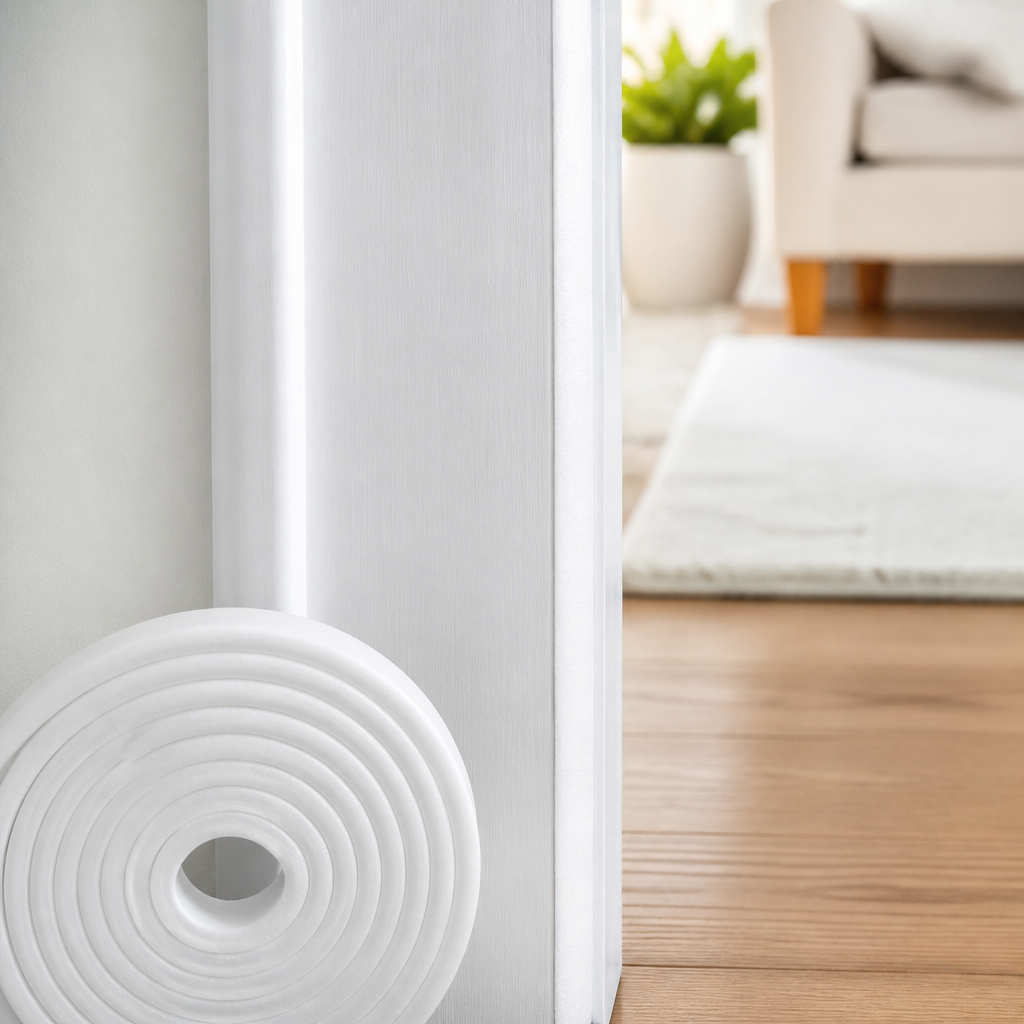
A snug, comfortable home can start with a simple roll of weatherstripping tape. In an afternoon, you can seal the little gaps around doors and windows, enjoy steadier temperatures in every season, and let your heating and cooling dollars go further.
Why Small Gaps Matter
Welcome, home improvement students! Doors and windows open and close, so they need a little space to move. Over time, that space can let air pass, carrying away the warmth or coolness you paid for. Weatherstripping fills those moving gaps with a soft, squishy seal. It is one of the most budget-friendly home projects around, and most of it needs no special tools.
Step by Step: Weatherstripping a Door
- Find the gaps. Close the door on a slip of paper at different spots along the frame. Where it slides out easily, a seal will help.
- Clean the surface. Wipe the door stop (the strip of the frame the door closes against) with soapy water, then let it dry fully. Adhesive loves a clean, dry surface.
- Measure and cut. Measure the top and both sides, then cut strips to length.
- Peel and press. Remove the backing a little at a time and press firmly as you go, keeping the strip straight.
- Test it. The door should close snugly but without a struggle. If it is too tight, a thinner strip may suit better.
Weatherstripping Windows
For windows that open, apply foam or rubber tape where the sash meets the frame when closed, such as along the bottom rail or where the two sashes meet on a sliding or double-hung window. Keep the tape out of any track the window slides in so it still moves smoothly. For windows you never open in winter, removable caulk is another tidy option you can peel off in spring.
Try It Free First
Before buying anything, check what you have. Many doors already have weatherstripping that just needs a refresh. Sometimes the old seal has simply come loose in one spot and can be pressed or tacked back into place. Also check that strike plates and hinges are snug, since a quick turn of a screwdriver can help a door close more tightly on its own. And a rolled towel at the base of the door is always a free and friendly helper.
Where Weatherstripping Tape Fits In
Self-adhesive weatherstripping tape comes on a roll and is about as easy as home projects get. Peel, stick, done. Common types include:
- Foam tape: inexpensive and easy, great for windows and irregular gaps.
- Rubber tape (often D, P, or E shaped): springier and usually longer lasting, great for doors.
- Silicone strips: flexible and durable in hot and cold weather.
Renters often love it because many types peel away when it is time to move. Check the package and test on a hidden spot if your paint is delicate.
What to Look For When Comparing
- Gap size: match the tape thickness to the gaps you measured.
- Material: foam, rubber, or silicone.
- Roll length: add up your door and window edges before buying.
- Adhesive strength: reviews often note how well it stays put.
- Color: white, black, gray, or brown to blend with your trim.
- Return terms: compare a few listings.
Professor Ima’s Wrap-Up
Find the gap, clean the spot, peel and press. That is a four-step lesson that keeps your home snug and comfy all year. A roll of tape and a free afternoon can feel like a brand-new house. Honor roll for you!
As an Amazon Associate, Cheap101 earns from qualifying purchases, at no extra cost to you. Browse more handy finds in the Student Store.
Find Hidden Storage You Already Have With Over-the-Door Organizers
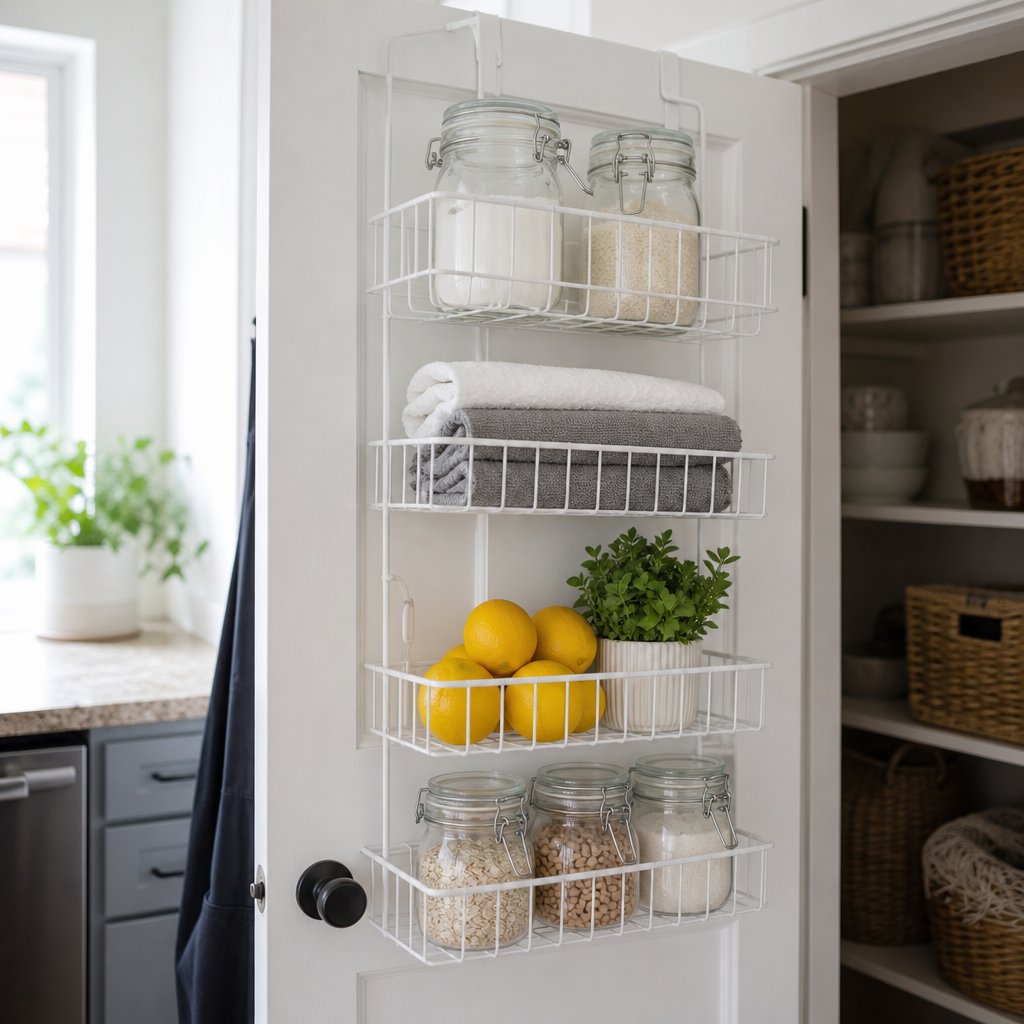
The back of every door in your home is a little bonus closet waiting to be discovered. With a few clever ideas and an over-the-door organizer, shoes, pantry goods and cleaning supplies can find a tidy home without buying a single piece of furniture.
Welcome, class! Today we are going on a treasure hunt, and the treasure is space. Before buying a new shelf or cabinet, Professor Ima likes to look for room that is already there. Doors are the champions of hidden storage. Let’s put them to work.
How to Find and Use the Space You Already Have
- Take a door tour. Walk through your home and look at the back of every door: pantry, closets, bathroom, bedroom, laundry room and even cabinet doors.
- Measure first. Note the door width, the thickness at the top, and how much clearance there is when it closes. Doors that close against a frame need slim hooks.
- Match the door to the job. Store items where you use them, such as spices and snacks on the pantry door and cleaning supplies on the laundry room door.
- Put heavy things low. Lighter items go up top, heavier ones in the lower pockets, so the door swings easily.
- Give every item a home. When each pocket has a purpose, putting things away becomes a quick habit.
Room-by-Room Ideas
- Pantry: Seasoning packets, snack bags, foil and wraps, and small jars.
- Bedroom closet: Shoes, scarves, belts, socks and handbags.
- Bathroom: Hair tools, lotions, extra toothbrushes and rolled hand towels.
- Laundry room: Spray bottles, sponges, dryer balls and lint rollers.
- Craft or hobby corner: Yarn, ribbons, paintbrushes and small tools.
- Entryway closet: Gloves, hats, umbrellas, reusable shopping bags and dog leashes.
A bonus thrifty perk: when you can see everything you own at a glance, you are far less likely to buy a duplicate by accident. That alone can make an organized door a smart little money saver.
Try It Free First
Test the idea with what you have. A sturdy hanger hooked over the top of a door can hold a tote bag of supplies. A few adhesive hooks you already own can hold aprons, bags or a broom. A hanging shoe organizer from a thrift store or a friend’s garage works for far more than shoes. Once you see how handy door storage is, you can choose an organizer sized just right for each spot.
Where Over-the-Door Organizers Fit In
Over-the-door organizers hang from hooks that slip over the top edge of a door, so most need no drilling or tools. They come in clear pocket styles, fabric pockets, wire baskets and adjustable rack systems. Renters especially appreciate that they install in minutes and come down without a trace.
They suit small apartments, busy family homes, pantries without shelves, and anyone who enjoys a neat closet. The button on this page is a search for this type of product. Compare listings, reviews, sizes and return terms to find the right fit for your doors.
What to Look For When Comparing
- Door fit: Check the hook depth matches your door thickness and the width fits your door.
- Pocket style: Clear pockets let you see contents; baskets hold bulkier items.
- Weight capacity: Important for pantry goods and cleaning supplies.
- Adjustability: Movable baskets let the organizer grow with your needs.
- Bottom anchors: Some include clips to keep the organizer from swinging.
- Easy care: Wipeable materials stay fresh with little effort.
Professor Ima’s Wrap-Up
The roomiest home is often the one you already live in. Take your door tour, measure, and give each pocket a purpose. You will open every door to a happy little display of order, and your budget will thank you for skipping that new cabinet. Class dismissed!
As an Amazon Associate, Cheap101 earns from qualifying purchases, at no extra cost to you. Browse more handy finds in the Student Store.

How to Budget by Hand (and Why an Undated Budget Book Helps)
There is something wonderfully calming about planning your money with pen and paper. Budgeting by hand slows you down just enough to make thoughtful choices, and an undated budget book lets you start fresh any month you like.
How to Make a Monthly Budget by Hand
Gather round, class! A budget is simply a plan for your money before the month begins. Doing it by hand helps the numbers stick in your memory, and it feels a bit like writing a letter to your future self.
Step 1: Write down your income
List every dollar you expect this month: paychecks, Social Security, pension, side gigs, or anything else. If your income varies, use a careful, lower estimate. Pleasant surprises are much nicer than short months.
Step 2: List your fixed bills
These stay about the same each month: rent or mortgage, HOA dues, insurance, phone, internet, and loan payments. Write the amount and due date for each.
Step 3: Plan your flexible spending
Groceries, gas, household supplies, eating out, and gifts change month to month. Look at what you spent recently and choose a comfortable amount for each.
Step 4: Pay your savings
Treat savings like a bill you pay to yourself. Even a small amount each month builds a lovely cushion over time.
Step 5: Make it balance
Subtract all your planned spending and savings from your income. Many people like to aim for zero, giving every dollar a job. If there is money left over, assign it to savings or a goal. If the plan runs over, trim a flexible category until it fits.
Step 6: Check in weekly
Once a week, compare what you planned with what you spent. Adjust as needed. At month’s end, jot a few notes about what went well. Next month’s budget gets easier each time.
Try It Free First
A plain sheet of paper works perfectly. Draw a line down the middle: income on the left, spending and savings on the right. Many libraries and nonprofit credit counseling groups also share free printable budget worksheets. Use one for a month or two and see how you like the rhythm.
Where an Undated Monthly Budget Book Fits In
An undated budget book has pre-printed pages for income, bills, spending, and savings, but no dates printed on them. That means you can start in March or November and never waste a page. Many include bill trackers, savings goal pages, and yearly overviews all in one tidy place.
It can suit people who love paper planning, anyone who wants all their money notes in one book, and folks who like flipping back to see how far they have come. It can also make a thoughtful gift for a graduate or newlywed.
What to Look For When Comparing
- Page layout: sample photos show whether the sections match how you think.
- Number of months: 12 months is common; some include more.
- Writing space: roomy lines are easier to fill in.
- Extras: bill trackers, savings pages, and debt payoff pages can be handy.
- Binding: spiral or lay-flat books stay open on the table.
- Reviews and returns: compare a few listings and check return terms.
Professor Cheap’s Wrap-Up
Budgeting by hand is a gentle, satisfying ritual. A pen, a page, and a few quiet minutes are all you need to give your money a clear plan. Whether you use scrap paper or a pretty budget book, the result is the same: more control and more peace of mind. Gold star for you!
As an Amazon Associate, Cheap101 earns from qualifying purchases, at no extra cost to you. Browse more handy finds in the Student Store.
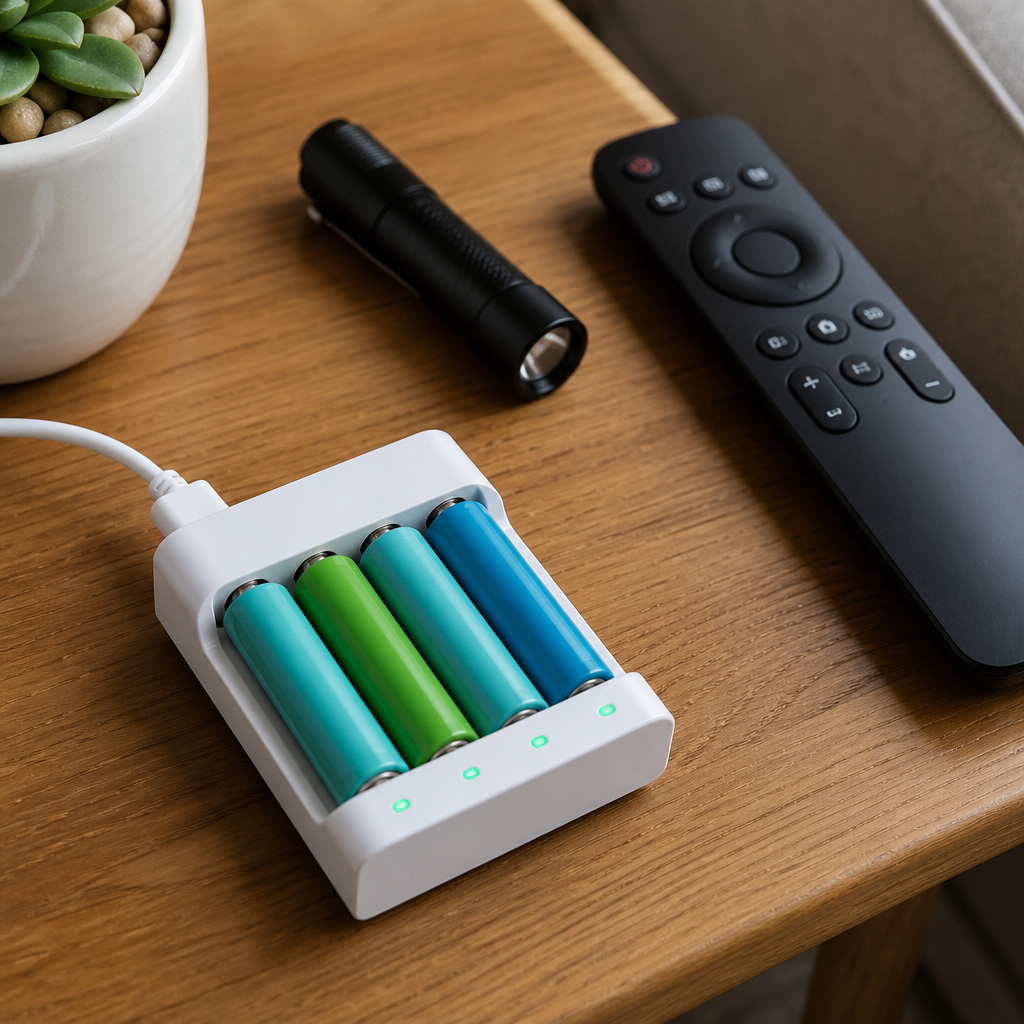
Power Your Home for Less With Rechargeable Batteries
Remotes, game controllers, flashlights and toys can keep humming along on the same set of batteries for years. With a good charger and a few simple habits, rechargeable batteries can be one of the thriftiest upgrades in your whole home.
Good afternoon, class! Let’s talk about the little cylinders that power so much of daily life. Single-use batteries are handy, but each one is used once and then it is done. Rechargeable batteries can be refilled with power over and over, which makes them a favorite of thrifty households everywhere.
How to Get the Most From Rechargeable Batteries
- Start with your busiest gadgets. Game controllers, wireless mice and keyboards, toys, flashlights and digital cameras go through batteries quickly, so they are the best place to begin.
- Keep a charged set ready. Own a few more batteries than you need so a fresh set is always waiting while the other set charges.
- Charge in pairs or sets. Batteries that work together in a device do best when they are charged and used together.
- Use the matching charger. Follow the battery maker’s directions and use a charger designed for that battery type.
- Store them cool and dry. A drawer or a small battery case keeps them organized and ready.
- Mark your sets. A dot of colored nail polish or a colored sticker helps you keep sets together.
Where Single-Use Batteries Still Shine
Honest professors share the full picture. Very low-drain items, such as wall clocks, may run so long on one battery that rechargeables offer less advantage there. Safety devices such as smoke alarms and carbon monoxide alarms should always use exactly the type of battery the manufacturer recommends, so check the manual. For everything else that gobbles power, rechargeables are a lovely fit.
Try It Free First
Before buying anything, gather every battery-powered item in your home and make a quick list of which battery sizes they use and how often you change them. You might find that a few gadgets use most of your batteries. Also look for devices that can be plugged in or charged by USB instead. Many people discover they already own chargers and cords for this. And when single-use batteries are finished, look for a battery recycling drop-off at hardware or home stores in your area.
Where Rechargeable Batteries and Chargers Fit In
The most common household rechargeables are nickel-metal hydride (NiMH) batteries in AA and AAA sizes. Many are rated to be recharged hundreds of times, and “low self-discharge” versions are designed to hold their charge well while sitting in a drawer. Kits often bundle batteries with a charger, which is an easy way to start. Some chargers have individual indicator lights for each battery so you know exactly when each one is ready.
They suit families with kids’ toys, gamers, photographers, and anyone who uses a lot of remotes and flashlights. The button on this page is a search for this type of product, so compare listings, reviews, sizes and return terms before choosing.
What to Look For When Comparing
- Sizes: Make sure the set covers the sizes you use most, often AA and AAA.
- Capacity (mAh): Higher capacity can mean longer run time per charge.
- Low self-discharge: Helps batteries stay ready in storage.
- Charger features: Individual bay indicators and automatic shutoff when full.
- Rated recharge cycles: Check how many times the maker says they can be recharged.
- Storage case: Keeps sets organized and contacts protected.
Professor Ima’s Wrap-Up
Every time you pop a recharged battery into the remote, give yourself a little gold star. You are keeping money in your pocket and batteries out of the trash. Charge them up, keep a spare set ready, and let the good times roll. Class dismissed!
As an Amazon Associate, Cheap101 earns from qualifying purchases, at no extra cost to you. Browse more handy finds in the Student Store.
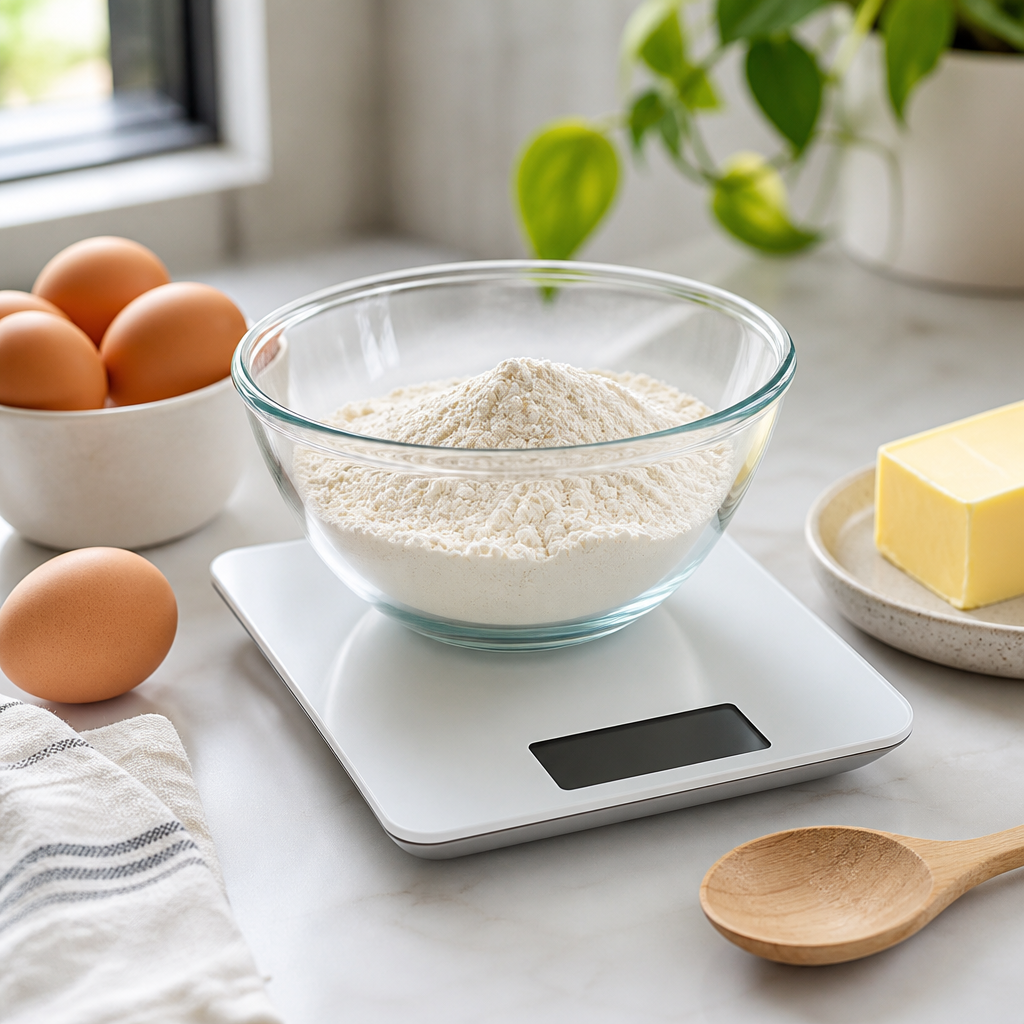
Weigh Your Way to Savings: Smart Uses for a Digital Kitchen Scale
A little kitchen scale can be a big money helper. It makes baking come out just right, turns one family pack into several perfect portions, and shows you which grocery deal truly gives you the most food for your dollar.
Welcome back, class! Today Professor Ima is bringing a small gadget to the front of the room. It fits in a drawer, it runs on a battery, and it can quietly help your groceries go further. Let us talk about the humble digital kitchen scale.
Portioning: Turn One Big Pack Into Many Meals
Family packs of chicken, ground meat, cheese and fish often have a lower price per pound than small packages. A scale helps you divide them evenly so every portion is just right.
- Decide on a portion size you like, such as 4 or 6 ounces of meat per serving.
- Set a freezer bag or small container on the scale and press the tare (zero) button.
- Add food until you reach your portion, seal it, label it with the date, and repeat.
- Freeze the portions flat so they stack neatly and thaw quickly.
The same trick works for snacks. Weigh a big bag of nuts or trail mix into small cups, and you have grab-and-go treats that cost far less than single-serve packs.
Baking: Better Results, Fewer Do-Overs
Flour can pack down in a measuring cup, so one person’s cup can weigh noticeably more than another’s. Many bakers like weighing ingredients because it makes recipes come out the same way every time. That means fewer flat cakes and more cookies worth sharing.
- Look for recipes that list grams. Many baking websites and cookbooks include them.
- Place your mixing bowl on the scale, press tare, add the first ingredient, press tare again, and keep going. Fewer measuring cups means fewer dishes, too.
- Weigh your dough to divide it into equal rolls or loaves that bake evenly.
Comparing Unit Costs Like a Pro
Shelf tags usually show a price per ounce or per pound, and that is the best way to compare packages. At home, your scale lets you go one step further. Weigh the edible part of foods to see what you really get. For example, weigh a whole head of lettuce before and after trimming, or a whole chicken compared with the meat you pull from it. Jot your findings in your price book or on your phone, and you will know which bargains are truly the best value for your family.
A scale is also handy when you buy loose produce or bulk foods. Weigh what you already have at home so you buy exactly the amount you need for a recipe.
Try It Free First
You can start portioning with no scale at all. Use the package weight printed on the label and divide by the number of portions you want. Then cut the food into that many equal pieces by eye. Many grocery stores also have produce scales you can use while shopping. When you find you love the habit, a home scale makes it quicker and more precise.
Where a Digital Kitchen Scale Fits In
A digital kitchen scale is a flat, compact gadget that shows weight on a small screen. Most switch between grams and ounces with one button, and the tare feature lets you weigh food right in a bowl. They suit bakers, meal preppers, bulk shoppers and anyone who likes to cook with a little more confidence.
The button on this page is a search for this type of product. Compare listings, reviews, sizes and return terms to find the one that suits your kitchen.
What to Look For When Comparing
- Units: Grams, ounces and pounds at the press of a button.
- Tare button: Essential for weighing inside bowls and containers.
- Capacity: Check the maximum weight so it handles a full mixing bowl.
- Easy-read display: A large, bright screen is a joy to use.
- Easy to clean: A smooth, flat surface wipes down in seconds.
- Power: Note the battery type, or whether it is rechargeable.
Professor Ima’s Wrap-Up
Every ounce counts, and now you can count every ounce! Portion your bargains, bake with confidence, and let the numbers point you to the best deals. Your freezer will be organized, your cookies will be famous, and your budget will be smiling. Class dismissed!
As an Amazon Associate, Cheap101 earns from qualifying purchases, at no extra cost to you. Browse more handy finds in the Student Store.

Alpha Grillers Meat Thermometer
Reads temperature in about 3 seconds. That’s it. That’s the magic. No more cutting into chicken to “check if it’s done” and ruining the whole presentation. Stick it in, get a number, eat with confidence. It’s under $15 and has saved me from food poisoning multiple times. Sometimes the simple gadgets are the best ones.